DNS_PROBE_FINISHED_NXDOMAIN: [Resolved]
Errors with DNS probes are widespread and imminent. White screen of death errors or Error 404 not found errors frequently occur.
DNS_PROBE_FINISHED_NXDOMAIN is one of the most commonly seen errors involving this concept. Nearly every regular computer user has encountered this issue at one time or another during their lifetime.
Rather than redirecting to the destination website, the message comes in a standard web browser.
In computer networks, one of the main concepts is DNS (Domain Name Server). DNS servers are mainly used to translate IP addresses based on their domain names.
It is essential to consider the fact that you have.
DNS Probe For Domain Finished – What Does That Mean?
DNS_PROBE_FINISHED _NXDOMAIN occurs as a result of the mismatch between IP and DNS address. More specifically, DNS converts any message in the form of an IP address from the domain end.
Real problems occur when people enter URLs into their browsers; DNS searches the server with the server’s IP address based on the URL. When the DNS fails, the searching process usually redirects to the target site.
The DNS_PROBE_FINISHED_NXDOMAIN error is displayed when the browser displays this message.
It belongs to the nonexistent domain category. That’s why it’s called DNS_PROBE_FINISHED_NXDOMAIN. This error occurs frequently, and there are working solutions for the problem.
Different browsers have different solutions for other server connections, which are based on the browser. Google Chrome displays the message “The Site cannot be reached” when trying to access it. It reads “Hmm.” in Firefox. It’s hard to find that website.
Ways To Fix DNS_PROBE_FINISHED_NXDOMAIN Error
The users are usually responsible for fixing DNS errors. These prolonged errors can be rectified quickly by following a few generic steps. There are some tested methods to improve the DNS_PROBE_FINISHED_NXDOMAIN error.
Restart The DNS Client Service
Various methods are used to address DNS errors. The most common way to fix DNS_PROBE_FINISHED_NXDOMAIN is to resolve cached DNS server files using Windows Operating System.
1. You could also use the key combination Windows +R to open a Run dialogue box and in it type “CMD” and hit the enter button to launch the Command Prompt.
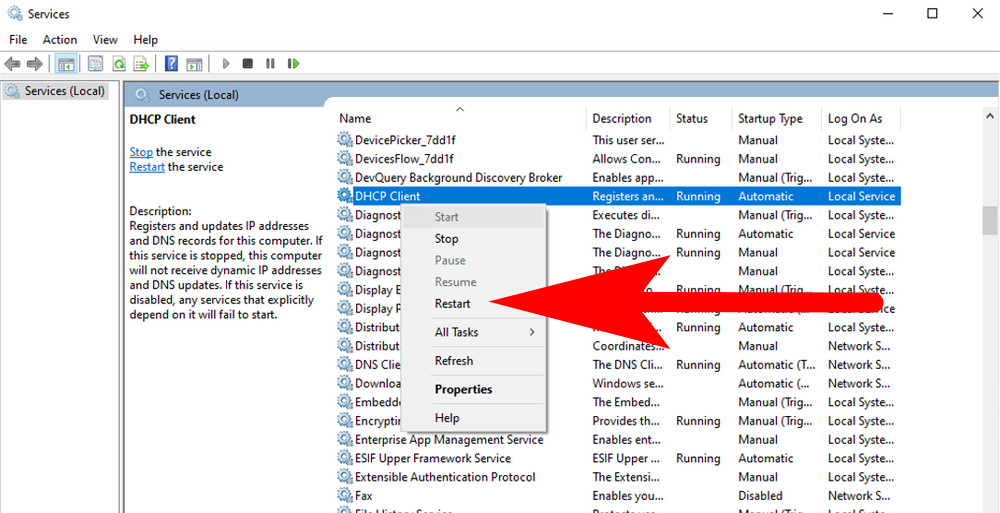
2. The Services window tab, will be displayed as soon as the terminal opens by typing services.msc.
3. On the next page, the user will select the ‘DNS client’ option. Right-clicking this option will yield a Restart option. Perform this function to refresh the DNS name cache files and eliminate errors.
Alternatively, you can resolve the issue at the command prompt depending on your Windows operating system version.
3. A person needs to type “cmd” or “command,” and a DOS layout will appear in the run tab.
net stop dnscache
net start dnscache
These commands will refresh the DNS files in this interface.
Change DNS Servers on Windows / Mac
An extensive user database and security are among the features of two popular public domains today. Public DNS is Google’s, and Cloudflare is Cloudflare’s.
The Internet Service Provider typically provides DNS Server addresses, and users can change these temporarily if they are experiencing problems.
In some cases, DNS_PROBE_FINISHED_NXDOMAIN can occur if a DNS server uses a free DNS server.
In this case, switching to Google or Cloudfare’s servers also resolved the issue. To do this, the following steps apply to various operating systems.
Windows
1. Go to the Search bar given next to the Start Menu and type “View Network Connections” and open it.
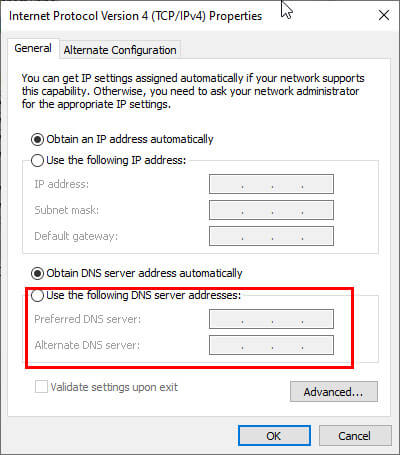
2. Secondly, choose the network connection in which you wanted to switch DNS Servers. Right-click on it and select “Properties” from the given menu list.
3. Displaying the box with the IP version is the next option. Upon clicking the same, a box will appear where you can change preferred DNS servers and alternate DNS servers.
Your Default DNS in Windows
- The IPv4 – XXXX or XXXX
- The IPv6 XXXX:XXXX:XXX::XXXX and XXXX:XXXX:XXX::XXXX
Use these DNS Server
- The IPv4 Address –
1.1.1.1or1.0.0.1 - The IPv6 Address –
2606:4700:4700::1111and2606:4700:4700::1001
5. For the changes to take effect you needed to restart the web browser.
Mac OS
1. Go to the System Preferences menu, located at the top left of the screen.
2. In the following step, click on the Advanced options to view the list of DNS servers.
3. The final step in setting up Cloudflare is adding the IPv4 DNS addresses 1.1.1.1 and 1.0.0.1 from Cloudflare.
Check The Local Host’s Files
Local hosts files on every computer are mapped to a particular IP address, containing manual DNS records. Before changing domain names, the only way to amend the DNS is to preview the DNS first.
Macs will be prevented from receiving DNS_PROBE_FINISHED_NXDOMAIN messages with this measure. Despite this, many operating systems today approach the same process differently.
Windows
The first step is to understand how other applications work, in contrast to any previous resolving strategy. You can manually search for a Notepad app under the Start menu to run the first step.
1. Go to the Start Menu and search for Notepad and open it as “Run as Administrator”.
It is required to run the file as an administrator rather than open it. Not only Notepad but any text editor can be used for this purpose. Text editors such as Atom, Sublime, and Notepad ++ are popular.
3. To access the file location, Go to the File navigation on Notepad and browser through the below path.
C:/Windows/System32/drivers/etc/typically it is located at C:/Windows/System32.
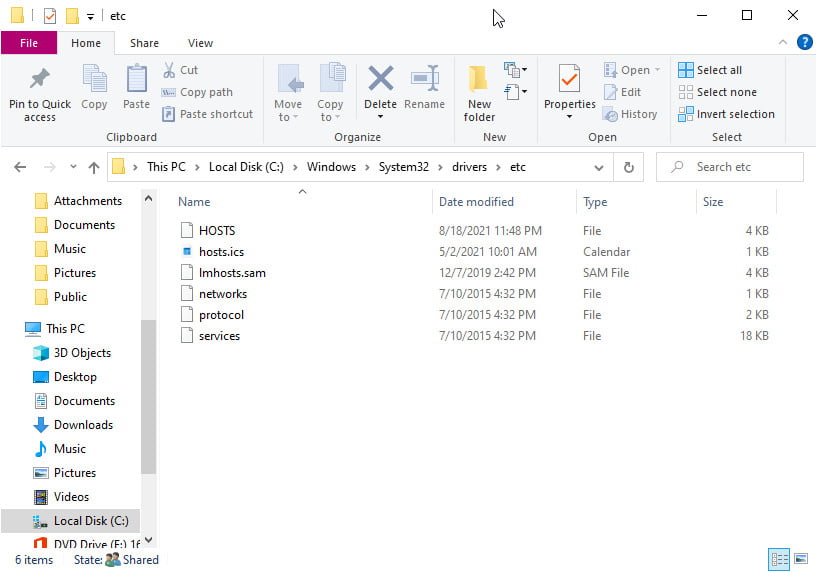
4. As soon as the operation has been completed, you will have to select the hosts’ file, which records the visited sites.
5. The final step is to remove any mention of a site to visit. The site’s main page is prone to errors due to these.
Mac
A MAC user can use Gas Mask, a dedicated file management app that takes care of all their work. In addition to this, it’s free to download and easy to use.
As well as working on hosts files, Gas Mask also works on triggered tasks between these files.
However, there is another simple solution as well for regular users. Utilities can be accessed from the View tab of the program.
1. Select Utilities from the utility menu, and a new page appears. Decide whether to use a terminal. The system is now asking for the admin password, however.
2. Then type “Sudo nano / private / etc / hosts” in the terminal. It shows information about the visited sites in the hosts’ file.
3. Last, as with windows, remove the page from the webpage if the site is being visited. There will be an immediate conclusion to the proceedings.
Use DNS Settings to fix the DNS_PROBE_FINISHED_NXDOMAIN
Various domains are affected by DNS issues, which are common. However, some parts might be affected differently. When the user attempts to visit a particular site, they receive DNS_PROBE_FINISHED_NXDOMAIN.
It appears to occur since the PC did not cache the DNS settings for the domain name correctly. So, if the user had changed hosts, the previous caching was mismapped.
We have a tutorial on how to point your DNS to WPOven if you use their servers.
DNS client service needs to be restarted to resolve the issue. The old DNS files are revoked, with the newer mapping and cached files taking their place.
IP Address Release and Renewal
There is no better solution to network topics than this. The concept involves flushing the cache and resetting it with the new IP address before it works.
In situations when cache files are corrupt or out of date, this is very handy. Mac and Windows devices have separate rules on how to speak when troubleshooting.
1. Go to the Search bar available next to the Start Menu. Type “CMD” and open it as “Run as Administrator.”
2. After the admin command, the prompt page has opened. Type the following command line to complete the process. By triggering this process, the current IP address will be released.
ipconfig /release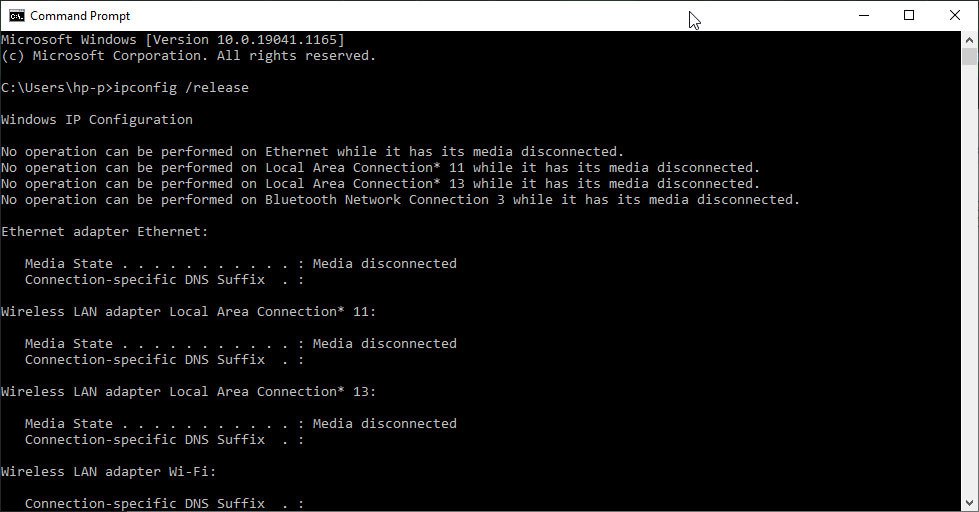
3. Then enter this command line to flush DNS on windows.
ipconfig /flushdns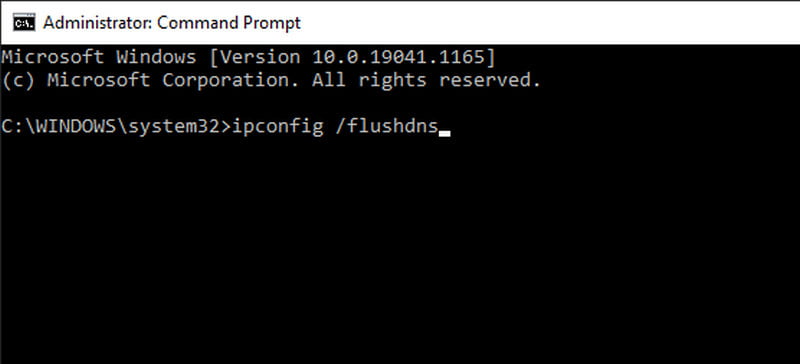
4. After that enter this command line to renew the IP Address.
ipconfig /renew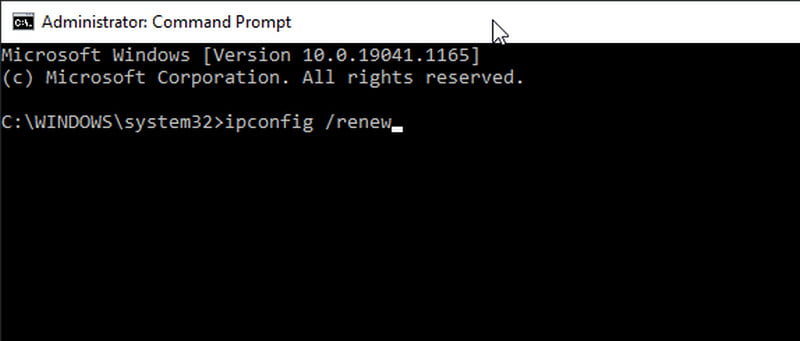
You may also try to reset the IP settings and Winsock catalogue using the below-given command line on the command prompt.
netsh int ip set dns
netsh winsock reset
Final Words
DNS_PROBE_FINISHED_NXDOMAIN errors are one of the most commonly occurring network issues. All of the solutions mentioned have been tried and tested, so the system is not affected negatively while the issue is quickly corrected.
On a general note, regular cleaning of the network cache memory is always recommended for all users. A DNS component failure might lead to problems. Next time, try the different methods listed the next time the issue arises.
Related Articles :
Outlook Won’t Open – 8 Ways To Fix It
2 Ways To Uninstall MacKeeper Virus App From Macbook Pro
25 Most Powerful Free Antivirus For Windows 10
10 Secure Money Transfer Services For Sending Money Overseas
How To Access iCloud Photos On iPhone & Mac
How To Fix iPhone Disabled Connect to iTunes
How To Take A Screenshot in HP Laptop [4 Methods]
How to Enable Windows Defender in Windows 10
4 Ways to Solve Google Chrome Critical Error