External Hard Drive Not Showing Up Guide
This is an ultimate guide based on an external hard drive not showing up with complete step-by-step instructions.
Portable drives such as USB flash drives, SD cards, and portable external hard drives can be a lifesaver most of the time.
When you urgently need the important document or items that you stored on the flash drive as the backup for instance photos, software, documents, and many more digital items.
In some of the cases, Windows users claim when they try to connect their flash drive to the Windows PC or laptop or else with another device such as smart TV using the USB port and they shock to see the external hard drive not showing up.
Well this issue can be used by several causes such as flash drive is not readable, USB port is dead due to which drive is not showing up, partition issues on the external drive, using the incorrect file system, drive errors on windows or maybe the drive is death itself.
In this short guide, we are going to show you what you can do if the external hard drive not showing up on your device system to fix it without taking the help of tech support or an expert.
Restart Your PC or Computer
Whenever something goes wrong with your devices including your computer, or phone. For example, some sort of error shows up in your computer system and your device begins to lag or the USB flash drive is not showing up. In this case before making any changes in the settings.
You needed to restart your device because most of the time, there is a temporary bug or error that can cause the issue and it can very easily be fixed once your device is restarted.
Due to the restart, all the startup processes get restarted along with that all the errors will get resolved in the system bootup process.
Well, if the system restart does not help you and the flash drive does not show up then you needed to move to the next method that is given below.
Check If External Drive is Turned On & Configured Properly
This is also a primary method but it’s very important to make sure the external drive is enabled and turned on. Because most of the USB drives required a third-party power source (to get power over flash) to get connected to the device.
Well, most desktop external drives come with separate power cables or else a physical power switch. So if your external drive is not delectable your computer or laptop system might have an issue with the power cable.
To fix this try out plugging it into some other power outlet or swapping the cables along with that keep an eye on the sign of activities like flashing of the lights on the unit or light movement inside the drive.
If you aren’t able to see any sign that shows that your drive is working fine it simply means that the device might get damaged or dead.
Check in the “Disk Management”
This is an initial step that is needed to perform to check if Windows detects your hard disk after you plug it in using the USB port.
Try to plug your removable drive into your laptop or machine, if it isn’t already. Now follow these steps to make sure its shows in the disk management.
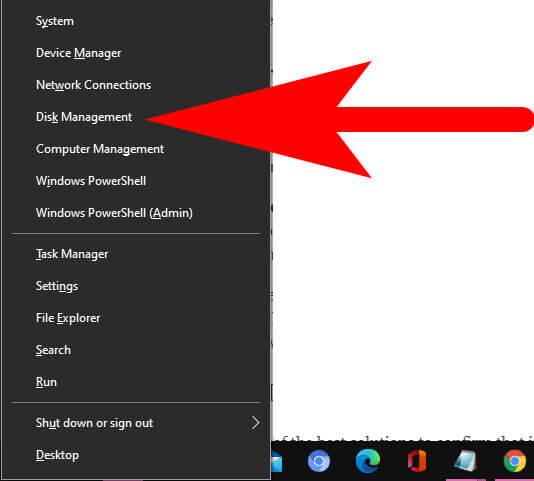
Press Windows + X keys together to open Windows Explorer and select the “Disk Management” from the list.
Else you can also press the Windows + R keys to open a RUN dialogue box and enter the following commend “diskmgmt.msc” to open the disk management utility of your computer.

With the help of Disk Management, you can easily able to see all the disks that were connected to your computer and with the help of it.
You can also make disk partitions, and review disk sizes, along with other disk-related information without having a hassle.
Must-Try Another USB Port and PC
This is one of the best solutions to confirm that if your Hard Drive is working fine and something goes wrong with the computer to which you’re trying to connect the external hard drive.
Well, you only needed another computer or laptop and plug in your external hard drive using the USB port.
If you’re hard drive working fine with another computer it simply means that your computer has some hardware or technical issues. Now let us try another method, try to connect the hard drive on your computer to another USB port.
Because most of the time, only the USB port is dead and stops showing the devices to the computer. To confirm it you can connect the device using another USB Port given on your computer CPU or laptop.
There are 2 USB ports on the CPU and the laptop so you must try plug-in the hard drive in both ports one by one and check if the hard drive working fine in any one of the USD ports.
Diagnose Device Drivers
If the hard drive does not show up on another computer or the USB Port you currently don’t have access to another laptop or computer.
Well, In this case, you must inspect the drivers on the computer because most of the time outdated drivers may cause the problem, especially the hardware drivers such as Bluetooth, Audio, Video etc.
You can easily inspect the drivers using the Device Manager tool available on Windows.
Follow the step-by-step instructions to know the entire process of diagnosing windows drivers.
1. Go to the Start Menu and use the search box to find “Device Manager” and open it.
2. Once the device manager dialogue box pop-up on the screen. Navigate to the Disk Drive and expand it.
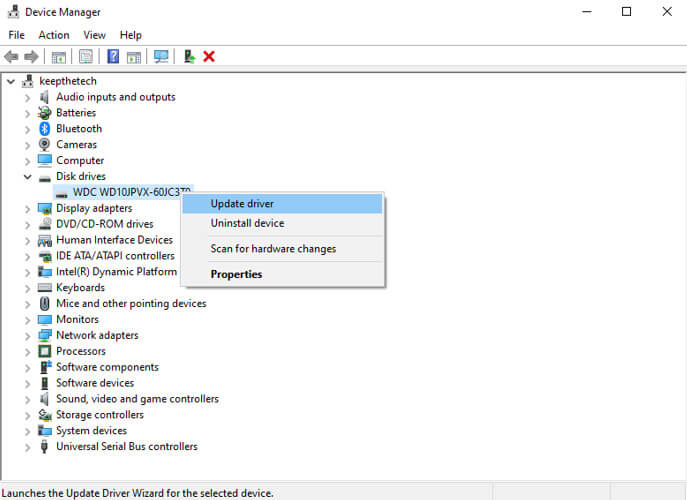
3. Now right click on the disk driver to open the menu list and then select “Update Driver”. Hit the OK button.
4. Again, open the menu list of Disk Driver and select “Properties”.
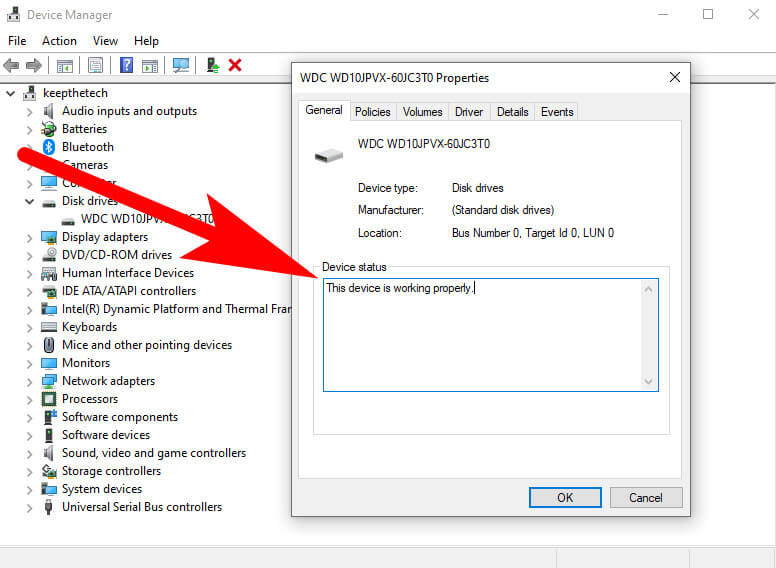
5. Go to the General tab and check the device status if it says “the device is working properly”. This means the drive is in perfect condition.
In case if the device status shows some kind of error then you needed to uninstall the driver and reinstall it. This will fix the issue.
Create A New Drive in This PC
If the hard drive shows up in the second method in we use the Disk Management or in other above methods able to detect the drive.
In this case, you can initialize the drive to use it, Apart from this the Disk Management tool can also be able to fix the disk-related problems along with disk partition.
Moreover, if the external hard drive shows only “Unallocated” space well then you’ll require to create a new disk volume or partition into the This PC or My Computer. After this, you can easily able to access the hard drive from your computer.
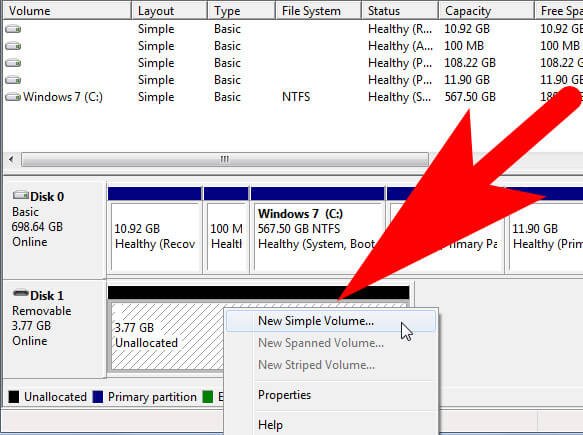
To create a new partition, right-click on the hard drive Unallocated space and then choose “New Simple Volume” and go through the wizard to create a new disk volume.
Once the partition process is completed you can able to see the hard drive on This PC and use it as other drives.
If the hard drive does not show Unallocated space and you cannot able to see it in the Windows, Then make sure the drive letter was written.
Because this can happen automatically however if you do it manually by removing the drive letter for some reason, then you cannot able to access the drive into the Windows or This PC.
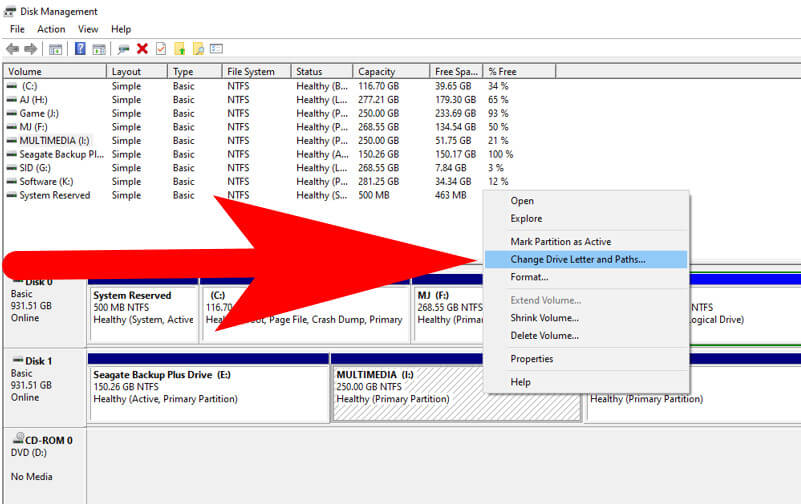
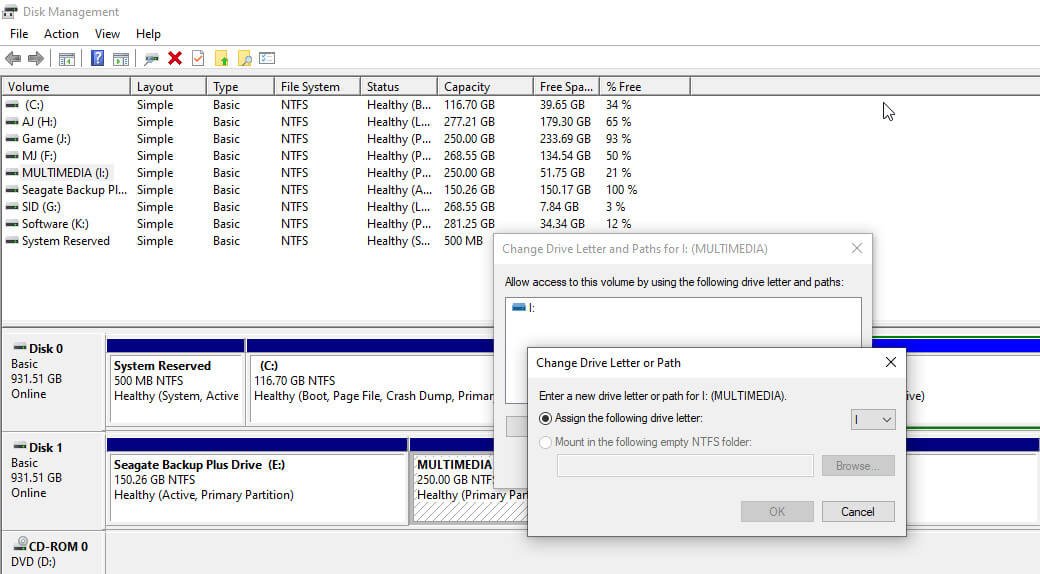
To switch the drive letter in windows, Right-click on the drive and choose “Change Drive Letter and Paths”. If the drive does not have the letter already then select “Add”.

What letter should you use for the removable drive, well the letters G and J work perfectly with removable drives.
Make sure to avoid the letter A and C, because these are reserved for Windows for other purposes. After this, all the drives will show up on This PC.
Format The External Hard Drive
If the hard drive shows to be partitioned and you can see it on This PC but cannot able to access it.
Well, this is can happen due to the partition with the different file systems. This means you’ve formatted the drive with the ext4 file system from Linux, or APFS on a Mac.
The windows cannot able to read the other file systems, so to fix it you needed to you again format the hard drive on Windows to switch to the file system that Windows can access such as NTFS, exFAT, or the older FAT32.
Once you perform the format the windows will access it. In this case, if you don’t know how to format the drive in Windows, then follow the below-given step-by-step instructions to understand the process without having a hassle.
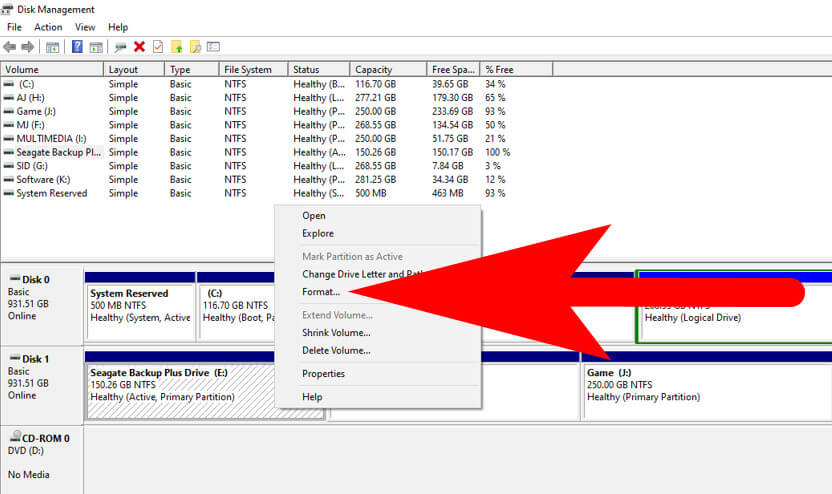
To reformat the drive using the Disk Management. Select the drive and right-click on it and from the menu, list select the “Format” option.
Note: Formatting the drive will delete all the data stored in the drive. To save the data make sure to copy it into another device before formatting.
If the drive is previously used on the Linux or Mac devices then access that device and generate the back of the drive on it.
While formating the drive you can change the drive name if you want and more importantly leave the Allocation unit size as Default; leaving Perform a quick format checked.

Select the file system which you should choose depending on the type of drive you use it for.
What is the best File System on Windows 10?
In Windows, there are mainly three file systems, FAT32, exFAT and NTFS. So the question is which file system is best to use for the computer.
FAT32 File System:
Well, if you have the smaller drive then you must go with the FAT32 file system because it a used for small storage devices and has longer compatibility.
However, the FAT32 cannot able to save files over 4GB and only support 2TB of volumes. So you can easily run into the issues related to the storage using the flash drive but there are some limitations.
Moreover, the main purpose of using the FAT32 is that it works fine with almost any device such as Media players, Game Consoles, Cameras and many more.
exFAT File System:
exFAT is an updated version of FAT32 it does not have the same liabilities as FAT32, its complete freedom from the file size restrictions compare to over format moreover it performs faster in tests compared to FAT32.
The exFAT is one of the best choices for smaller removable devices such as flash drives. If you specific closeness reason to use FAT32.
NTFS File System:
The NTFS is the latest version of the file system in the Windows operating system. However, there is nothing special about it and most of the older devices are not compatible with NTFS.
Moreover, it’s not for the smaller devices it is best to use NTFS for the larger external hard drives that you use for other purposes such as workstations etc. In end, the exFAT is best for commercial purposes and the removal of storage devices.
FAQ: Frequently Asked Questions
These are some of the frequently asked questions related to the External Hard Drive Not Showing Up with complete information.
Hopefully, Its Work For You!
Alright! this is an end-of-the-short guide, hopefully, all the above-given methods worked for you and the hard drive started showing into your computer.
In case you’ve any other problems related to the Windows, Mac, OS, or Android feel free to ask us, We try our best to resolve your issue with the help of your technical expert’s team.
Related Articles:
How To Install Windows 10 on a New Hard Drive?
How To Partition A Hard Drive In Windows 7
How To Shrink A Volume of Hard Drive in Windows
5 Best Live Game Streaming Apps For Android
How to Install PowerShell 7 on Windows 10
How To Justify and Align Text Left, Right or Center In Word
What is The Largest Flower In The World [Explained]
How to Change Admin Name on Mac
How to Change Your Name in Gmail
How To Screen Share on Mac – Step by Step
How To Add Signature To Mail – Step by Step
How to Recall an Email in Outlook – Step by Step Guide
How To Edit PDF In Word – Step by Step Guide