8 Ways To Fix VIDEO TDR FAILURE On Windows 11
If you’re watching a movie or playing a game with your friends and suddenly you get an error message on your Windows PC. All fun is over, but things get worse when the error is followed by the Blue Screen of Death also known as the BSOD.
All Windows users know that the BSOD error is the worst error for Windows and every Windows user doesn’t want to see these errors on their computer screen. Moreover, there are multiple types of BSOD errors such as timeout, clock watchdog, Windows Stop Code error, and many more.
But in this guide, we are going to discuss the methods to get rid of the VIDEO_TDR_FAILURE error on Windows without having much hassle.
What is VIDEO_TDR_FAILURE Error?
First of all, you must know what is video TDR failure error is and why it occurs on Windows. Technically the Video TDR stands for Video Timeout Detection and Recovery and this can be caused by the corrupted video graphics card driver or something goes wrong with your graphic driver and you need to fix it. In order to get rid of the Video_TDR_Failure error.
Mostly, the Windows 10 users discuss Video Tdr Failure Errors a lot. But that does not mean this error cannot occur on Windows 8, Windows 7, or the recently introduced Windows 11.
Causes of Video_TDR_Failure BSOD Error
There are multiple reasons why the Video TDR Failure arises on Windows. Here we are going to explain some of the points that mainly cause the issue.
- Graphics card driver that is incompatible, defective, obsolete, or corrupt.
- Problems with your graphics card on your PC.
- Several apps are running in the background at the same time.
- Overheated computer components / overheated system.
But you don’t need to worry about the causes anymore because we are going to take you through the step-by-step instructions that you can implement in order to fix the error without having a hassle.

How To Fix Video TDR Failure Error on Windows 11, 10, 8, 7
If you also come across the Video_TDR_Failure BSOD error and search for a hassle method to get rid of it. Then this is the right article for you, we are going to cover all methods that you can implement in order to get rid of Video TDR Failure.
Update Graphic Driver To Get Rid of Error
Mainly, this error occurs due to the failure of the graphic card, or else the display driver on your Windows PC stops responding. Sometimes the outdated or incompatible driver can also cause this error.
But you can easily fix it, by simply updating the graphic driver or display driver on your Windows.
Here are the steps that you need to take in order to update your Windows PC or laptop graphic driver.
Follow the steps to upgrade the device driver manually on your computer.
Go to the Search Bar, given next to the Start Menu.
In the Search Bar, type “Device Manager” and open it.
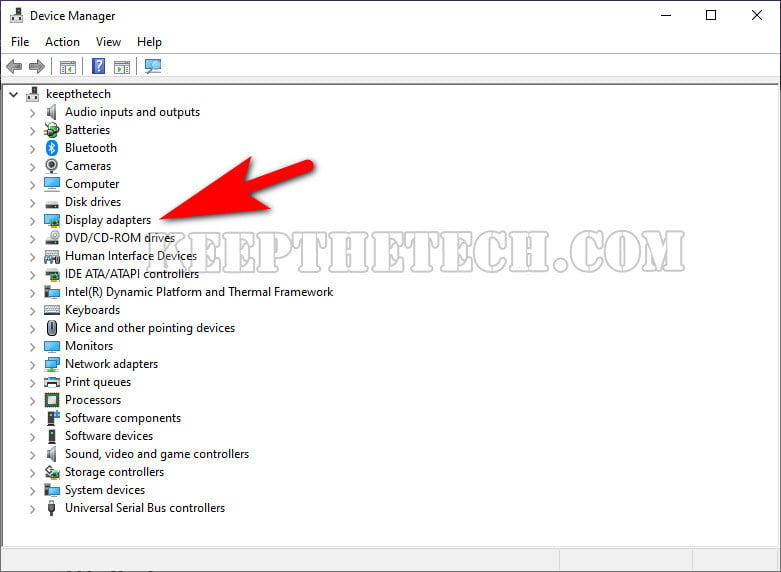
You need to navigate to the Display Driver to expand it.
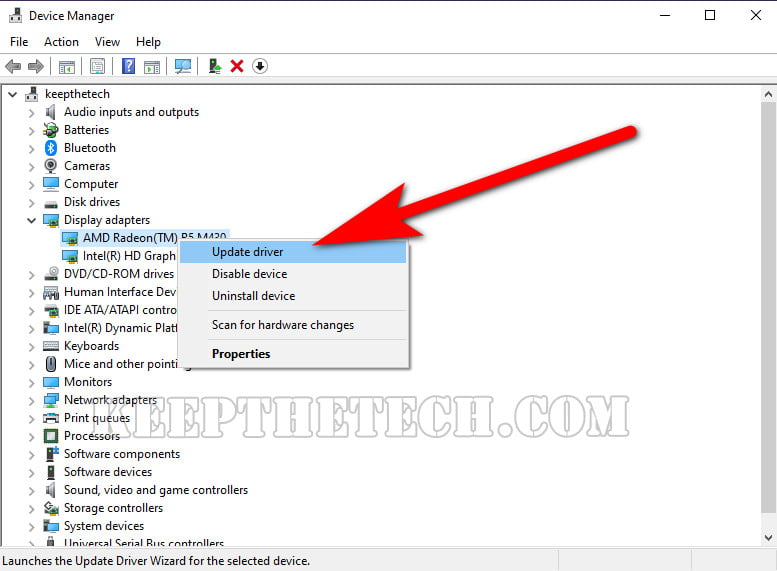
Now simply select the Graphic Card and simply choose Update Driver.
Once you update the graphic driver using the Device Manager. Simply restart your computer system in order to apply changes and see if the BSOD errors still exist or not.
Use Windows Build-In Troubleshooter Utility
Microsoft has its own troubleshooter program that Windows users can use in order to fix some common errors. Most of the time the BSOD errors can easily fix using this program. But most of the users don’t know how they can use it.
Here are the step-by-step instructions to use Windows build Troubleshooter program. In order to get rid of the blue screen of death error in no time.
Press the Windows + I buttons together to open Windows Settings.
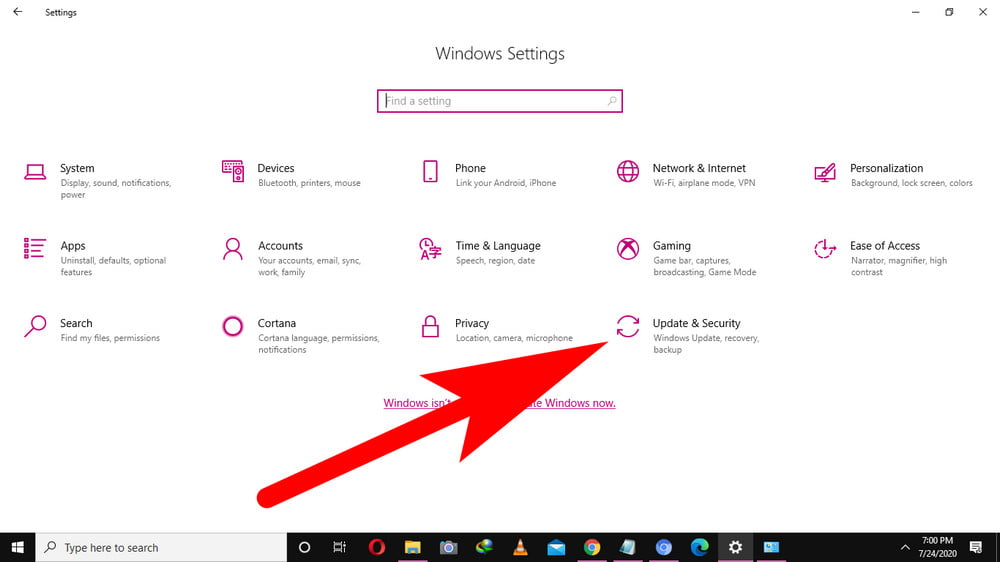
Now, simply navigate to the “Update & Security” from the left sidebar simply choose the Troubleshoot option.
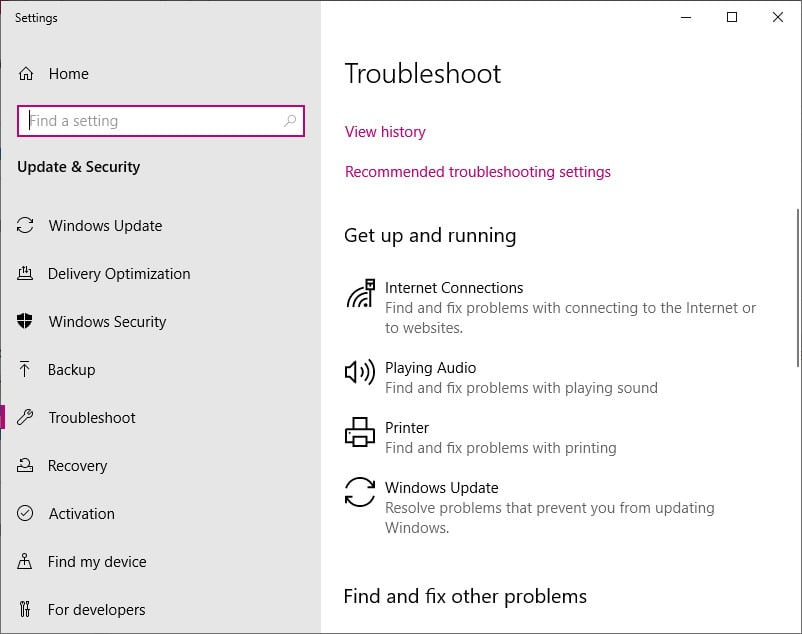
In the Troubleshoot window, Go for Display Troubleshoot and run it.
The system will run display troubleshoot and fix all issues related to the display of the graphics. Once it’s done, simply restart the system to check if the error still persists.
Roll Back To Previous Video or Display Driver
Most of the time, Windows users start the graphic BSOD error after updating the video driver because the new update comes with some bugs that can cause the BSOD error, and to fix it you need to roll back to the old version of the video driver.
Here is the step by steps you need to follow in order to roll back the video driver to the previous version.
Go to the Search Bar and type “Device Manager” and simply launch it.

Now go to the Display Driver > Graphics Card > Properties.
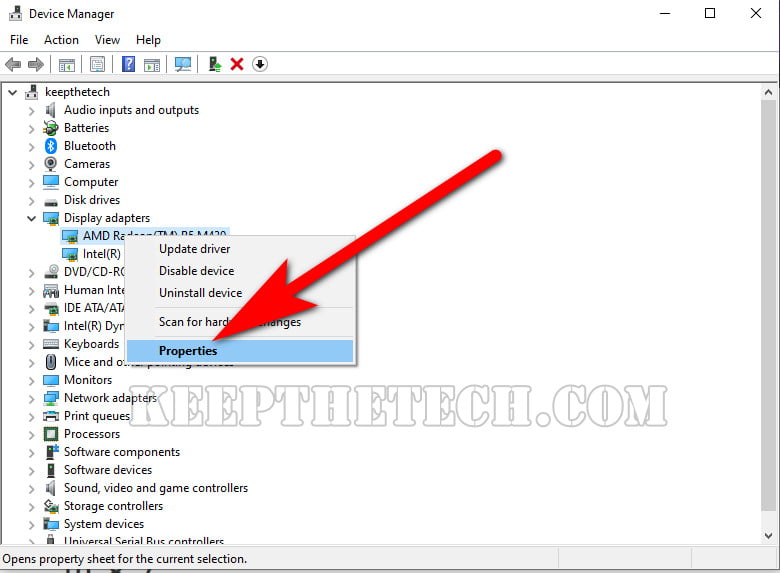
Switch the tab to Driver and choose the “Roll Back Driver” option.
Alternatively, if the above automatic process does not work for you. In this case, follow these below-given steps in order to roll back the driver manually.
Launch the Device Manager from the Search Bar.
Now, go to the Display Driver> Graphics Card > Update Driver.

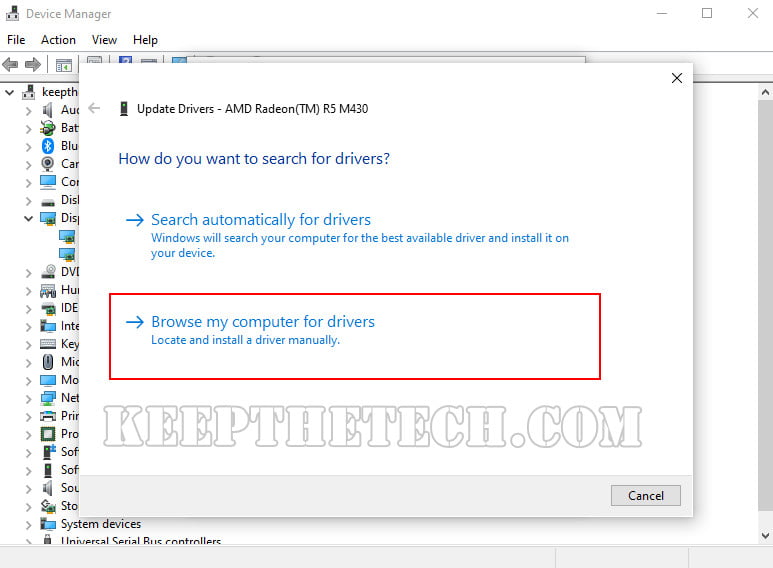
The Update Driver window will be pop-up. You will see two options there and you need to select the second options that say “Browse My Computer For Driver.”
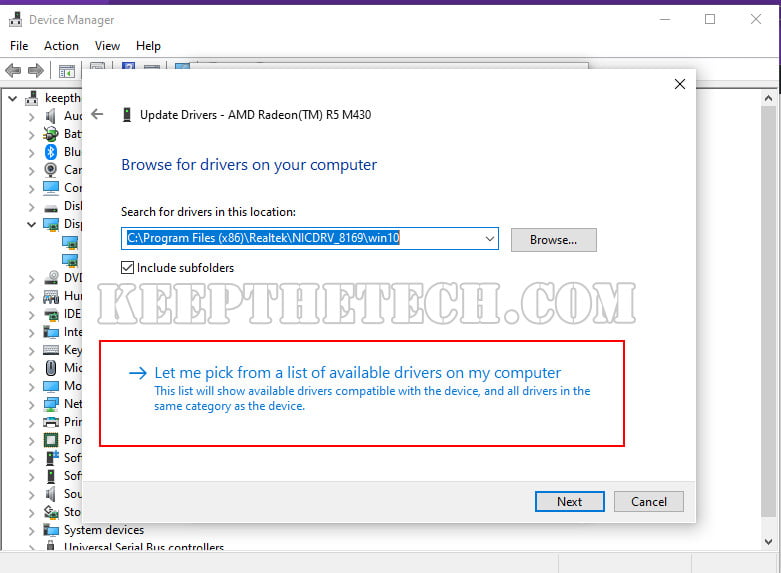
Now in new windows, choose “Let me pick from a list of available drivers on my computer” and select the Next option.
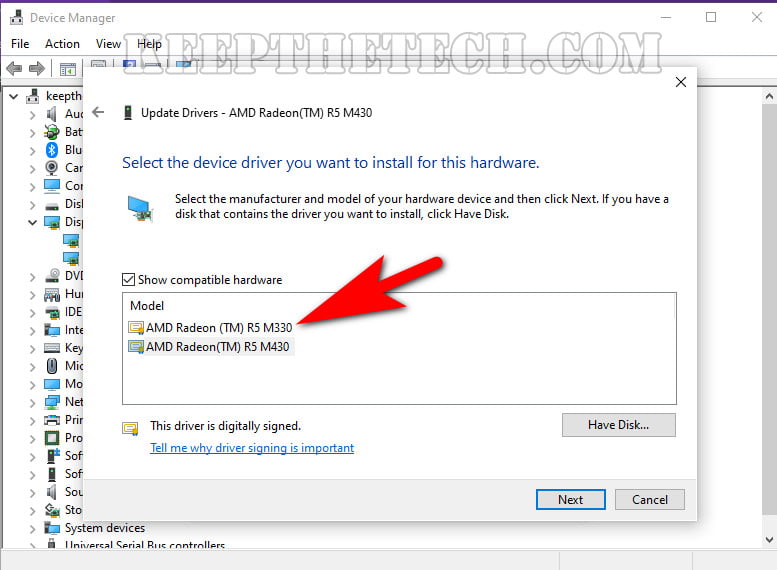
Choose the older version of the Graphic Card Driver and choose the “Next” button.
Use System Files Utility Checker To Get Rid of Error
The corrupted files can also initiate the Video_TDR_Failure error on Windows. One of the best solutions for this type of error is scanning the corrupted files and fixing them using the System Files Utility.
The System Files Utility on Windows is a tool that scans your computer for corrupted files and replaces them with correct files automatically.
Here are the step-by-step instructions you need to take in order to scan all corrupted files on your Windows PC.
Go to the Search Bar given next to the Start Menu.
Now, simply search for Command Prompt and simply launch it as “Run as administrator”.
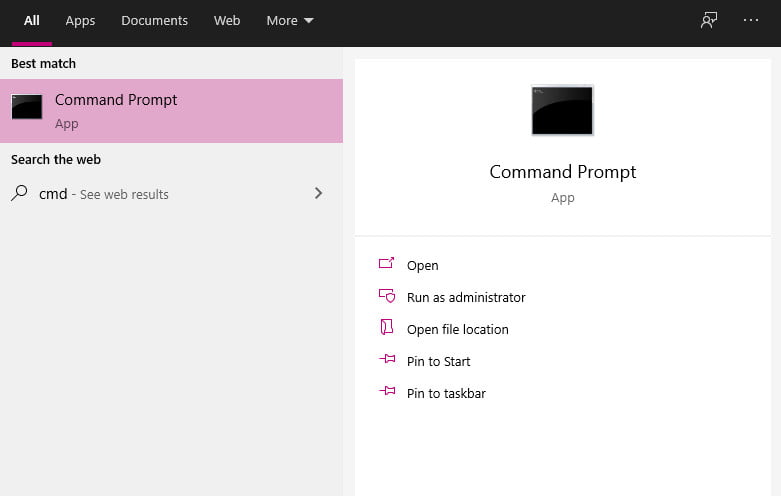
You need to enter the following command line and hit the enter button.
sfc /scannow
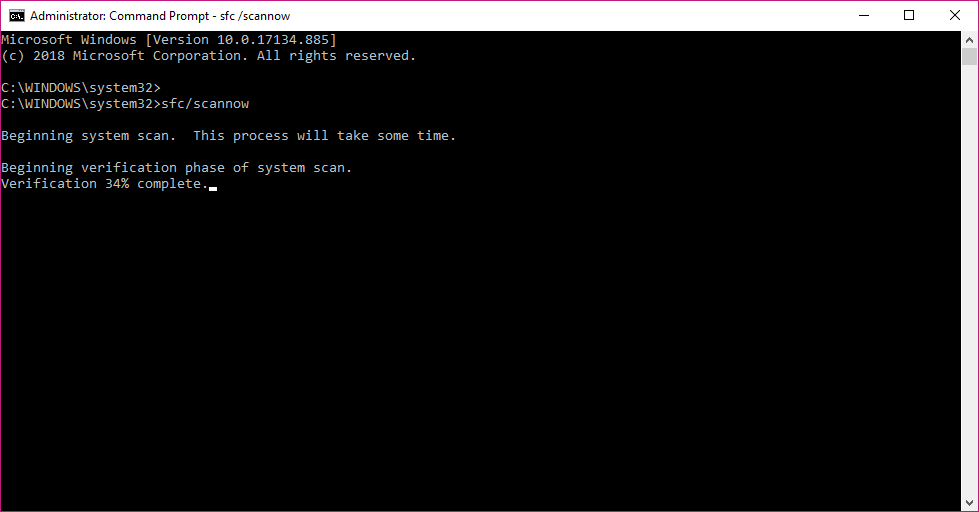
This command will scan the files and automatically replace them with working files. Once the scan is complete, simply restart your PC in order to see if the error is gone or not.
Uninstall and Reinstall the Graphics Card Driver
Most of the time, the graphics card driver can get corrupted or some temporary bug or program conflict with the graphics driver. You can easily fix it by simply uninstalling the current graphic card driver and re-install it new driver with a minute to resolve the error.
In order to uninstall and reinstall the graphics card driver on Windows follow the below-given step-by-step instructions.
Launch the Device Manager using the search bar given next to the Start Menu.

Now, navigate to the Display Adapter > Graphics Card Driver and simply Right-click on it. In order to open the menu options list.
From the list, choose the Properties and then in the Graphics Card Properties window tab.
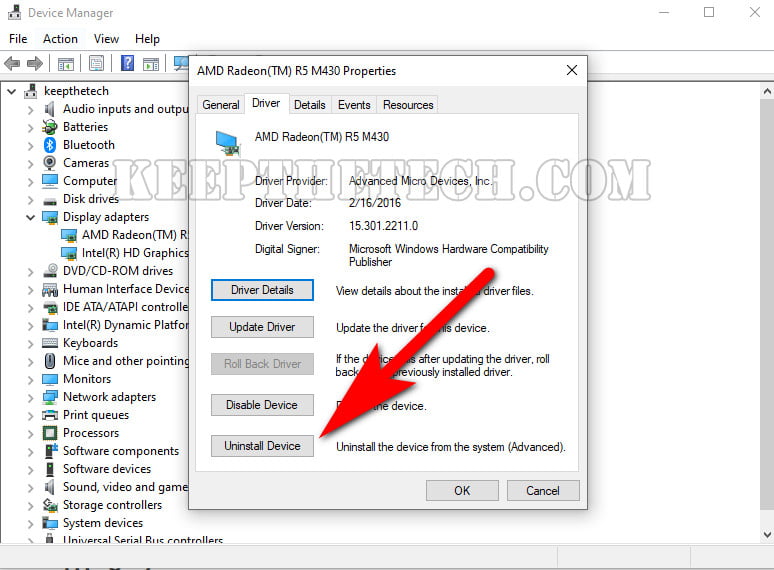
You need to choose the Uninstall option.
Simply, follow on-screen instructions in order to uninstall the driver. Once you successfully uninstall the graphic driver. Close the Device Manager and restart your Windows PC or laptop.
The bootup process will reinstall the graphic card driver again and the issue will be fixed.
This is the end of this short guide, hopefully, you find this article helpful.
How to Disable Incognito Mode in Windows 10 | Methods to Fix DISM Error 87 on Windows 7/8/10 | How to Enable and Disable Windows Hello on Windows 10 | How To Install Bluetooth Driver on Windows 10 | How To Install Windows 10 on a New Hard Drive | How Much Space Does Windows 10 Take on PC | How to Fix Error 0xc1900223 on Windows | How To Change DHCP Lease Time In Windows 10 | Optimal Fan Controller Software for Windows and Mac | Get Rid of Error “Microsoft Windows Not Responding” | Ways To Access Command Prompt in Windows 10 | Windows 10 Update Stuck | Windows Stop Code