How To Use Windows Movie Maker In Windows 10
Windows movie maker is basically a video editor app from the windows essential software program by micro soft. It offers an ability to create and edit videos in the best possible ways with effects, transitions, texts, inserting music, and clips.
What is Windows Movie Maker?
It is basically either creating or having a video which you can edit by shuffling and juggling it with up with effects, texts and adjusting clips an save it in high quality so as to ensure that your video is presented in the best possible way and also it allows you to publish the video directly from the app either to your gallery or to Facebook, Youtube, etc Windows Movie Maker.
In this app you will get to see, importing your clips on to your timeline, to cut your individual clips and to add new transitions in between your clips, to add a title, to add music and innovation as well and finally to add cool effects like black and white, and also to add the title page at the beginning of the video and also an end page at the end of the video Windows Movie Maker.
How To Use Windows Movie Maker?
So, Firstly, you’ve to download the Windows Movie Maker from Microsoft Store for free Windows Movie Maker. After that open, the Windows Movie Maker program using the Start Menu or the Dekstop shortcut. You will see a little screen where your video will be displayed on the left upper side and a wide dashboard area on the right.
8 Ways To Use Windows Movie Maker In Windows 10
These are features you can use on Windows Movie Maker to edit videos or photos using the software on your PC. Basically, with the help of this Windows video editor, you can trim a video clip, add audio tracks, add photos, add sound and video effects along with the text.
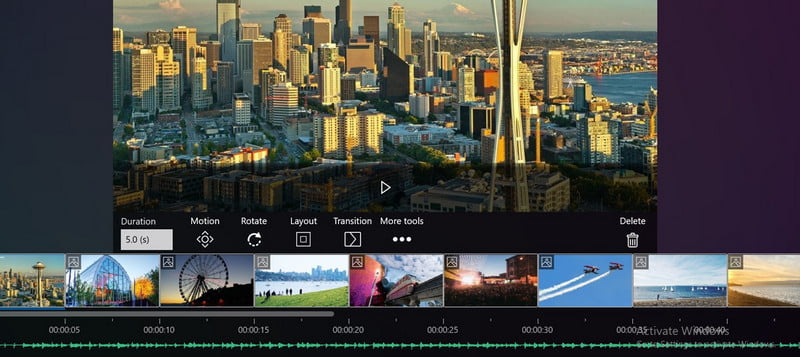
Add Video & Photos
Firstly, to import your videos and photo you gotta click on ‘add videos and photos’ that appears on the top left corner on the menu bar. It will open up the media files of your device from where you gotta select the video clips or image whatever you want to add up to your creation Windows Movie Maker.
If you want to select multiple media all together then you can just hold down ‘CTRL’ key on your keyboard and the task will be done.
After the selection is complete, you gotta click ‘open’. Some times if your video file is pretty big, movie time can take a bit of time to load your clip. All the clips and images you selected will appear on the dashboard in the same series that you selected.
Now to play the clip on your timeline, you can press the ‘space bar’ on your keyboard and it will start playing.
How To Trim A Video Clip
Now if you want to cut or trim some part of the video clip, then you can move your cursor over the clips on the dashboard from where you gotta cut the clip.
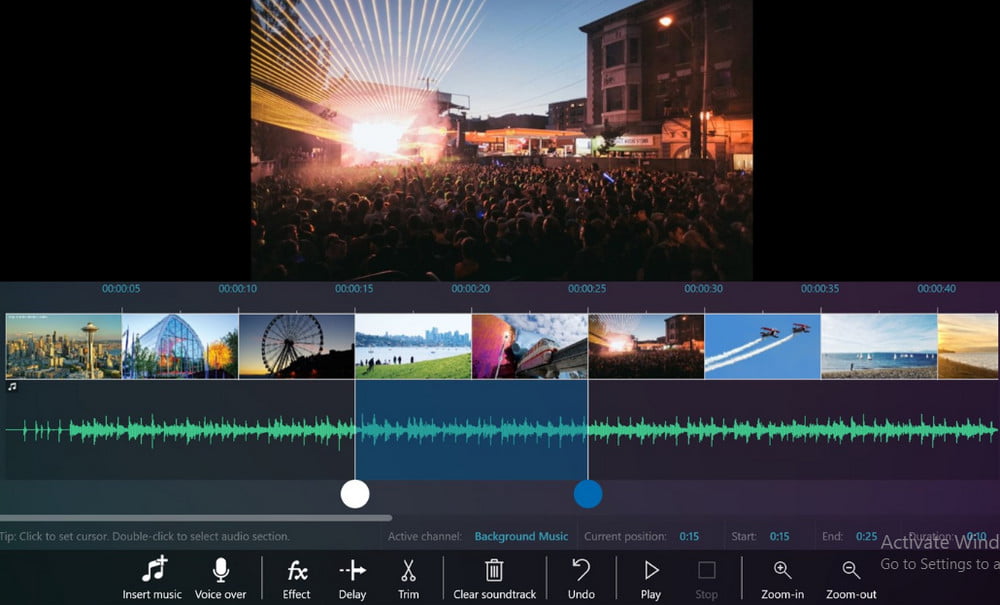
Keep the cursor at that point and then on the menu bar click on ‘edit’ and then click on split and then you can drive your cursor all the way to the output area, where you want to cut the second part of the clip.
Delete A Video Clip
Now you gotta do the same process for if you want to delete a clip, all that you gotta do is, after you select the clip, press ‘delete’ and the clip will be removed. Or you can keep your cursor on the clip, right-click on it, and select ‘remove’.
If you want to edit any part of your clip you gotta double click on it, and a video tool section will appear on the menu bar. In this area, you can speed up the clip, or you can fade it in and out and you can also increase and decrease the audio volume of your clip.
Boost A Volume of Video
If you want to increase the volume, you just gotta select the clip and then increase its volume from below the player. Or if you want to speed up a certain clip, you gotta select the part of the clip and then on the menu bar, you gotta click on speed and a drop-down list appear with the speed options, so you gotta select accordingly and click on it and the speed will increase.
Add Transitions
Now to add transitions in between your clips, it’s really easy. What you gotta do is, go up to the menu bar, which is the magic area, and then clicks on animation and you will see a lot many transitions that you can choose from to add to your video clip. You can scroll up and down and surf on the transitions and you gotta click on the one you want to put into your video.
The three most used transitions by professionals in windows movie maker are Crossfade, blur through black and blurring. These three are used the most by a lot of people and are the most recommended.
Also, you can add multiple transitions as well.
Edit The Transition
To edit the transition, just select the clip or if you want to edit the complete video in the same form, go home by clicking on it on the menu bar, click on ‘rule’ and you will see that you have an outline on every single clip.
And now if you add any transition it will be applied to the complete video.
So if you wish to do so, all you gotta do is after you followed the above steps where all your video clips are outlined, you gotta go back to animation and select any one the transitions you want to add to your video and it will be added between all your video clips. You can also change the duration of the transition to make your video look continuous and real.
Add Effects & Audios
Now after the effects and audios the third most important thing in a presentable video is its text presentation which includes both title and captions.
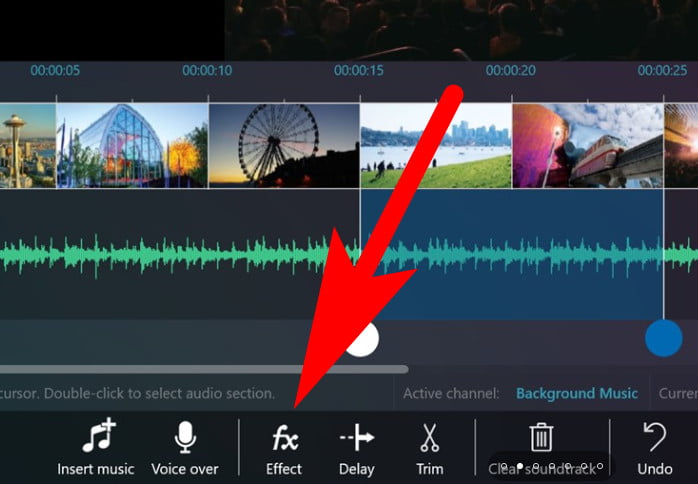
To do that, you gotta go home by clicking on the home from the menu bar. Now if you gotta add a caption right at the beginning, so put the cursor exactly t the beginning and then you gotta click on the caption, and you will see a box appearing underneath your clip and also a box appear on the screen, where the actual video is.
Edit or Delete Text
Just delete the text that appears highlighted by just hitting the backspace. After that add whatever text you want to add to it. After you have written what you want to add, you gotta adjust the box accordingly depending on the size and content of the text you added.
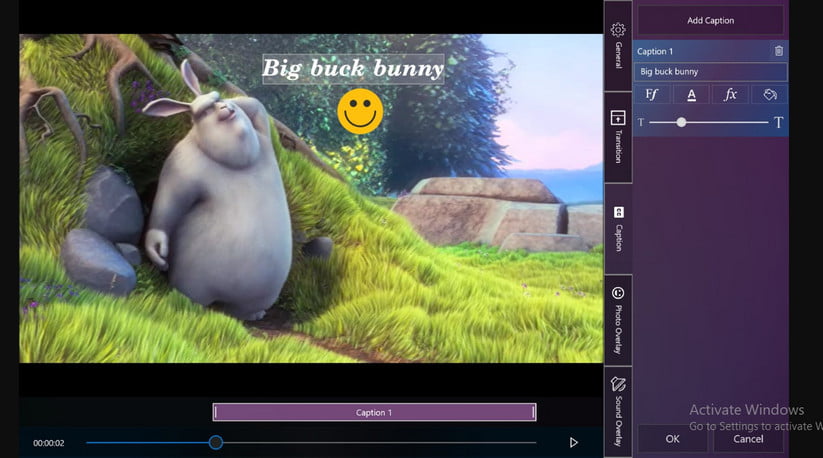
Adjust the size and position of the box and your caption is successfully added. You can add a caption to any, clip or you can even add multiple captions to a single clip just by repeating the same process.
Also, you can change the duration of your caption, and also you can shift it from one clip to another just by selecting it and then putting your cursor to where ever you want to add it.
Add Effect To The Text
You can also add, effects to your text, basically your caption, so to do that, on the menu bar you will see boxes that appear with text effects on them, so just choose any of the ones you like and want to add to your text. And to change the font, on the menu bar, you will see a font section where if you tap on it, a long drop down will appear, so you gotta choose whichever you like out of it.
Video Export Options
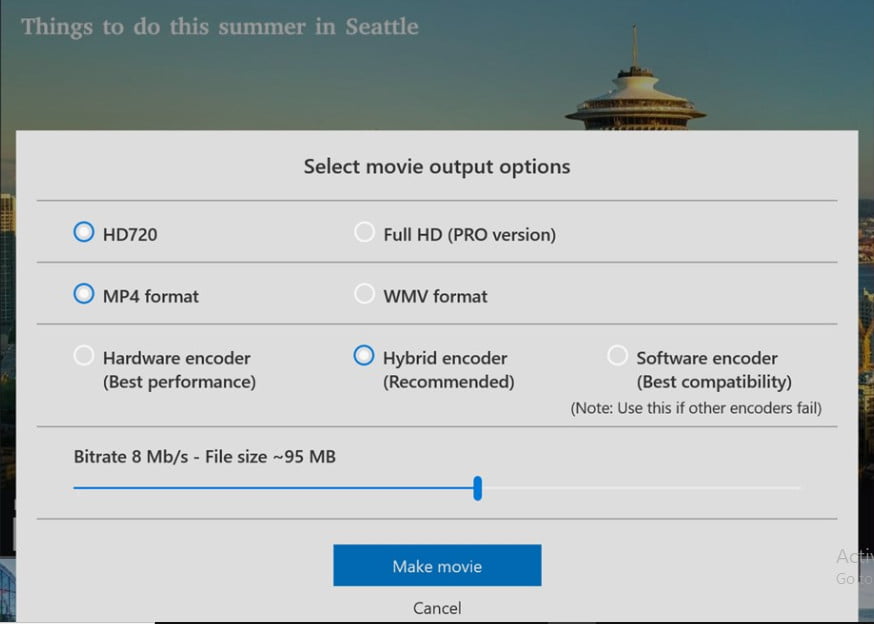
The software offers several video export options, you can easily export the video into MP4 format, WMV format, FullHD or HD720p, etc. Moreover, while exporting the video can also choose the encoder options such as Hardware Encoder, Hybrid Encoder, or Software Encoder.
Final Words
These are the ways how you use windows movie maker and create a super presentable video. Moreover, Windows Moviemaker is a free to use software develop by Microsoft. You can easily download it from Microsoft Store and install it on your Windows PC.
Windows Movie Maker program allows Windows users to make changes into the video clip or make your video clip with the help of the software for free and import it to your computer system.
Is there still a version of Windows Movie Maker available?
It was officially announced that Windows Movie Maker will no longer be supported on January 10, 2017, and it was replaced by Video Editor, which was originally known as Microsoft Story Remix. Video Editor is now integrated into Microsoft Photos in Windows 10.
Is Microsoft Windows Movie Maker 2012 available at no cost?
The multimedia programme known as Windows Movie Maker was built specifically for use on Windows-based personal computers. It is an application for editing videos that allows users to produce new films or improve existing ones. It has a straightforward user interface, which makes the procedure simpler to complete for those who are not trained professionals.
Is the Microsoft Movie Maker programme included in Windows 2017?
On January 10, 2017, Microsoft Movie Maker was officially taken off the market and no longer available for download. Movie Maker, along with Windows Photo Gallery from Windows Essentials, is now obsolete and has been replaced by the Microsoft Photos app, which is included in Windows 10 and now has Video Editor (formerly Windows Story Remix).
Why did Windows decide to do rid of the Movie Maker programme?
The video editing tool known as Windows Movie Maker, which was developed by Microsoft and first released 19 years ago, did not reach the level of popularity that the firm had hoped for, and as a consequence, the company was forced to stop providing support for the product.
Related Articles:
- How Much is $1 in Robux? [Explained]
- 8 Ways to Fix Discord Screen Share Audio not Working
- How to View Passwords on Mac – Step by Step
- How to Install Bluetooth Driver in Windows 10
- How To Close Amazon Account – Step by Step Guide
- How To Share Google Map Location
- How to Turn on Google Assistant On Any Device
- How To Cancel NetFlix on iPhone – Step By Step
- How To Call Someone Without Showing Your Number