10 Ways To Fix Windows 10 Won’t Sleep
Windows 10 Won’t Sleep: Well, putting your Windows laptop or PC to sleep is an excellent way to save power energy while still obtaining sure can resume without draining power. However, sometimes due to some error the PC running on Windows 10 Won’t Sleep or it may automatically go to sleep.
Ways To Fix Windows 10 Won’t Sleep
The procedure gets a bit complicated with different types of computer manufacturers. Basically, there are some different types of methods that we can try to fix this issue of Windows 10 Won’t Sleep without having a hassle.
Windows 10 Won’t Sleep
In this article, we get you through some Windows 10 tweaks to fix Windows won’t go to sleep issues. All you’ve to do is follow these methods one by one and check if the issue gets resolved.
1. Quick Glance on Sleep Mode Settings
Firstly, you’ve to check all the Sleep Mode settings on your Windows 10 PC in Windows 10 Won’t Sleep. To see all settings and circumstances that stop a sleep state of the system. Well, the Power options of the computer can affect the sleep mode of the Windows PC.
Technically, if your system is installing any updates on a background or else any recently installed app that requires a restart, in these cases the Windows 10 won’t sleep at all Windows 10 Won’t Sleep.
If you’re not using a personal computer else you’re operating a shared PC system. In this, it might be possible someone has may change into the Power option of Windows 10. To get a quick glance into the Power options follow these steps Windows 10 Won’t Sleep.
1. Go to the Start Menu and open the Control Panel.
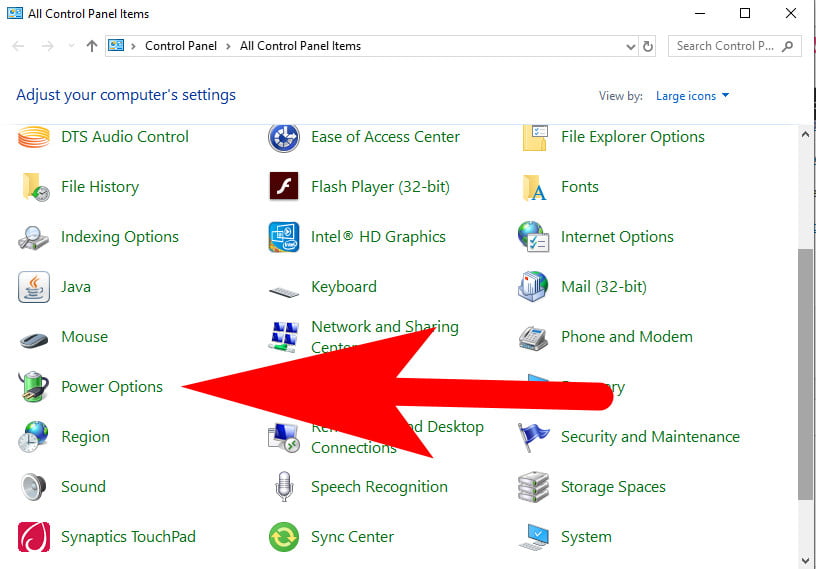
2. Now, from the control panel, Go to the Power Options.
3. Click on Choose when to turn off the display from the left side panel.

4. In the Put the computer to Sleep, Setup the time when you wanted your PC to go to sleep mode.

In case, if your computer goes too soon to sleep mode within a few seconds or takes way to long to goes on sleep mode then this method will first to use on your PC.
2. Adjust or Change Power Options
In this method, we try to adjust the power options on the Windows 10 PC. Sometimes, when you’re playing any muti media app on your Windows system. In this case, lots of time the computer won’t go to sleep mode. To fix this can make changes into the Power plan settings.
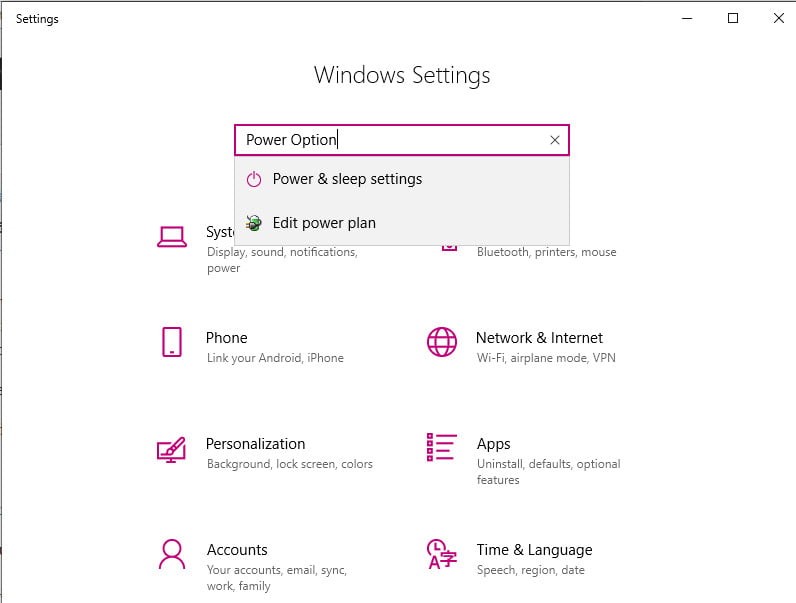
1. Press Windows key + I to open Settings.
2. Type “Power Options” > “Power & Sleep Settings” and open it.
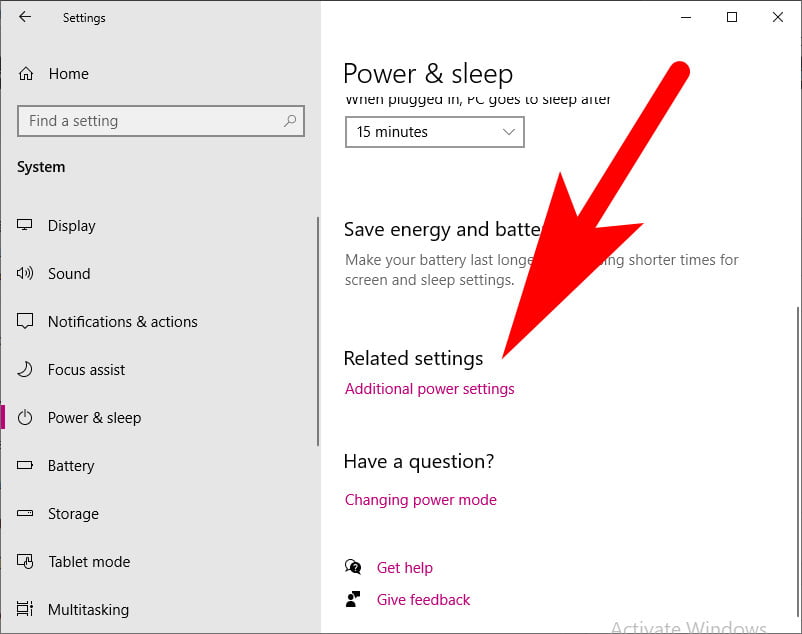
3. Scroll down and click on “Additional Power Settings” under the Related Settings.
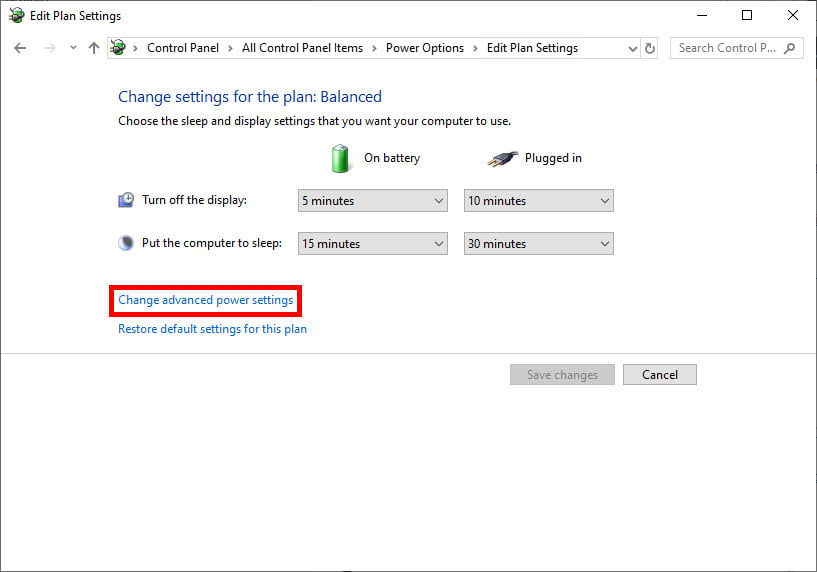
4. Select the Power plan which one you’re using such as “Balanced” or “Power Saver”.
5. Click on the “Change Plan Settings” > “Change Advanced Power Settings”.

6. Expand all the Power options to check all settings and ensure that they “Allow the computer to go to sleep mode”.
In my case, the settings under Mediamedia Settings > When Sharing Media is set to “Prevent idling to sleep“. So I have to change it to “Allow the computer to go to sleep mode”.

Else you can also click on “Restore Default Settings” to fix the issue.
3. Disable Fast Startup In Power Options
Windows 10 Fast Startup is a newly introduced feature in Windows 10. These features help the PC to start up faster after getting shutdown. Technically, it does keep a vision of the kernel and loaded drivers to the C:\hiberfil.sys in the hibernate folder at simultaneous shutdown.
When you restart your Windows 10 PC, the hibernate files loaded into the memory of the PC first. So if you’re using an old version of a computer system with the latest version of Windows 10. Then it may cause Windows 10 Won’t Sleep.
However, you can easily disable the Fast Startup features to resolve the sleep mode issue.
1. Press Windows Key + I to open Settings.
2. In the Settings window, Type “Power Option” > “Additional Power Settings”.
3. Click on the “Choose What the Power Buttons Do” from the left side menu.
4. Now, Select “Change settings that are currently unavailable“.
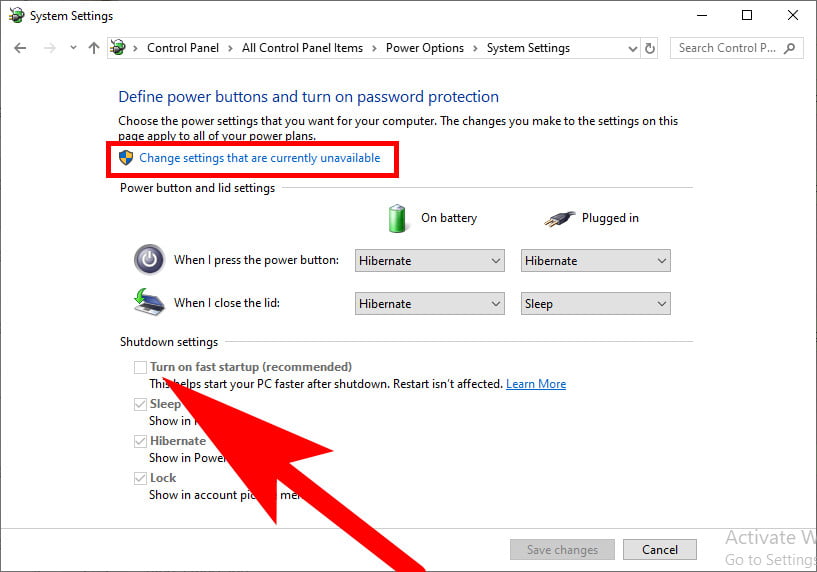
5. Uncheck the “Turn on Fast Startup”. Click on “Saves Changes”.
4. Sensitive Mouse Can Generate Windows 10 Won’t Sleep
Well, if you’ve sensitive mouse settings on your Windows 10 PC. This may be a cause to which your Windows 10 PC won’t going to sleep mode. Because any small vibration to the computer could keep the system awake. You can try these below-given steps to prevent the mouse from keep waking your PC Windows 10 Won’t Sleep.
1. Go to the Start Menu and search for “Device Manager” and open it.
2. Now, Expand the “Mice and other pointing devices” section.
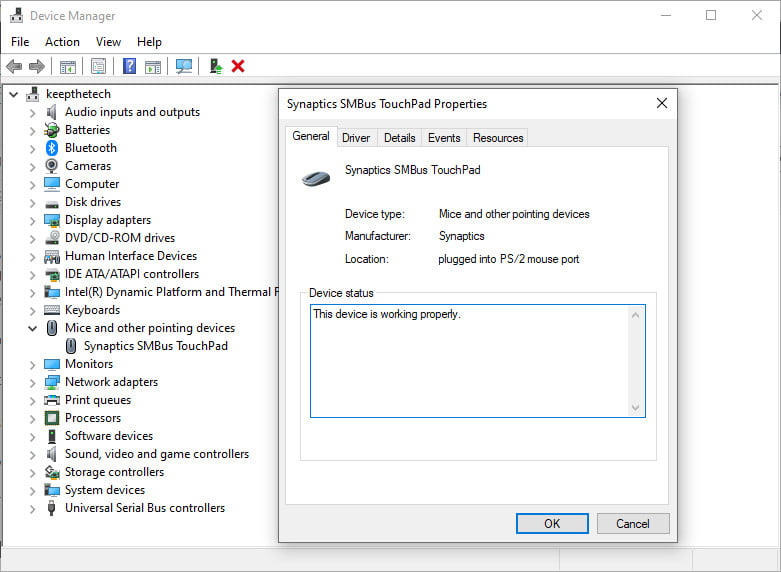
3. Right-Click on the Mouse that you’re and picked “Properties”.
4. Switch to the “Power Management “ tab.

5. Uncheck the “Allow this device to wake the computer”, next choose “OK
5. Take Look on ScreenSaver Settings
Screensaver is a feature that allows your PC to goes to Sleep Mode to conserve power energy. The display screen of the computer gets turned off if you don’t operate your PC for a few minutes Windows 10 Won’t Sleep. However, miss-configuration Screen Saver Settings can easily issue from which your computer or laptop won’t go to sleep mode Windows 10 Won’t Sleep.
You can easily check the Screensaver settings, By following these steps.
1. Press the Windows Key + I buttons together to Windows Settings.
2. Go to the Personalization, then Type “Screen Saver Settings” in the search bar.
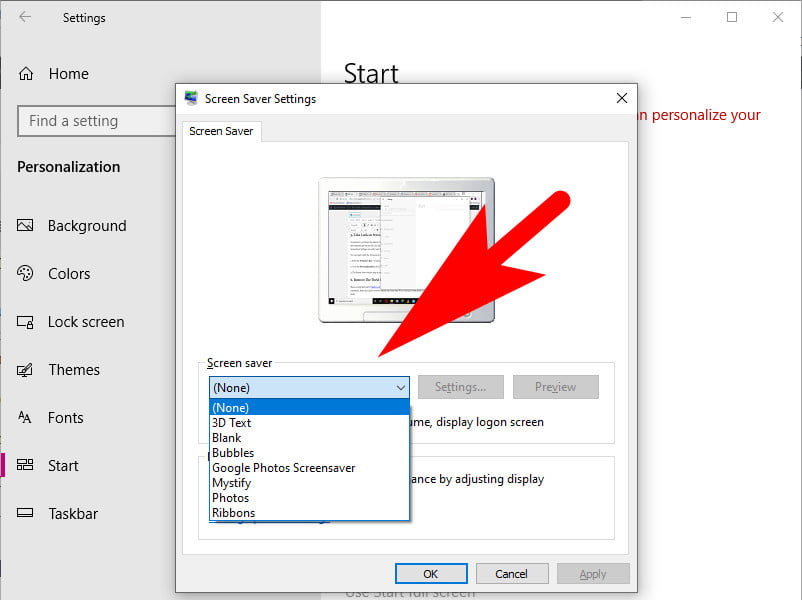
3. The Screen Saver window pop-up on the device screen. Then select “None” in the Screen Saver drop-down menu.
6. Remove The Thrid Party Windows 10 Themes
There several third party Windows 10 Themes were available on Microsft Store or any other website. Well sometimes, these third party windows themes can cause your PC to won’t go to sleep mode or randomly goes to sleep mode.
To fix this, you can switch back to Windows 10 default themes. here how,
1. Press Windows + I keys to open Settings.
2. Go to the “Personalization” > “Themes”.

3. Click on “Default Windows 10 Theme” from available themes and restart the PC.
7. Network Adaptor Settings
Network adaptor settings also can keep awake your Windows 10 PC. If the settings of network adaptor are not set up properly. To check the network adaptor on Windows 10 follow these steps.
1. Go the Start Menu and search for “Device Manager” and open it.
2. Navigate to and expand the “Network adapters”.
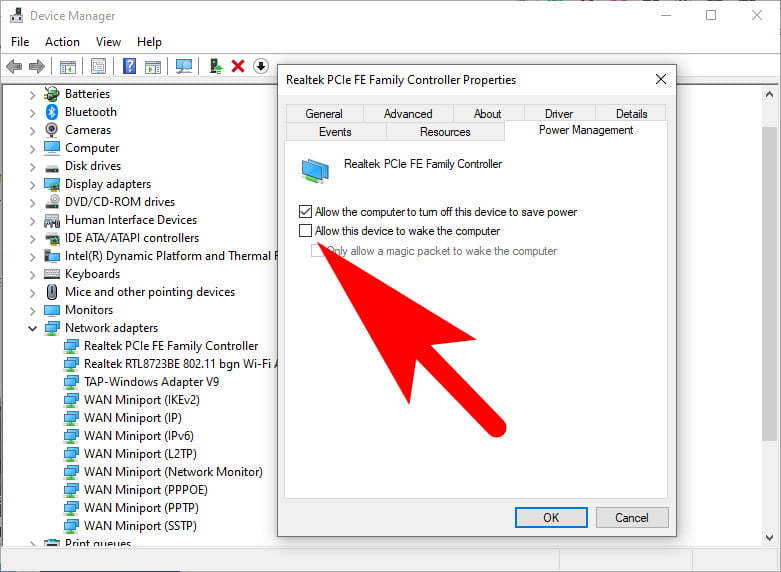
3. Right-Click on each setting and select “Properties”.
4. Switch tab to Power Management and uncheck the “Allow this device to wake the computer”.
5. Click on “Ok” button to save changes.
8. Run A Power Troubleshooter
Lots of times, Windows 10 users can make some changes into the Power plan settings to customize laptops or their Windows PC. Well, this may cause your computer sleep mode related issues. To fix this, you can run a troubleshooter that comes in Windows to resolve issues. Here how you can run troubleshooters in Windows 10 without having a hassle.
1. Press Windows Key + I to open Settings.
2. Go to the Update & Security > Troubleshooter.
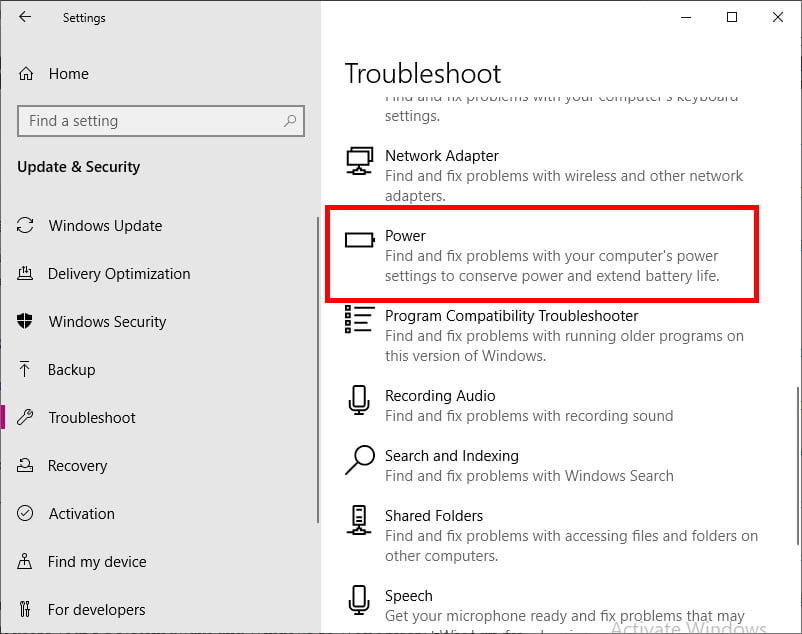
3. Scroll down the screen and click on “Power”.
4. Wait for few seconds until the troubleshooting completes.
Once the troubleshooting completes, you can able to see all issues and their solution. Click on the issue to get it fixed Windows 10 Won’t Sleep.
9. Power Request
Technically, the drivers and software installed on your Windows 10 PC. May send a power request to the system interface which may cause an issue that keeps your PC system awake and Windows 10 Won’t Sleep. To see all the power requests use these steps Windows 10 Won’t Sleep.
1. Press the Windows key + W together, then select Command Prompt.
2. Enter the following command line.
powercfg -requestsThese steps will display all the present and active power requests and make sure all the categories will be theoretically empty. In case if they are not, make a note of what is prompting the power request.
As you see on the given screenshot, the caller type with the process “synergyc.exe” and “request” type as “SYSTEM” is Stoping the computer system from going to sleep mode.
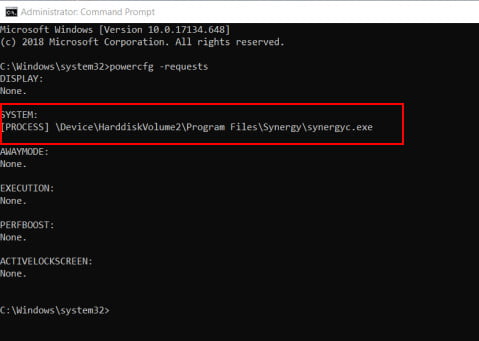
To fix this, use this command line
powercfg -requestsoverride <CALLER_TYPE>“<NAME>”<REQUEST>Change the Caller Type, Name, and Request with the active power request.
10. Check Sleep Mode in Safe Mode
Sometimes, the sleep mode can be interface with the install drivers and software. To check this you can run your computer on Safe Mode. If the PC goes to sleep mode in the Safe Mode, Then you’ve to perform Clean Boot to filter down the issue.
Follow the steps, To Clean Boot the Windows 10 PC.
1. Press the Windows + S keys to open Windows Search.
2. Type “System Configuration” and open it.
3. Click on the “Services”.
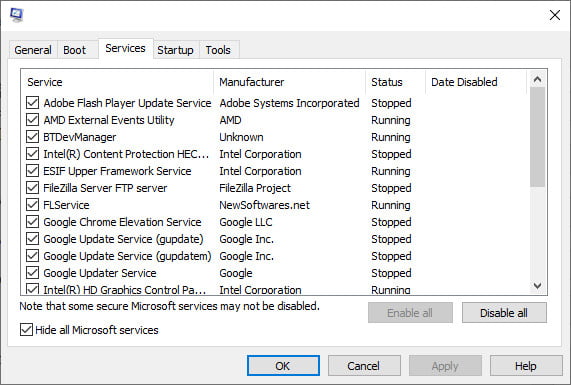
4. Check Hide all Microsoft services and choose to Disable all.
After, only the essential apps will be run on the PC. Now, next Press and Hold “CTRL+ALT+DETLE” buttons. Select “Task Manager”. In the task manager, turn off each app that setup to launch on the startup. After finishing these steps, Restart your PC.

Final Words
After going to all these methods, Still, the Windows 10 Won’t Sleep and you’re using the laptop, Then you can remove the battery of the laptop after turning off the laptop. Wait for a few minutes and reinsert the battery again and restart the laptop this may help to fix the Sleep Mode.
Take A Look on Health of your Windows 10 PC
Apart of troubleshooting methods, if after applying all the above-given methods won’t help you and the issue still remains the same. In this case, check the health of your PC, if it gets any physical damages that may cause the sleep mode error. Also, check the battery help of your laptop sometimes the laptop battery can be damaged or causing an issue that reflects the power settings on the Windows PC.
Is there a cost associated with downloading Windows 10?
Windows 10 may be freely downloaded and installed by anybody, regardless of whether or not they have a product key from Microsoft. It will continue to function normally far into the foreseeable future, with the exception of a few minor aesthetic constraints. After you have installed Windows 10, you will have the option to pay to upgrade to a licenced version of Windows 10.
What is the price of a Windows 10 licence?
Windows 10 Home has a price tag of $139 and is designed to be used on personal computers or for gaming. Windows 10 Pro has an MSRP of $199.99 and is designed for use in commercial or large-scale corporate environments. The Windows 10 Pro for Workstations edition has a price tag of $309 and is designed for companies or corporations that need an operating system that is both quicker and more powerful.
Is it true that Windows 10 is an improvement over Windows 11?
The upgrade to Windows 11 is beneficial for the majority of users. It comes with a plethora of brand new features, improvements in functionality, and modifications to the overall look. Because it is the most recent version of the Windows operating system, it often receives more attention than Windows 10. There is also not a significant amount of risk involved in upgrading to Windows 11.
Is it free to use Windows 10 indefinitely?
If you upgrade to Windows 10 during the first year, you may keep it free of charge permanently. There are no subscriptions, thus there are no further fees.
Related Articles:
- How Much is $1 in Robux? [Explained]
- 8 Ways to Fix Discord Screen Share Audio not Working
- How to View Passwords on Mac – Step by Step
- How to Install Bluetooth Driver in Windows 10
- How To Close Amazon Account – Step by Step Guide
- How To Share Google Map Location
- How to Turn on Google Assistant On Any Device
- How To Cancel NetFlix on iPhone – Step By Step
- How To Call Someone Without Showing Your Number