
Insert A line in Word: There are various ways of Insert A line in Word. It includes various procedures to follow for that. Other than using the keyboard for drawing the lines here we have various other ways also.
Procedure 1: By the use of Shapes menu
For adding the line to the document of Word here it is the way by drawing it on the given page. The Shapes menu includes various options that also have lines with the points of the arrow on the one or both of the ends. After drawing the line, do the customization of the color as well as the appearance to Insert A line in Word.
Step 1
Place the cursor in the spot where you want to Insert A line in Word.
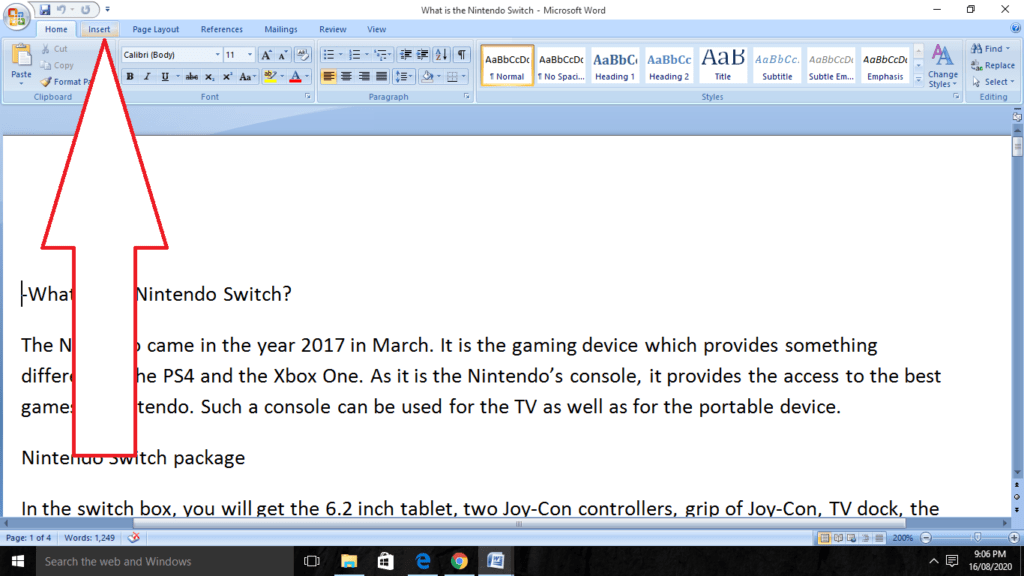
Step 2
After that, go to the tab of Insert.
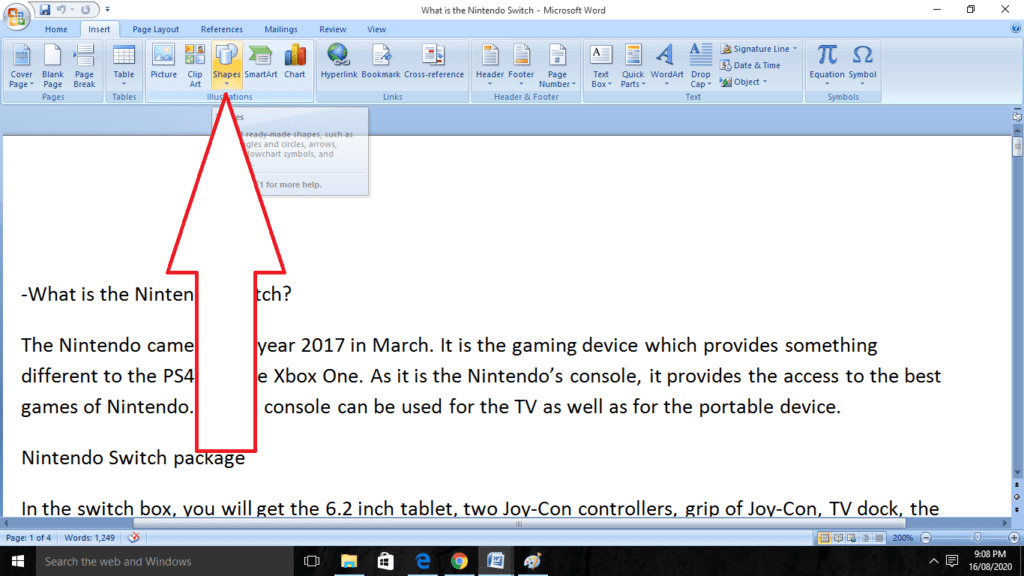
Step 3
In the group of Illustrations do the selection of the Shapes of the arrow of the dropdown.
Step 4
In the given Lines group, do the selection of the shape of the line.
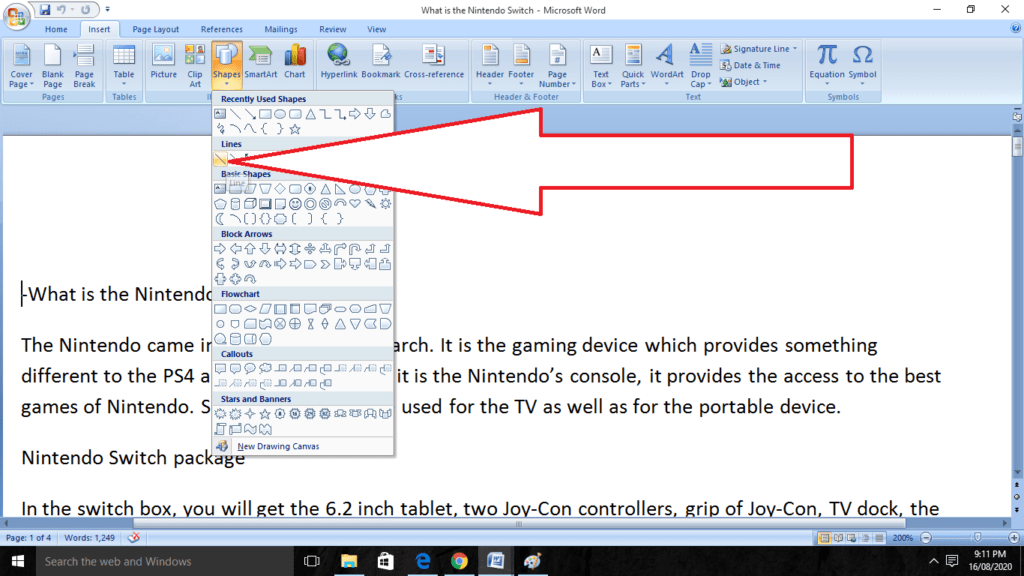
Step 5
Now in the Word document, do the dragging of the location where you need the line to appear.
Step 6
For changing the appearance of the line, do the selection of the line for enabling the Shape Format tab. Most of the versions of Word call this as Format.
Step 7
Go to the tab of Shape Format and then change there the color. Do the use of the different styles of line or apply there the different effects.
Procedure 2 : Using the AutoFormat for Inserting a Line in the Word
You can easily insert the line in the Word Document through the AutoFormat feature. For the creation of the line, do the placing of the cursor in the required location which you have to insert there. Type there the three characters for the required style of line. Then press the Enter key.
For the creation of the different kinds of lines, press the required keys on the given keyboard:-
- Broken or Dotted Line –For those three asterisks that are ***.
- Bold Single Line – Press the three symbols of underline _ _ _.
- Plain Single Line –For this click on the three hyphens —.
- Plain Double Line – You have to press the three signs of equal for this that are ===.
- Wavy Line – For this, click the three tildes ~~~.
- Triple line including the thick center – Click the three number signs ###.
Here we have the procedure explained of it:-
Step 1
You can do the use of key combinations for the creation of various kinds of variations on the plain or the Horizontal line that spans the document of word from the margin to margin.
Step 2
Now open word. Click or do double-click on the icon of the Word app. It appears as the W of white on the background of a dark blue background.
If you want to make the line in the Word Document, then either double click on the Word Document or open it or follow the given steps.
Step 3
After that, click on the Blank document. It is located at the upward left side to the given page.
Step 4
Then do the placing of the cursor where you want the line should appear. You must be on the blank line as it will not work if there includes text which is either before or after the cursor on that line.
You have to create a horizontal line there which will span from one edge of the page to the other one. Such a line will stop at the set margins.
Step 5
Now type there three dashes in the given row. By the use of the dash key, on the given number row at the upward side of the keyboard or on the numeric pad.
Step 6
Then press the enter key for converting the dashes in a line. It will in an automatic way do the creation of the solid line which will itself situate directly beneath the previous line of the given text. Take a note that the line never occupies the space of the line of text, though exists between the lines of the text.
Step 7
As there are various designs available as explained above by which you can do the creation of the own characters other than the dash.
Step 8
After that, move the line by entering the shortcut given above. Then press the enter key. By deleting the given above text line will prompt for moving upward.
Procedure 3: Using the Horizontal Line Tool for inserting the Line in MS Word
To Insert A line in Word Document by the use of a built-in horizontal line tool, follow the given steps to Insert A line in Word:-
Step 1
Firstly, place the cursor where you want the line to appear.
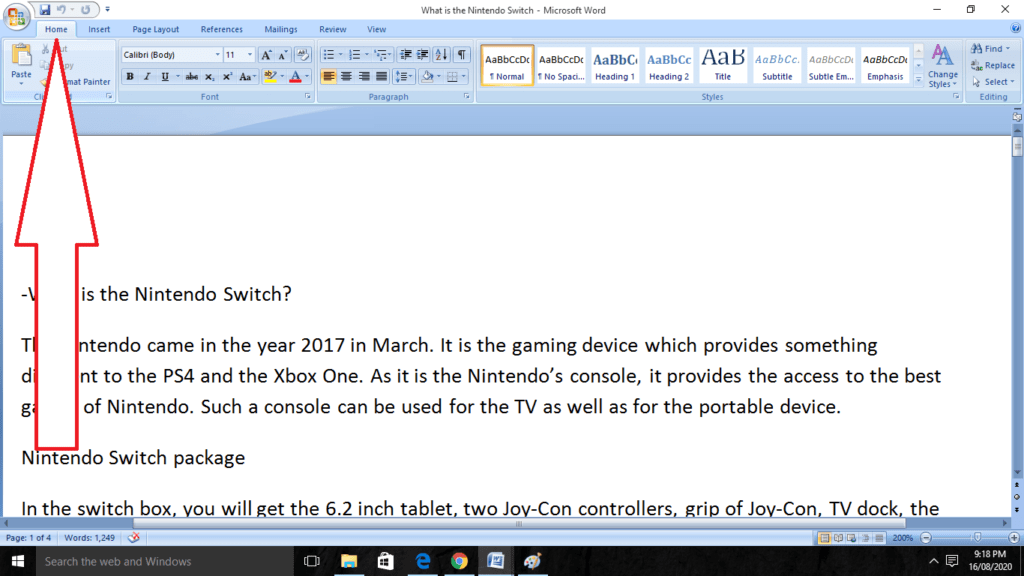
Step 2
After that click on the Home tab.
Step 3
Now in the group of Paragraphs, do the selection of the Borders from the given dropdown arrow and select the Horizontal line.

Step 4
For changing the look of the line, do double-click on the line in the document.
Step 5
In the dialog box of the Format Horizontal line, do the modification of the color, height, width, and alignment of the given line.
Procedure 4: Carrying a Line On the Mac
Step 1
Firstly, open the Word. You can click on the icon of the Word app which appears as the W of white and the background of dark-blue.
If you want there to draw a line in the given Word Document, then do double-click the Word Document or follow the given steps to Insert A line in Word.
Step 2
After that, click on the Blank document. It is located at the upward side to the left of the given page.
Step 3
Then click on the menu of Insert there. This button of the menu is available at the upward side of the screen of Mac in the grey menu bar. It will now show the drop-down menu to Insert A line in Word.
Step 4
Then click on the Shape option. It is located on the Insert dropdown menu. By performing this, it will open the pop-up window there.
Step 5
After that, click on the dropdown box. It is available on the upward side of the given pop-up menu. By clicking it, it will show the dropdown menu.
Step 6
Go to the Lines and Connectors. It is located in the dropdown menu.
Step 7
Do the selection of the line template. Click on one of the line options in the given window of the pop-up to Insert A line in Word.
Step 8
Now draw their line. Click here and do the dragging across the place where you want to insert the line in the Word Document there.
You can also remove the line by clicking there and dragging it. You can also do the adjusting of the length of the line and orientation through clicking and doing dragging any of the circles on the end of the given Insert A line in Word.
Final Words
Here we have explained the various ways by which you can Insert A line in Word. The easiest way was by the use of shape menu and the keyboard shortcut which will help you in inserting the line easily on Word. Such methods are easy to access and can be performed smoothly. Give a read to this topic and tell us about it in the comment section below. Also, go for our more topics for more info.
How do I add a vertical line to a document that’s been created in Word?
To add a line, go to the Lines area of the Insert tab, click the Shapes drop-down arrow, and then choose the Line option. Make the line the desired length by dragging the pointer along the screen. After that, choose the line you want to move or resize and use the mouse to drag it in the desired direction. To make changes to the line’s appearance, you must first select it and then go to the Shape Format tab.
What is the name of the sign that looks like a horizontal line?
Vinculum is a term that may be used to describe almost any horizontal line that appears in mathematical figures. Some instances of vincula include the line that is drawn between the numerator and the denominator as well as the line that is drawn above the repeating decimal.
What do you name the line that is always straight on the keyboard?
The vertical bar, denoted by the symbol |, is a graphic that has several applications in the fields of mathematics, computers, and typography. It is referred to by a variety of names, most of which refer to it in relation to a specific concept: Sheffer stroke (in logic), pipe, bar, or (literally the word “or”), vbar, and others.
How do I add a vertical line to a document that’s been created in Word?
To add a line, go to the Lines area of the Insert tab, click the Shapes drop-down arrow, and then choose the Line option. Make the line the desired length by dragging the pointer along the screen. After that, choose the line you want to move or resize and use the mouse to drag it in the desired direction. To make changes to the line’s appearance, you must first select it and then go to the Shape Format tab.
Related Articles:
- How Much is $1 in Robux? [Explained]
- 8 Ways to Fix Discord Screen Share Audio not Working
- How to View Passwords on Mac – Step by Step
- How to Install Bluetooth Driver in Windows 10
- How To Close Amazon Account – Step by Step Guide
- How To Share Google Map Location
- How to Turn on Google Assistant On Any Device
- How To Cancel NetFlix on iPhone – Step By Step
- How To Call Someone Without Showing Your Number