How to Change Language in Windows 10
Change Language in Windows 10: Windows 10 gives support to the changing of the default language. You don’t have to think about the default language at the time of purchasing the laptop or computer. If you want to change and use a different language, then it can be changed at any moment.
It is helpful at the time when there are various users in accessing only one computer and such users go for various languages. Either you can download and do the installation of the additional languages of Windows 10 for viewing the menus, user interface items, and dialog boxes in the required language.
Change Language in Windows 10
Step 1
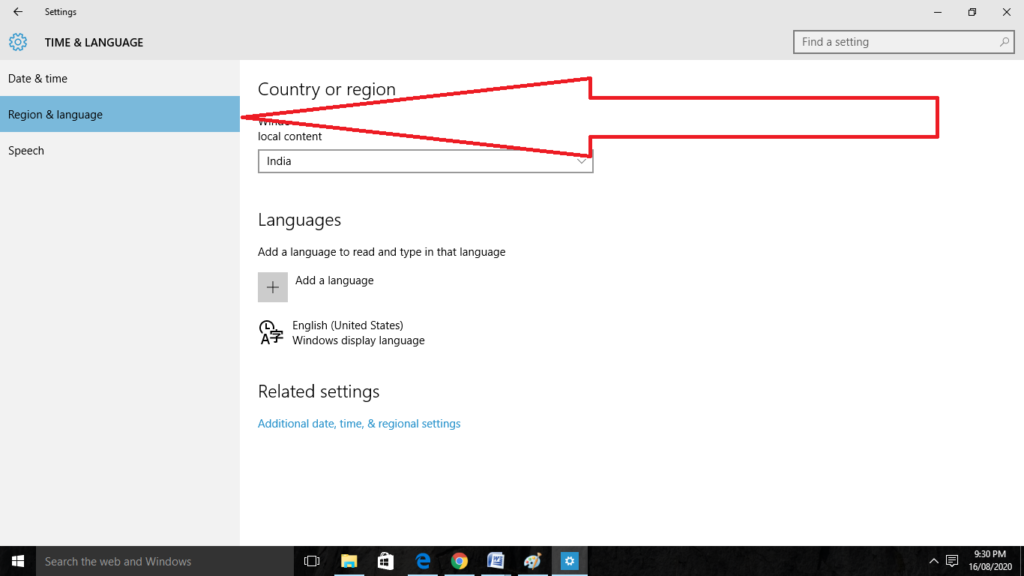
Firstly, you have to sign in to Windows 10 by the use of an administrative account. Press the keys of Windows + I for opening the window of Settings and then click there on the Time & Language.

Step 2
Do the selection thereof the Region & language which is located on the left side.
Step 3
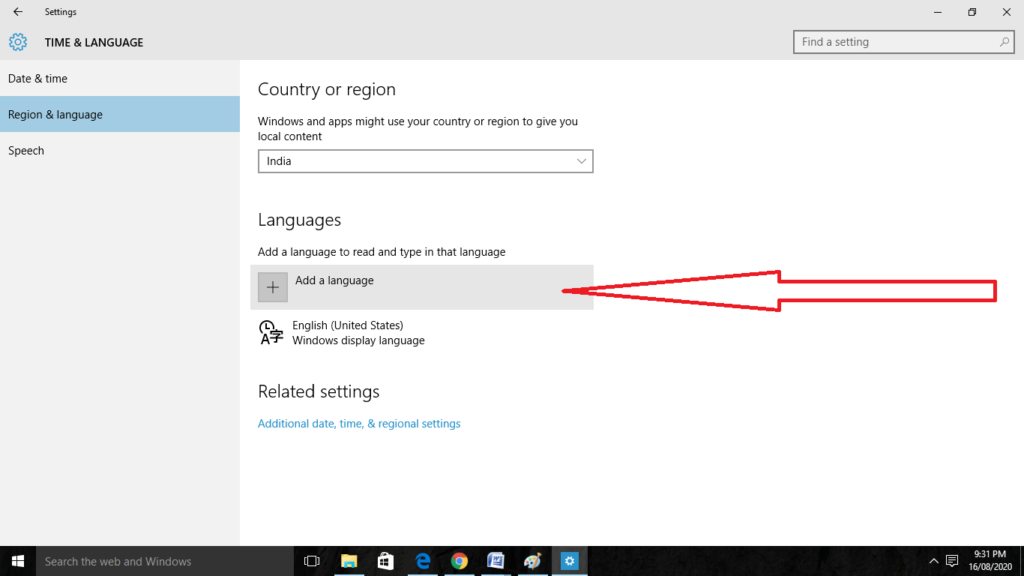
After that, select the option of Add a language there on the right side.
Step 4
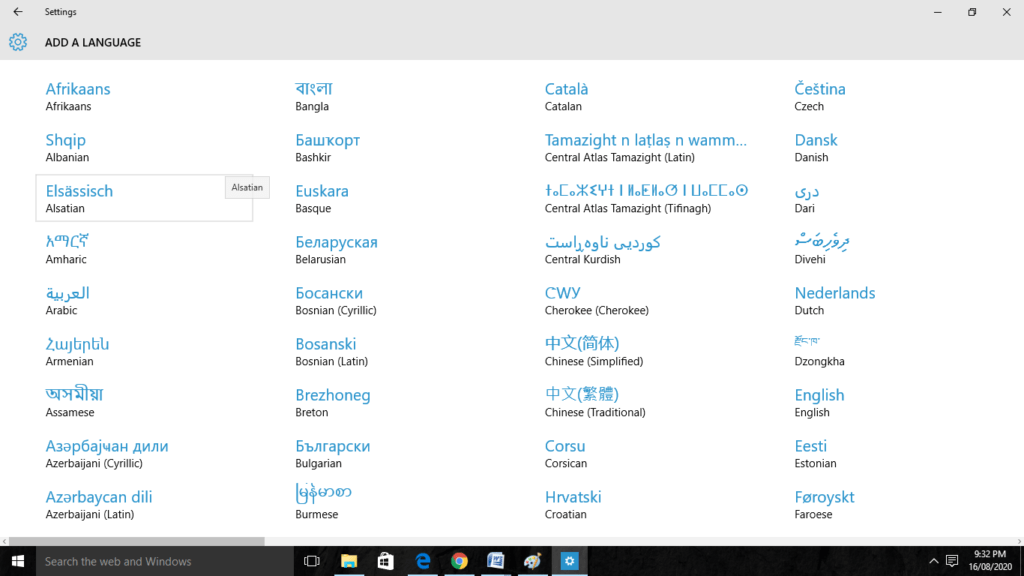
The window of Add a language will show the various languages that are there for the installation on the PC. Such languages are listed in the order of alphabetical as per the default Windows language. Then click on the language which you want to download there to Change Language in Windows 10.
Step 5
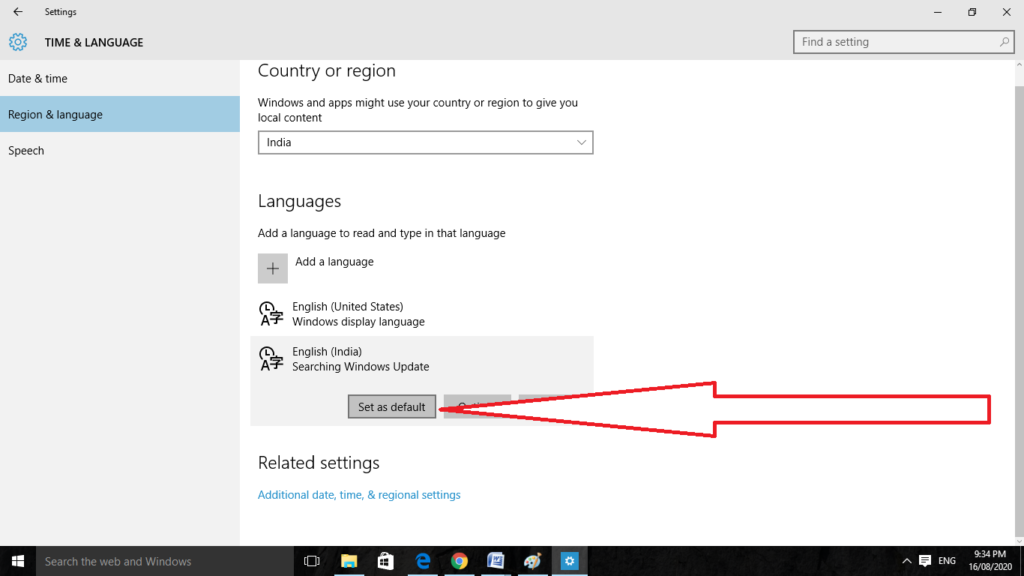
Go back on the screen of Time & Language, and you will get the languages that you have installed. Click on the required language and it will show the three options that are Options, Set as default, and Remove. Click on the Options and then go for the Download for downloading the pack of language and keyboard also for such language to Change Language in Windows 10.
As when you will complete such steps will Change Language in Windows 10. Such changes of the new one will be in the reflection on the screen of Sign-in, File Explorer, Settings app, websites, browser, and Desktop and the websites where you will visit. It will depend on the new settings that Windows 10 will ask for reviewing the privacy settings again.
Changing the Display Language
Step 1
For changing the language for the user account, it is currently showing you the Settings page of Time & Language to Change Language in Windows 10.
Step 2
Do the selection of the language and change it to Set as default. A notification will appear there under the language which tells that – Will display language after next sign-in.
Step 3
Sign out of that into windows and the new display language will appear there. If you want to do changing of the language of another account of the user, then firstly sign in to that account. You can also set a different language for each of the accounts of the user to Change Language in Windows 10.
Changing the region settings
If you want to change the system language because you are currently in a different country, then you have to update the settings of the region to Change Language in Windows 10.
For changing the local region settings on Windows 10, go for the given steps:-
Step 1
Firstly, open the Settings on your system.
Step 2
Then go for the Time & Language option on it.
Step 3
Click on the Region option there.
Step 4
Do the use of Country or region which is the dropdown menu for the selection of the geographical location if it is different in your present settings to Change Language in Windows 10.
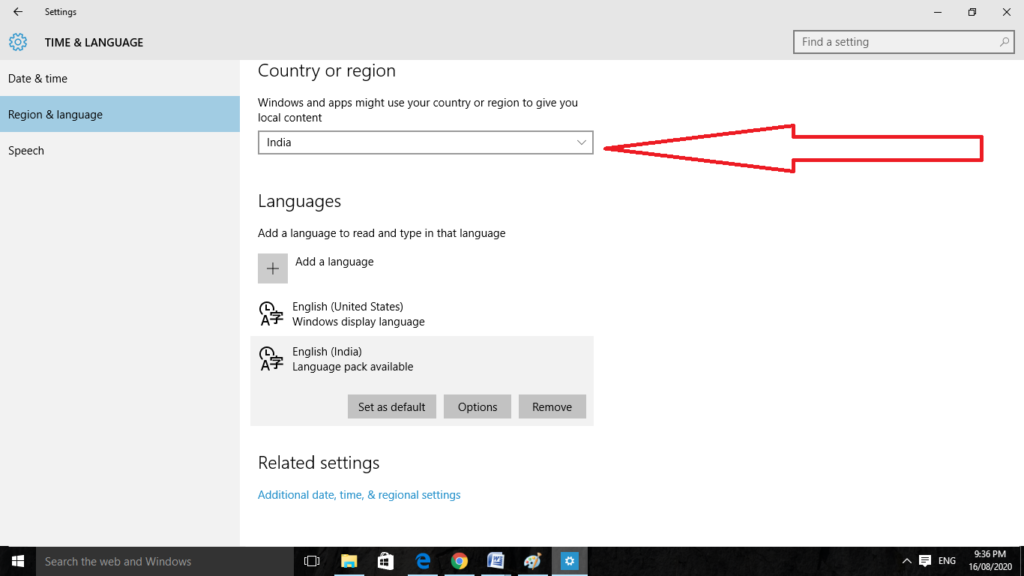
Step 5
Then under the section of Regional format, do that use of dropdown menu for the selection of the correct formats for dates as well as times if it is different in your current region.
Step 6
Go to the Language option on the left side.
Step 7
Under the section of Related settings, on the given right side, click on the Administrative language settings option.
Step 8
In the tab of Administrative, click on the button of Copy Settings.
Step 9
Now under the section of Copy your current settings to, check there the Welcome screen and system accounts and the option of New user accounts.
Step 10
After that click on the OK button.
Step 12
Go for the restart now button.
As when you will complete the steps, the device will show the correct region settings as per the physical location. As now you will never require the changing or for the installation of the additional languages. The ability for adjusting such settings occurs in the small as well as the large organizations that are working with the users who have various preferences of language.
Such a feature will be required in the situations at the time when moving to the other region and you have to do the matching of the local settings. Or at the time when you have to purchase the new computer which will ship from a different country as it is not available in the local form.
Remember that at the time of changing the language settings you may lose the use of Cortina, which is the assistant of digital form which is not in support in most of the regions.
Disabling the Language Sync
At the time when you are in use of the Microsoft account on Windows 20, the language settings will sync in the device.
In such a case, if you are in a plan for changing of the region as well as the language settings only for a single computer, then you have to Disable the option for synching of such settings at the time before making any of the changes for the prevention of the new configuration from overwriting of such settings on the various devices.
For disabling the language synching on the Windows 10, follow the given steps:-
Step 1
Firstly, open the Settings on your system.
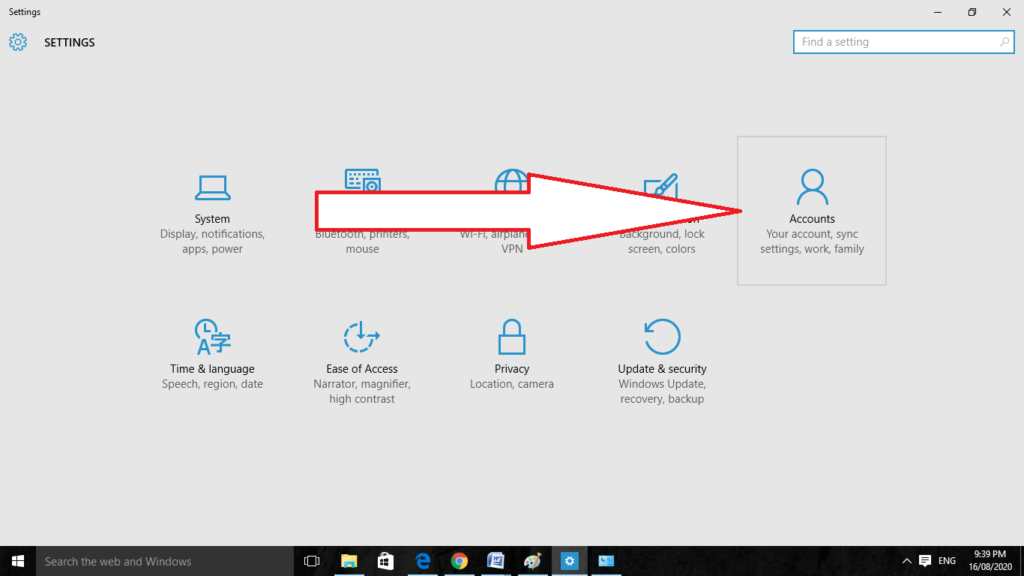
Step 2
Then click on the Accounts there.
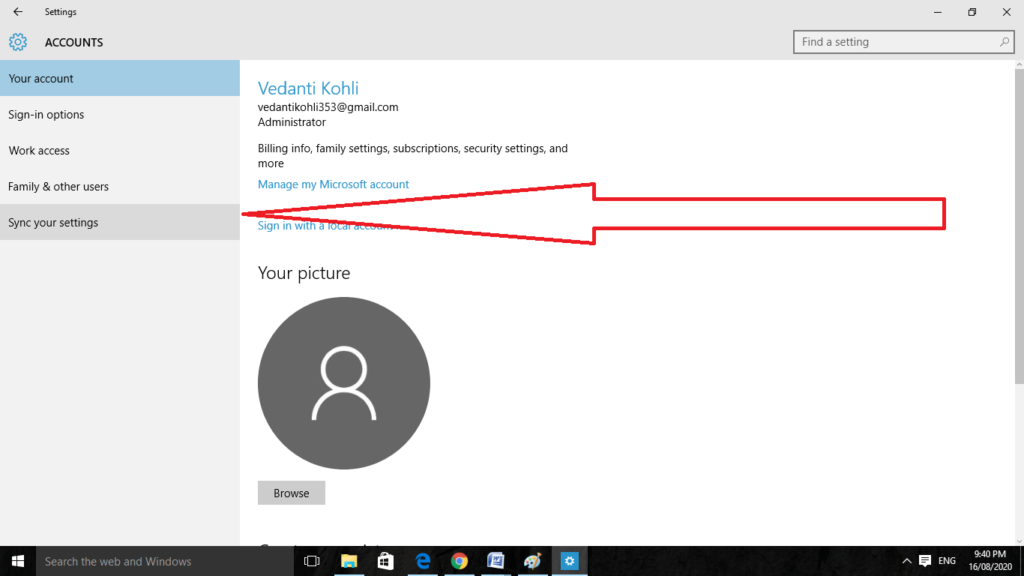
Step 3
Do the selection of the Sync your settings option.
Step 4
Under the section of Individual sync settings, turn off their Language preferences toggle switch.
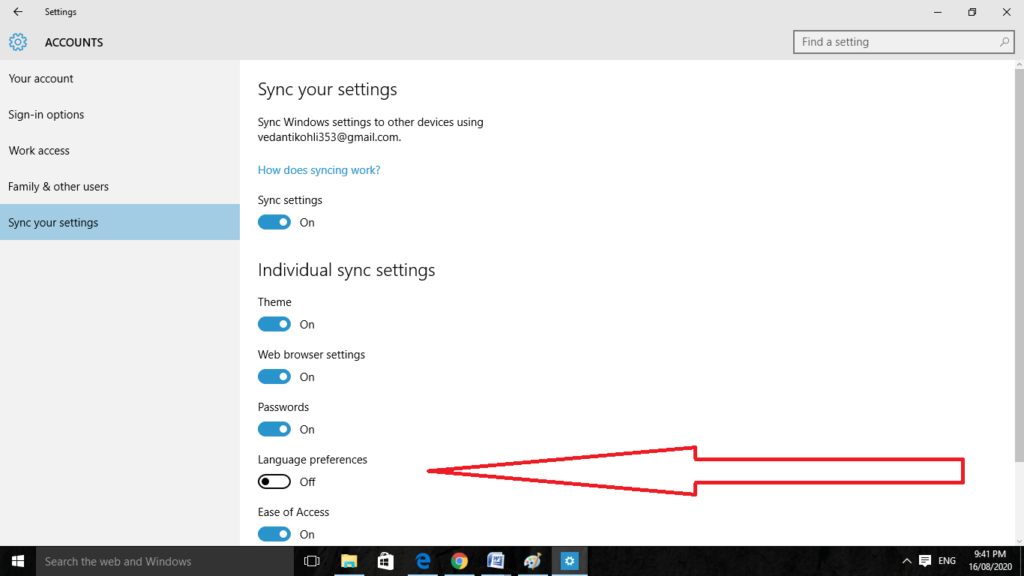
As the steps get completed, you can change the settings of language without affecting the settings on different devices.
Why Use the Language Change Option?
If you are living in the household of multi-lingual or if you work on the side as a co-worker who speaks a different language, then in such a case the requirement is of language interface. The pack of language will do the conversion of the field boxes, labels, menu names, through the user interface for the users in their required language. Windows has the support of multi-lingual in it since the time of Windows XP.
Microsoft has made it the feature of exclusive in the Windows Vista Ultimate and then afterward the requirement was dropped with Windows 8. Therefore, the need for a change of language either if it is installation or the regional change is a special need for people while changing or traveling through the other countries. It will easily adapt to the region and will change as per the country.
Wrapping Things Up
Here we discussed how you can change the language in your Windows 10. It can be either installed or can be changed through the default settings. It is necessary to change as per the change in the region. Go through with a read on this topic and comment on this. Also, read our more topics for more info.
Is it possible to change the language that Windows uses?
In the Settings app, select “Time & Language,” then select “Language” from the menu that appears. 3. In the drop-down menu that says “Preferred Languages,” click the link “Add a preferred language,” and then start typing the name of the language you want your computer to use.
Is it possible to alter Windows’ language?
To change the language on your device, open the Settings app, go to “Time & Language,” then choose “Language.” 3. Go to the section labelled “Preferred Languages,” click on the link that says “Add a preferred language,” and then start entering the name of the language you want your computer to use.
Related Articles:
- How Much is $1 in Robux? [Explained]
- 8 Ways to Fix Discord Screen Share Audio not Working
- How to View Passwords on Mac – Step by Step
- How to Install Bluetooth Driver in Windows 10
- How To Close Amazon Account – Step by Step Guide
- How To Share Google Map Location
- How to Turn on Google Assistant On Any Device
- How To Cancel NetFlix on iPhone – Step By Step
- How To Call Someone Without Showing Your Number