How to Add Checkbox in Word Document
Add Checkbox In Word: Microsoft Word has various purposes and it is not only the application of word processing. You can perform the formatting of the text in various ways and can make business documents in professional form. As with much of the features and usage, you might not have the knowledge of how to apply them to Add Checkbox In Word.
At the time of the creation of surveys or the forms through the Microsoft Word, to Add Checkbox In Word it provide the options that are easier for reading as well as answering.
Here we have two options to Add Checkbox In Word. Go for the methods and perform them.
Add Checkbox In Word for Printed Documents
If you require the use of the paper version of the document and want to tick the boxes by the use of pen, then just perform the inserting of Add Checkbox In Word.
Step 1
Firstly, write there text in the list and then do the selection of it through holding the button of the left mouse and then drag it through the First to the last point in the given list Add Checkbox In Word.
Step 2
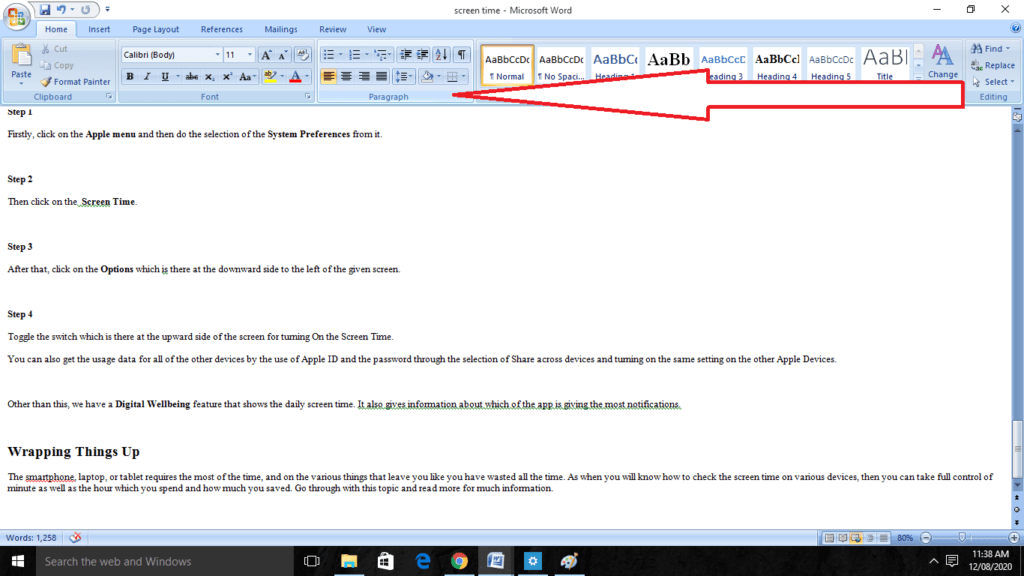
Take a proper check that the Home menu is open there. Do the search of the Paragraph tab from it.

Step 3
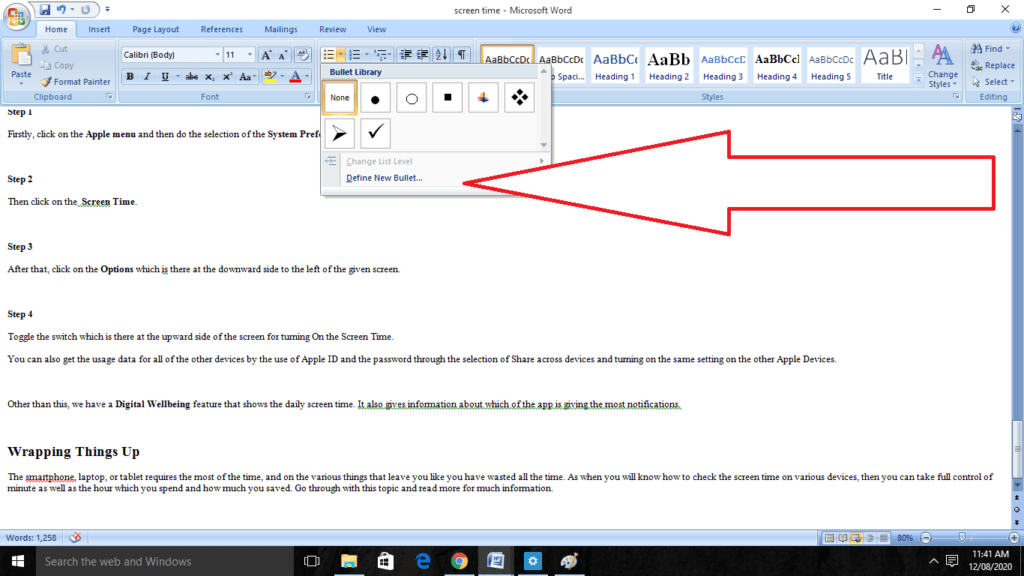
Next to the given icon of bullet points, you will get the arrow which shows the dropdown menu. Open that dropdown menu and then click on the Define New Bullet option.

Step 4
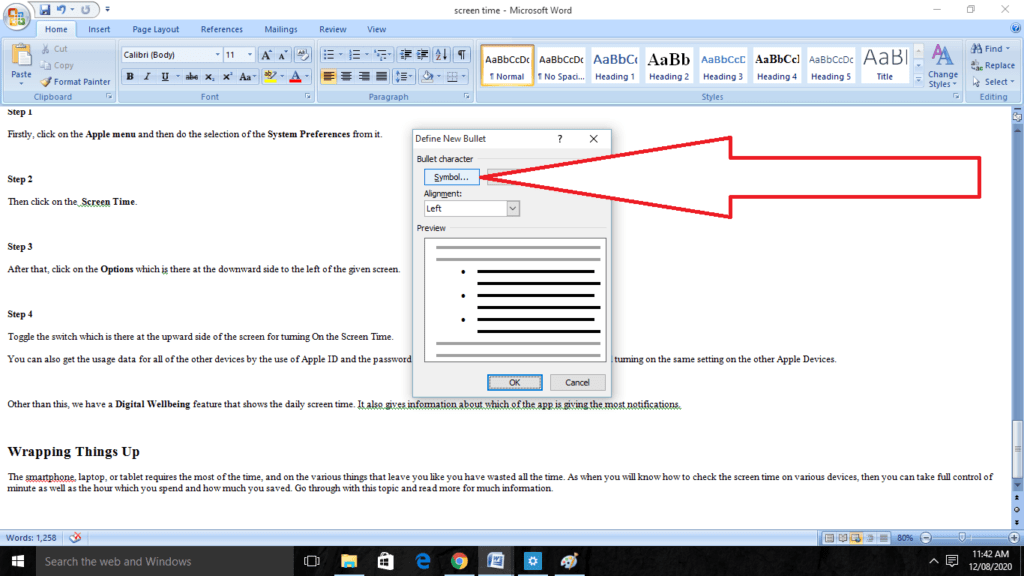
Now click on the tab of Symbol.

Step 5
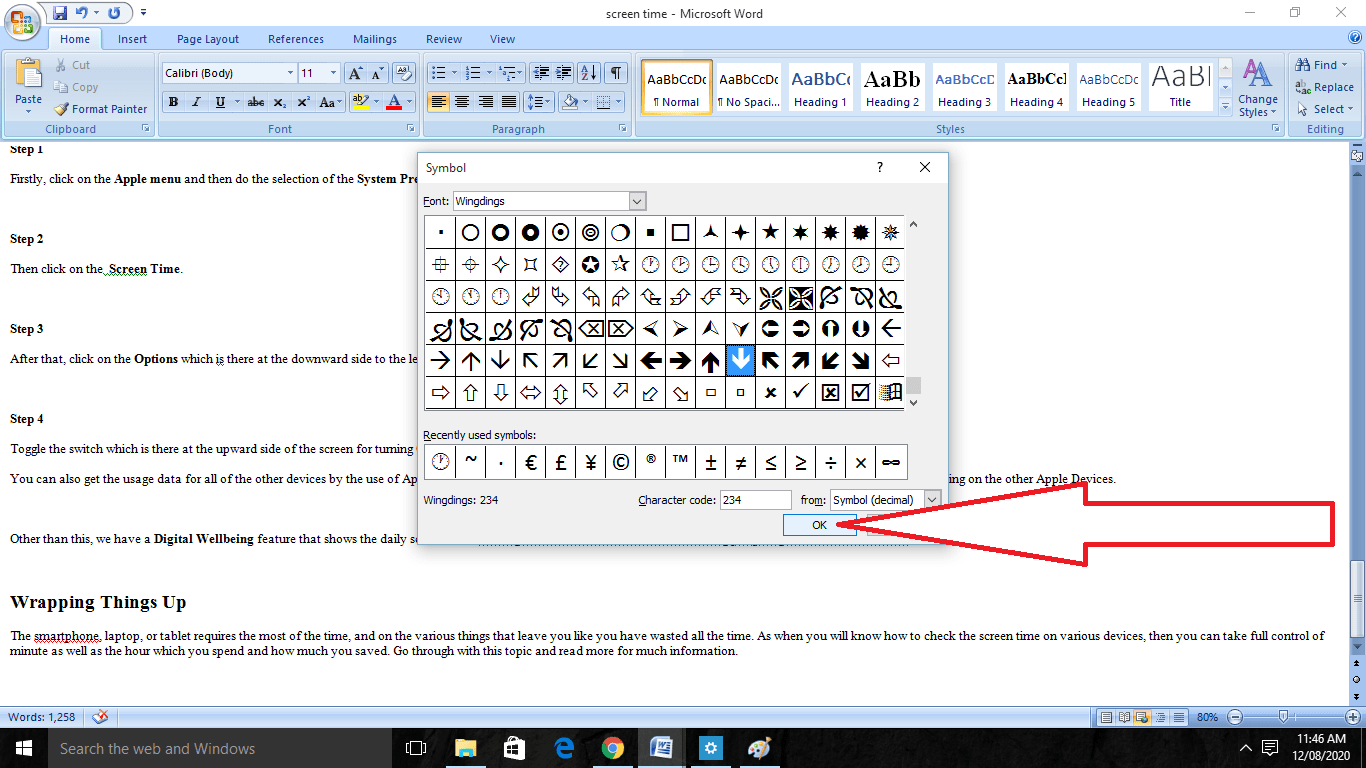
At the list of given fonts, do the selection of Wingdings or you can select Wingdings 2 in the new version of MS Word and can search for the appropriate empty checkbox.

Step 6
Click on the OK button for the confirmation and then again click there.

Add Checkbox in MS Word 2007 or Older Versions
If some of the people are in use of older versions of Word, then the steps for inserting the checkboxes are a bit different.
Step 1
Do the selection of the list and then right-click on the mouse.
Step 2
Then click on the Bullets and Numberings on the given menu.
Step 3
Then select any of the bullet styles and then select the Customize.
Step 4
After that, click on the Character option.
Step 5
Through the selection of fonts click on the Wingdings option.
Step 6
From the checkbox, click on the OK button.
This option will do the replacement of the default bullet points with the empty checkbox. You will not be able to fill the form, though it is required whenever you need the print out of the document.
Use Word Developer Tools To Add Option of CheckBox for Forms
Step 1
For the creation of fillable forms, which includes checkboxes you have to enable first the Developer tab on the Ribbon there. As when the document file is open there, click on the dropdown menu of File and then do the selection of Options command.
In the window of Word Options, go to the tab of Customize Ribbon. Given on the right side the list of Customize the Ribbon does the selection of Main Tabs on the dropdown menu to Add Checkbox In Word.
Step 2
Then on the list of main tabs that are available there, do the selection of the Developer checkbox and then click on the OK button.
Step 3
See there the Developer tab is in addition to the Ribbon. Take the cursor to the document where you want the checkbox. Then switch to the Developer tab and then click on the button of Check Box Content Control.
Step 4
You will get the checkbox there when you will place the cursor. Place it to each of the answers and then you will get the checkboxes. Click on the box and mark it with X or do the selection of the whole form box for moving the checkbox around. Do the formatting of it.
How to Add the Fillable Checkbox in Word
If you want the interactive Word document where you can perform the ticking off the required checkboxes, then follow the given steps to Add Checkbox In Word:-
Step 1
Firstly, go to the menu of File and then click on the Options for opening the additional window which is the Word Options.
Step 2
After that click on the option of Customize Ribbon.
Step 3
In the given dropdown menu of the right side check there if the Customize the Ribbon is in the selection or not.
Step 4
Search there the checkbox of Developer and then click on the + button.
Step 5
Tick there the Developer check box and then click on the other button of + which is next to the Controls checkbox.
Step 6
Then click on the Checkbox Content Control and then click on the OK button.
Step 7
Search for the Controls tab in the given menu of Developer and then click on the icon of Checkbox.
Step 8
Look for the Controls tab in the menu of Developer and then click on the icon of the checkbox.
As depending on how much you require the checkboxes, click on the icon of a checkbox for the creation of interactive and fillable checkboxes. There will occur a sign of X when you will check the box. If you want to change such a symbol, then visit the Properties option in the Controls tab.
If the icon of Properties appears in the blurred form, then check the box which you have inserted and then visit there. At the downward side, of the Content Control Properties, you will get the option of a Check symbol. Click on the button of Change and do the selection of the required signatures for the checkbox. Then click on the OK button for the confirmation of the changes to Add Checkbox In Word.
Insert the Single Checkbox in Word
As the checkboxes are used for the creation of to-do lists, other lists, and surveys. Though sometimes you may require only a single checkbox that can be placed anywhere in the given text. For the inserting of a single checkbox, perform the given steps to Add Checkbox In Word:-
Step 1
Firstly, click on the required place in the given document where you want to insert the single checkbox.
Step 2
Then click on the Insert menu and then go to the Symbol option.
Step 3
From the given list of symbols search there the checkbox symbol which you want to insert there and do double-clicking on it.
Such a method is required only for the use of documents that you want to print out. The symbols of checkboxes are not that interactive. Therefore, you can check them put under the Word document.
Enlarging of the size of the text box without enlarging the given text
If you want to enlarge the size of the checkbox, then click on the left button of the mouse and the small squares will show the enable option for dragging the box and making it larger. It may occur that the increase in text size together with the box though you can change the font size. Just do the selection of the text and in the Font options change the size.
Final Words
Here we had a discussion on how you can insert the checkboxes in MS Word. We discussed various methods of it. Go through with a read on this topic and tell us as a comment on it. Also, read our more topics for more info.
How can I fast check a box in Word that has been selected?
Put the cursor where you wish to add the checkmark, and press Enter. Navigate to the Insert menu, then choose Advanced Symbol, then Symbols. Pick the symbol of a checkmark that best suits your needs.
Explain the checkbox’s purpose by providing an example of its use.
A checkbox, also known as a tickbox, tick box, and check box, is a graphical widget that enables the user to make a binary decision, also known as a choice between one of two viable alternatives that cannot be selected at the same time.
How do you check or uncheck a box with a checkbox in Word?
To activate the checkbox in the “Controls” section, click its icon. It ought to show up for you in the document at this point. It may appear to be checked or unchecked depending on whether or not you click it.
What may be causing this problem with my checkbox in Word?
For the checkbox to function effectively, the document must first be locked (i.e., secured so that users may fill out forms).
Related Articles:
- How Much is $1 in Robux? [Explained]
- 8 Ways to Fix Discord Screen Share Audio not Working
- How to View Passwords on Mac – Step by Step
- How to Install Bluetooth Driver in Windows 10
- How To Close Amazon Account – Step by Step Guide
- How To Share Google Map Location
- How to Turn on Google Assistant On Any Device
- How To Cancel NetFlix on iPhone – Step By Step
- How To Call Someone Without Showing Your Number