This is comprehensive guide based on how to use Nvidia Shadowplay in order to record your gameplay without having a hassle.
Do you want to record your gameplay on PC and also live stream on various social media platforms? Search everywhere but still don’t find the relevant software or application for recording.
Don’t worry you can use NVIDIA, a famous and popular software that provides you unlimited recording and live streaming of your gameplay with HD resolution.
Here we will provide you with basic information about NVIDIA and how to use it for recording your PC gameplay.
What Is NVIDIA?
NVIDIA is an application that can be used for recording your PC gameplay and live streaming it on all social media platforms including Youtube and Facebook.
It will automatically record gameplay in the background. It is also known as NVIDIA’s ShadowPlay or NVIDIA Share.
Nvidia Share:

How To Record GamePlay With NVIDIA Share?
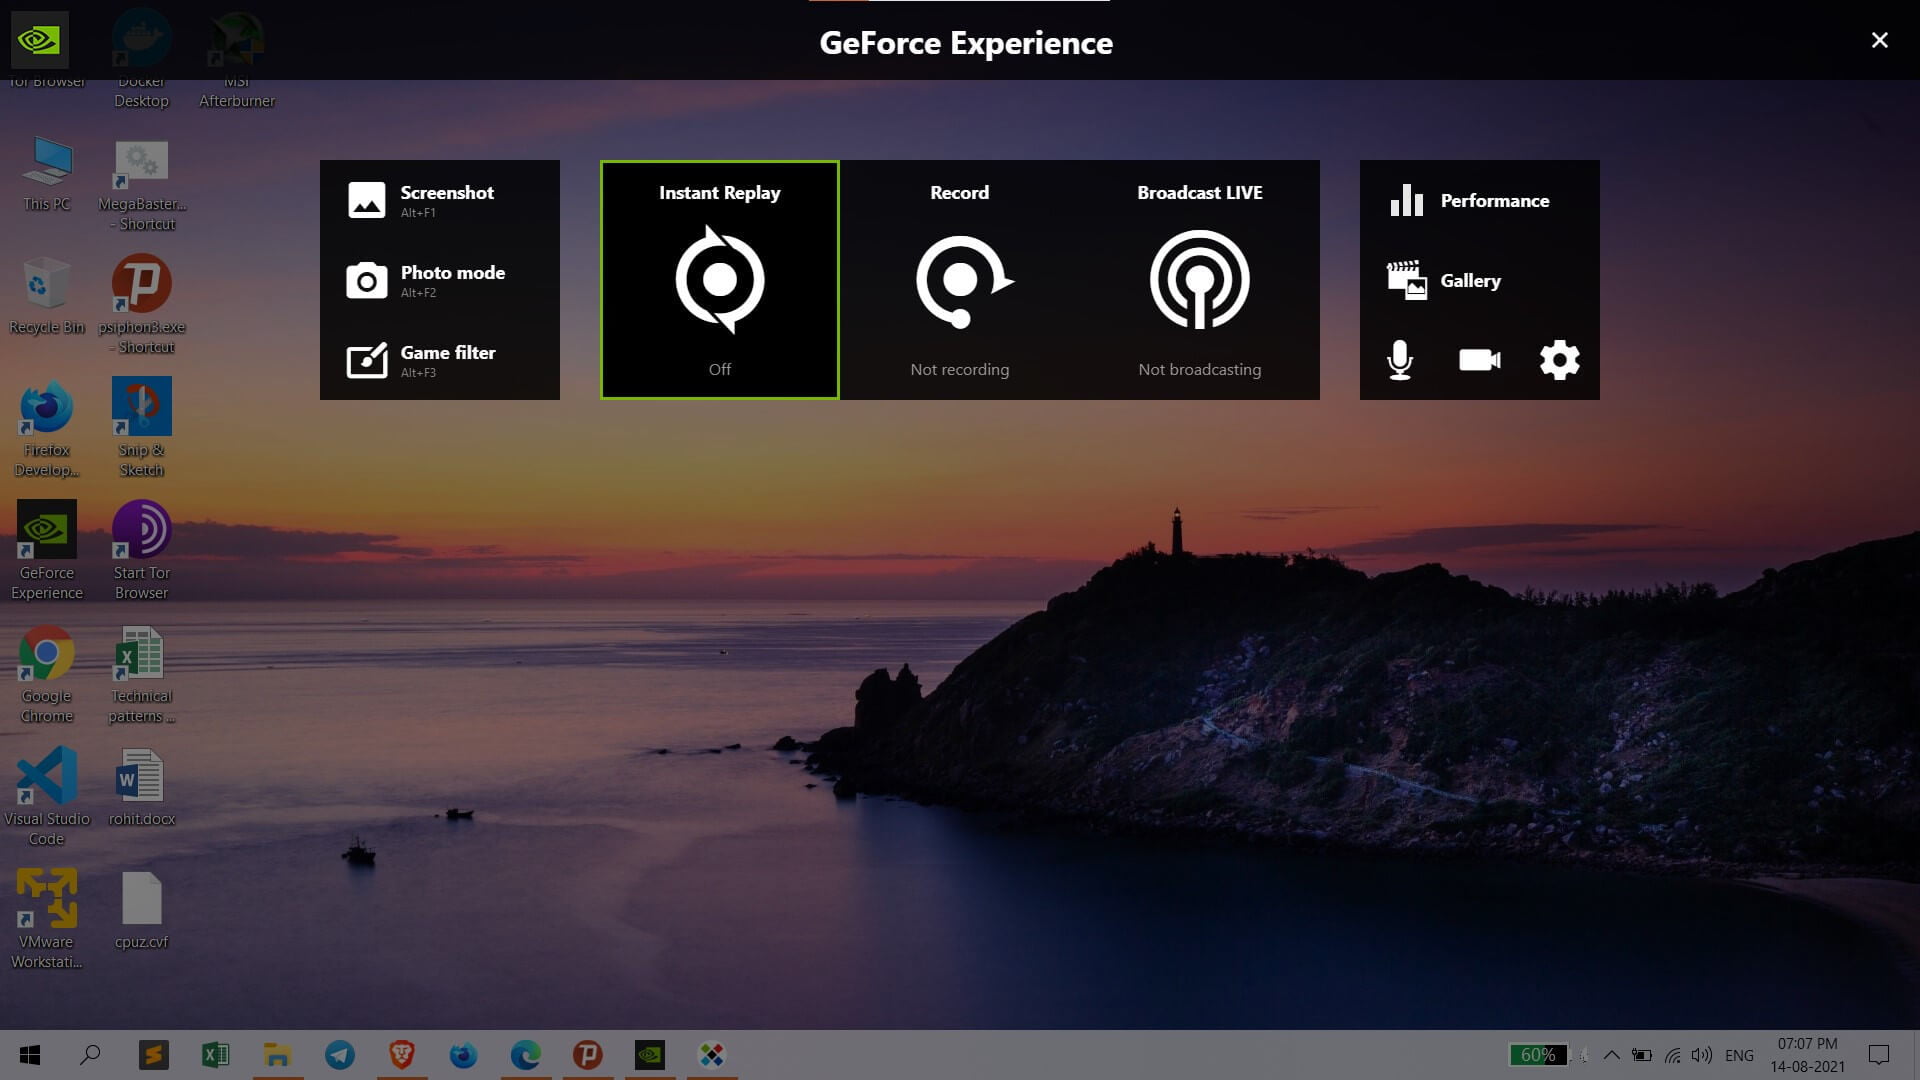
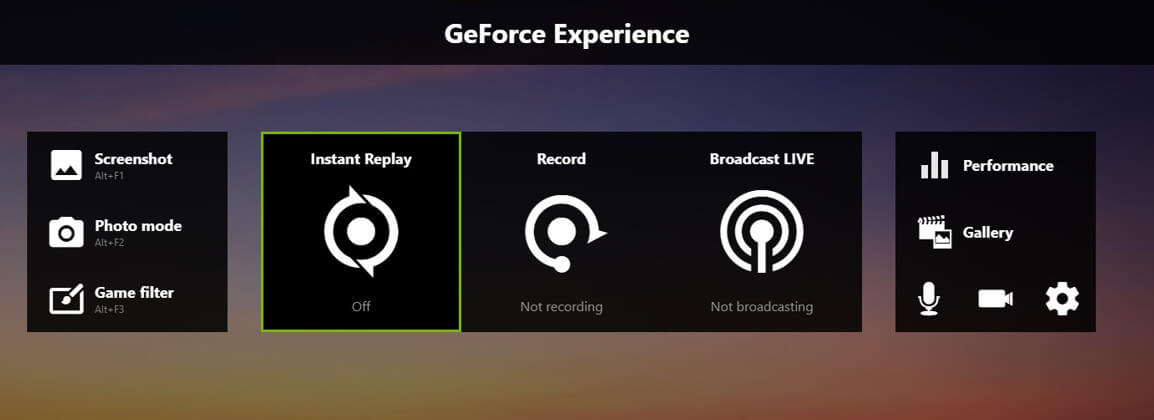
NVIDIA has rebranded the name of “ShowPlay” to “NVIDIA Share”. You can easily operate NVIDIA Share from the NVIDIA GeForce Experience overlay and access its press Alt+Z keys from your keyboard.

But if you are not supposed to see anything on your screen then you need to open the GeForce application from your start menu.
Press the Share button and open the overlay. If the application isn’t installed then download and launch it from NVIDIA.
For more specifications, the application offers you abundant features like one-click game setting optimization, graphic driver updates, live streaming, and more.
Recording gameplay from ShadowPlay includes very simple steps; it will automatically record all your gameplay in the background after enabling the ” Instant replay” option. You can start it by using the Alt+F10 key.
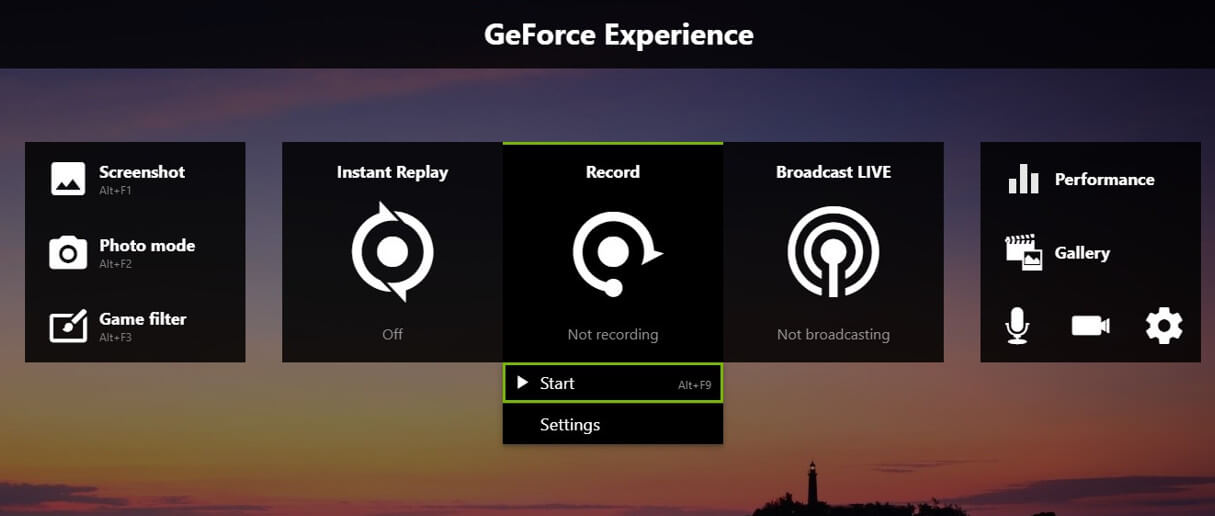
For recording specific gameplay just press the record buttons and select “Start”, it will start your game recording.
Also, you can use Alt+F9 to start recording. In that situation, it will continuously record until you stop recording.
How To Record OpenGL Games Using Nvidia Share?
You may feel sad after knowing that not all games will be recorded using NVIDIA Share by default. But, don’t worry! We are here to help you and provide solutions to your problems.
To record OpenGL games simply follow the following steps:
1. Open the NVIDIA GeForce Experience or press ALT+Z keys together.

2. Click on Record and then select Start to begin the recording.
All set, now Nvidia Share will be able to record all types of games including OpenGL games. And all other shortcuts and settings work the same as before.
How To Add Audio And Web Camera?
To record your voice your gameplay and also your video watermark at the side of the recording, you need to enable them from the sidebar of the overlay.
How To Change Resolution Settings?
For customization of your Showplay settings, you need to click on the “Record” icon and select settings. Here, you will freely change the resolution, quality, FPS, Length, and bitrate options.
To change the keyboard shortcut keys and add new ones you need to use the Alt+Z tab to open the shortcuts and then click on “Settings”. You will change the keyboard shortcut keys or add your customizable one.
Other specifications are also included in your settings like HUD layout, where you can choose the place for your webcam watermark and FPS counter on the recording of gameplay.
Where Will The Recordings Appear?
All your recordings will appear in a specific folder in your account’s Videos. These recordings are saved safely on your Desktop by default. Like if you are recording your desktop then you are supposed to find them at,
c:\users\name\videos\desktop.For choosing a different storage location for your recording of gameplay you can use the following steps:
1. Click on Settings from the overlay
2. The select Recordings from the menu
3. Change your “Videos Directory”.
Nvidia Shadowplay

Does NVIDIA ShadowPlay Impact Your Game Performance?
Yes! The application will increase your gameplay performance not much but a little bit. It will increase the performance by at least 5% and even 10% in some demanding games.
This is because it takes a huge RAM and Cache Memory for running in the background.
If you have a GPU having high-performance hardware components then don’t worry, this will not affect your gameplay a lot more.
How To Record Gameplay With Shadowplay?
After launching the Shadowplay application the record feature is disabled by default. You need to enable it, there are easy steps behind it. Let’s have a look.
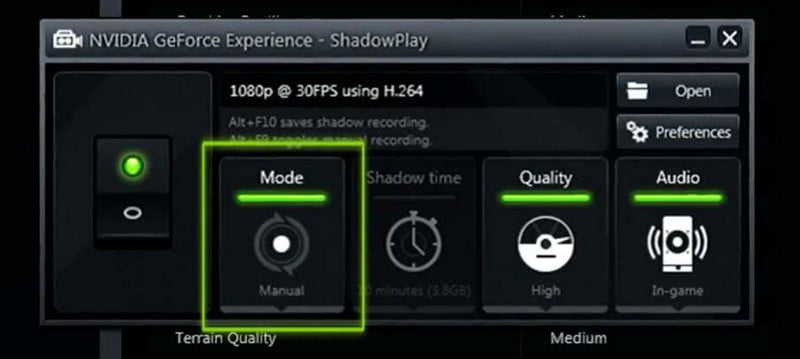
1. Launch the “NVIDIA GeForce Experience Application”.
2. Press on the “Shadowplay” icon from the right corner at the top.
3. Click the Switch to flip it on.
4. You are supposed to see a green light if Shadowplay audio-recording is enabled.
Shadowplay uses the “Shadow & Manual ” mode by default which saves your last five minutes of recordings of gameplay. You can simply save it by using the keyboard shortcut key Alt+F10 to save it in your Videos folder.
You are supposed to set a manual mode by which you can start your recording and stop it just by clicking the Alt+F9 shortcut key when you are done.
It also provides you abundant features like a Live FPS counter by using the Alt+F12 key.
How To Configure NVIDIA ShadowPlay?
Shadowplay with all the above features provide many specifications also, you can use all of them by just clicking the setting option and you are supposed to use the following:
1. Shadow Mode will allow you to record the last 5 minutes of gameplay.
2. Manual Mode provides you with the access to record Gameplay manually.
3. The twitch option can be used for a live broadcast of your gameplay along with your webcam watermark and audio cover.
4. Shadow Time helps you to choose the duration of gameplay you want to record.
5. The quality option allows you to configure the resolutions and FPS of your gameplay
6. Audio Option can be used to add any audio track to your gameplay.
7. The preference screen allows you to choose designs of overlay, webcam watermark location, FPS counter, Status indicator, and many more.
Overall, the application is a combo of numerous features and specifications if you are a die heart gamer and wanted to start your Youtube gaming channel then the tool is perfect for you.
Final Words
Alright! readers this is the end of this short guide, hopefully, know you understand what is Nvidia Share and how you can use it for recording your gameplay for PC along with other functions.
Today we will know about one of the most famous gameplay recording applications and how we can record through it on your PC.
As today’s gaming live streams are the best option for earning a passive income, you can simply go with NVIDIA ShadowPlay for recording and live streaming your gameplay.
FAQ: Frequently Asked Questions
These are some of the frequently asked questions related to the Record PC Gameplay with Nvidia Shadowplay with complete information.
How do I enable Nvidia ShadowPlay?
To enable it, open the NVIDIA GeForce Experience application and select “ShadowPlay” from the top right corner of the window. To turn on ShadowPlay, click the switch to the left of the window. When NVIDIA ShadowPlay is activated, a green light will display.
What does Nvidia ShadowPlay do?
It comes with a screen recording overlay as well as tools for broadcasting. I’ll use the old term because Nvidia Share is still generally referred to as ShadowPlay. You can utilize Nvidia ShadowPlay if you have an Nvidia graphics card model GTX 650 or newer with the Nvidia GeForce Experience.
Is ShadowPlay for free?
Depending on your PC configuration, Nvidia’s ShadowPlay can have varying levels of performance. However, it’s free, simple to use, and can be customized for straight-up recording, capturing the final few action-packed minutes of your game, or streaming your adventures on Twitch.
Is ShadowPlay better than OBS?
There are some of the main difference between the Shadowplau and BOS. Techincially in terms of the performance the Shadowplay is better and on other hand OBS will reduced the frame rate that can reduce your gaming experience.
How long can you record with ShadowPlay?
When Game DVR is turned on, the maximum recording time is set to 2 hours by default, but you can change it to 30 minutes, one hour, or four hours. You may also choose to record your mic during gameplay in the Game DVR settings, and you can capture video at 30 or 60 frames per second below that.
This is the end of this short guide.
Related Articles:
How To Enable Dark Mode On WhatsApp
7 IMO Video Call Recorder Apps For Android
How To Delete Whatsapp Video & Audio Call Logs
How to Cite PDF – Step by Step Guide
What Does :” Mean in Text – [Explained]
How to Play Fortnite on PS4 Ultimate Guide
How Much Does YouTube Pay? [Explained]
How to Add Music to a Video on iPhone
How to Remove Watermark in Video [3 Methods]
How To Change Minecraft Username?
Enable NetFlix Password Sharing (Step-by-Step)
WiFi Symbol: What Does it Mean?