How to Disable Skype on Startup Windows 11/10
If you have Skype in your Windows 10 then it may occur an issue where automatic start can happen. By logging into the account of using it can appear straight to the screen. Such a thing occurs as it can provide easy notifications when any of the people either texts or give a call.
When you will go for disabling Skype on the point of a startup, open it in the manual form for the first time when you start the computer. As when it gets open, it will be there as normal and the notifications on it will appear there till you will sign out or close it.
How to Stop the Startup of Skype in Windows 10?
Skype can be easily stopped from appearing of it on its own automatic form in Windows. The procedure of it depends on how you have installed the program.
Skype App on Windows 10
If you have installed Skype directly from the Microsoft Store, then as per the technical form, Skype cannot be disabled on the startup. Though we can do the logging out of the program for the closing of it and stopping of all of the notifications.
Here we have the explanation of the steps of it:-
Step 1
Firstly, do the selection of your profile image. You can easily find it on the upward side to the left corner.
Step 2
Now do the selection of Sign Out option.
Step 3
After that Exit from the window of Skype.
When you will leave the Skype as in the open forum and you are logged in there, then the main thing is that SkypeApp.exe is still in a run form in Task Manager. As while closing the app even without logging out, it will keep running there by which the notifications can be received.
When you will do the logging out of the Skype on your Windows 10, then such a process will close thereby which, no other notification of texts or calls will be received by you.
For the closing of the Skype in a complete form after the logging out of it, then go for the area of notification located on the taskbar of Windows. If you get the Skype available even after when you exit from there, then do the right click on the given icon and do the selection of the Close Skype.
Skype Program in Standard Form
If there is an installation of standard Skype in Windows 10 or in Windows 8 which has been performed from the website of Skype, then we can easily open it from the settings for disabling the feature of auto-start.
Follow the given steps for it:-
Step 1
Do the selection of the menu of three-dotted which is located next to the given name on the page of the main one in Skype app.

Step 2
Now select the option of Settings.

Step 3
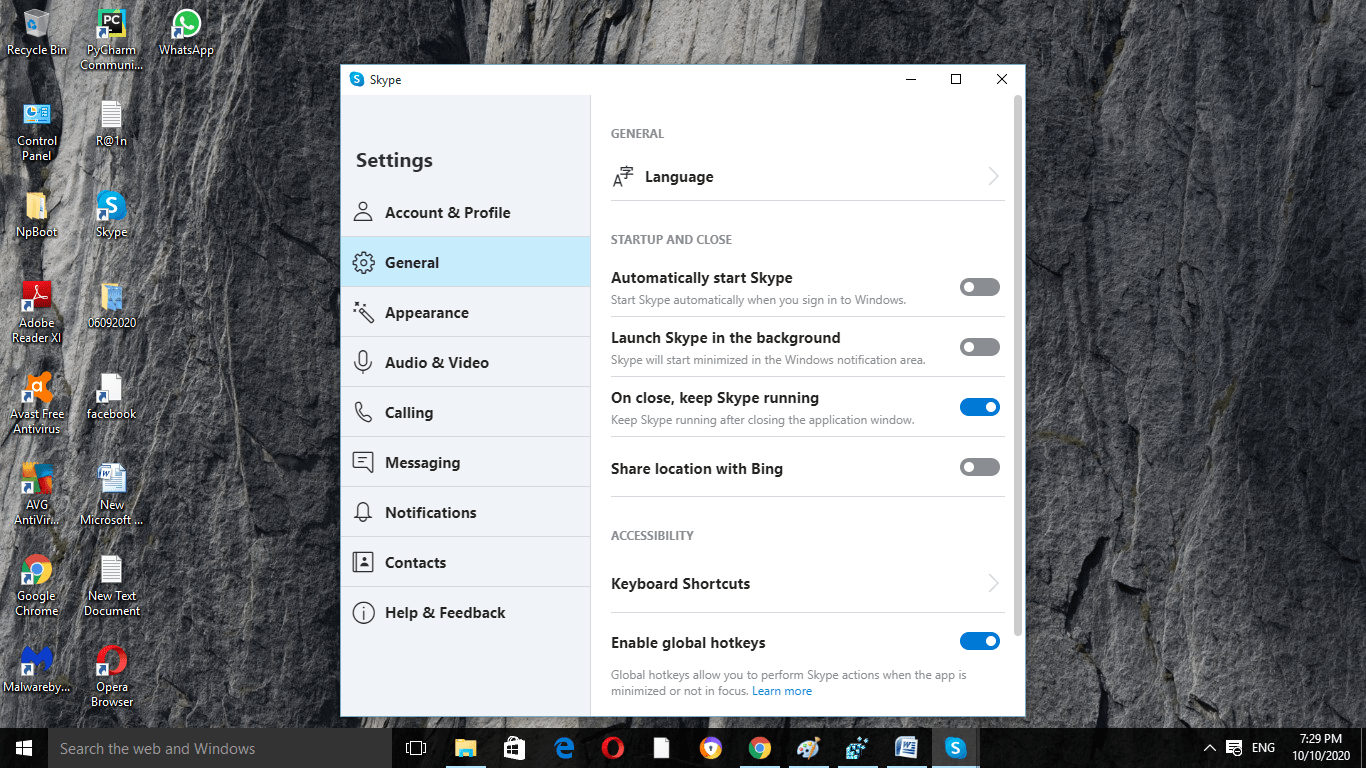
Open the General section.
Step 4
Swipe the Automatically start Skype to the position in off. The button will turn in the color of grey.
Step 5
Now exit the screen of settings.
Remove Skype Login in MacOS
We have various ways for the disabling of autorun of Skype on the device of Mac.
Method 1: Use the Dock
Follow the given steps for it:-
Step 1
Firstly, open the Dock and then do right-clicking on the icon of Skype.
Step 2
Now open the Options there.
Step 3
Do the selection of Open at Logon for removing the checkmark.
Method 2: Using System Preferences
Follow the given steps:-
Step 1
Firstly, open the System Preferences on your Mac.
Step 2
Now do the selection of Users & Groups.
Step 3
Click on your Username.
Step 4
Visit the tab of Logon Items.
Step 5
Click on Skype.
Step 6
Now select the button of minus or remove. It is located on the downward side of the given screen.
Prevention of the Classic Skype Application of one from its Start
For the window of classic Skype application, follow the given steps:-
Step 1
Firstly, do the navigation to the Tools. Now click on the Options.
Step 2
Do the Highlighting towards the section of General settings located on the upward side to the left.
Step 3
Now uncheck the Start Skype when I start Windows which is located on the right side.
Step 4
Now click on the Save button.
Uninstall the Classic Application of Skype
If the users need to remove the whole application, then the application of Skype Win32 will be shown in the option of Programs and Features in the located Control Panel. Do the highlighting of the entry of Skype in the given column of Name and then do the selection of the button of Uninstall located at the upward side.
Remove Skype form Windows 10
The situation can be there that Skype may have become an issue for the user. After every trial, it may still appear as a part of giving notification to the user and just uninstallation of it is only the answer you have found.
Here we have the steps for it:-
Step 1
Do the navigation towards the Start button. Now open Settings from it. Then click on the Apps option from it.
Step 2
Take a proper check that you have performed the selection of Apps & Features located on the upward side to the left. Do the scrolling down of the screen and do the left-clicking on Skype for the selection of Uninstall.
Step 3
Now do the selection of Advanced options and then click on the Terminate. Then click on the Uninstall button.
Other Solutions for Skype Startup
There can be various reasons for the auto startup of Skype. The main thing to remember is that it may occur due to a virus that is there in your Windows 10.
It is necessary to give proper updates to the device for better response to the apps. The newly installed devices can get easily trapped there by which issues of improper working of them may happen.
Summing Up
Here we discussed how you can clear out the issue of the automatic startup of Skype that occurs on your Windows 10. The methods understood here will give a great effect on removing the issues of Skype startup.
Related Articles:
How to Drop a Pin in Google Maps
How to Change Google Background
How Much Space Does Windows 10 Take Up? [Explained]
12 Ways To Fix If Computer Randomly Restarts
How To Password Protect File or Folder in Windows 10
10 Ways To Access Command Prompt in Windows 10
How to Open CRDownloaded File on Windows 10