How To Delete TrustedInstaller Files on Windows 10
Windows 10 was the most successful operating system of Microsoft recently the company announced Windows 10 was installed on more than 200 million devices.
According to my personal research, there are lots of errors in Windows 10 then users can’t fix them by themself. Microsoft developers also working to fix the error via new updates.
In this guide, I will tell you how you can delete files that are protected by a Trusted Installer, first of all, I will tell what is trusted installed and what is used for.
What is a TrustedInstaller?
Trusted Installer is a process of Windows Modules Installer in Windows 11, Windows 10. Windows 7 and Windows 8. Its main function is to install, remove, and modification of Windows.
You require permission from a trusted installer to install some new program or application on your computer machine.
How Do I Disable TrustedInstaller on Windows?
You can easily disable this Windows service but after that Windows, Updates may fail to install there is some other software that is a good replacement such as System File Checker.
Grant Permission For Files From TrustedInstaller
Follow the step-by-step guide to get permission to all files and folders from the trusted installer on Windows.
Step 1 :
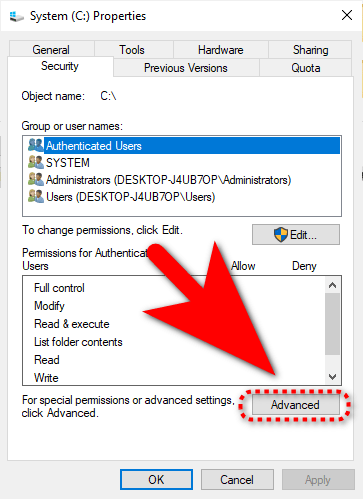
Go to the C: and select the folder Right-click Click on it and open its Properties.
Step 2 :
Go to the Security tab and click on Edit > Add >Advanced.

Step 3 :
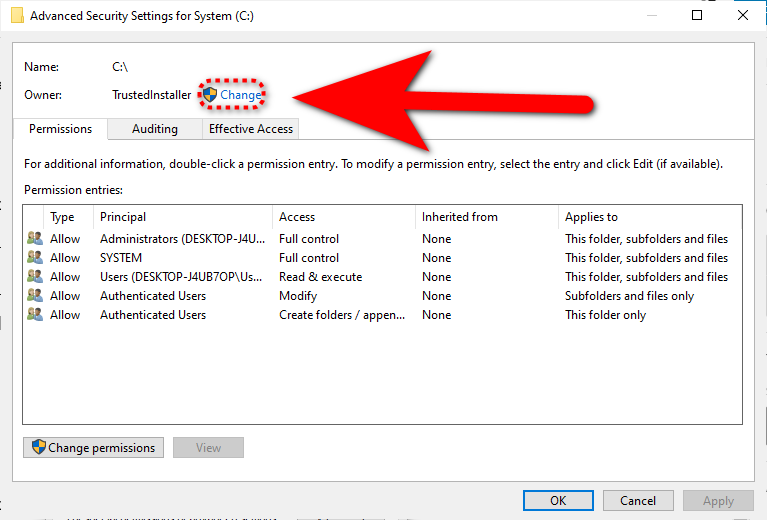
In Advanced settings. Click on the “Change” given just after TrustedInstaller as shown in the screenshot.

Step 4:
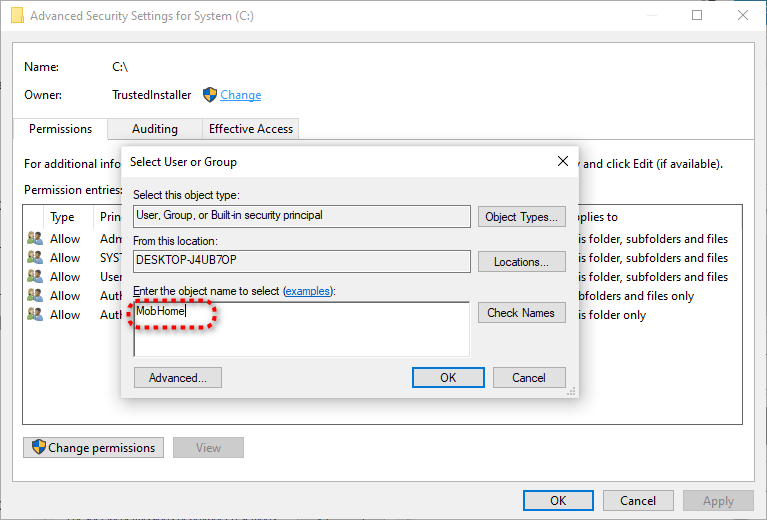
In the Select User or Group, Look for the Enter Object Name To Select box in it enter your PC username and hit OK button.

This is the end of how to delete TrustedInstaller on Windows for more similar guides you can refer to our Windows guides section.
How to Flush DNS Windows 10 | How to Fix 100 Disk Usage In Windows 11 | Ethernet doesn’t have a Valid IP Configuration | This app can’t run on your PC | Fix Windows 10 Won’t Sleep | How to Delete Win Log Files in Windows 10