
The most perfect thing in the VPN services is that it includes an app for Windows 10 which makes the connectivity an easy form.
We just have to click on the green button available on the screen which spells as connect. If you are accessing Windows 10 in the S mode and are not able to install any of the apps other than the store.
Then it means that you are in use of a VPN but without any client. Though still, we can do the configuration of VPN in a manual form.
It is necessary to understand that in the present era, as people have begun work from home, and now there is more requirement of VPN.
Things Required For The VPN Connection:
1.Updated VPN Service
Though if you are in use of Windows 10 for managing the connection of VPN, still the requirement of the selection of VPN service of better quality is there. The type of service you select will show who is running the shown servers in which you are connected.
It is a recommendation to go for the updates drivers of the VPN which will be long-lasting for the system. There are various options available which include cheap VPN, iPhone VPN, as well as Android VPN.
It doesn’t matter which server you are selecting but sees there if any red flags are there which may indicate a less than private service.
2. Latest Microsoft version
For the better response of the VPN, the Windows 10 should be in the updated form.
3. Choice of Protocol
At the time of setup, the selection of protocol will be asked to you. Easily, the protocol that you will select will tell the strength of the encryption.
There are various types of protocols that are in use by VPNs. The main common ones are OpenVPN, SSTP, L2TP/IPSec, and PPTP. While setting up, you have to tell Windows which protocol the VPN uses from the available list.
4. Select the Right VPN
There are various best VPNs available out there. The only thing which you need to focus on is that which one gives more benefit. The most famous one is the ExpressVPN.
It has rock-solid encryption along with various connection protocols. The Surfshark VPN has the best VPN option which will be great for the whole family. The CyberGhost VPN has rock-solid security and can be easily affordable.
Computing and Connecting VPN in Windows 10 / Windows 11
As when you have taken the subscription to a VPN service, it is necessary to understand that there are various options available that are out there. For that, the list of servers and their access is required which you have to connect.
The only thing which will make the difference is the type of VPN service you are in use. The need here is only that you should have the access to the webpage or to the section of the desktop app which shows the list of server locations. Need here is of address for the creation of manual connection along with the server’s current load.
The VPN provider will show the information of manual signs which will be used in the form of credentials for logging in. It will be available in the form of a username and password or can be a certificate that depends on the type of service you have taken.
How to Change VPN Connection on Windows 10 / Windows 11
As when you have collected the needed information for the connection, you can more now to the settings and can go further. We can change the VPN connection by simply adding a new one.
Follow the given steps for it:-
Step 1
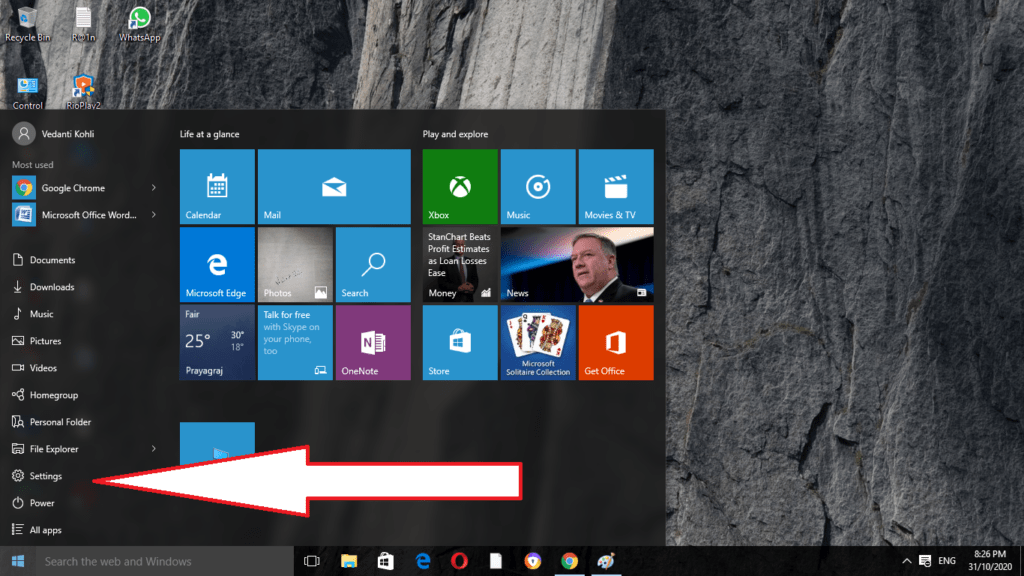
Firstly, do right-click on the Start button.
Step 2
Now click on the Settings option.
Step 3
Go to the section of Network & Internet.
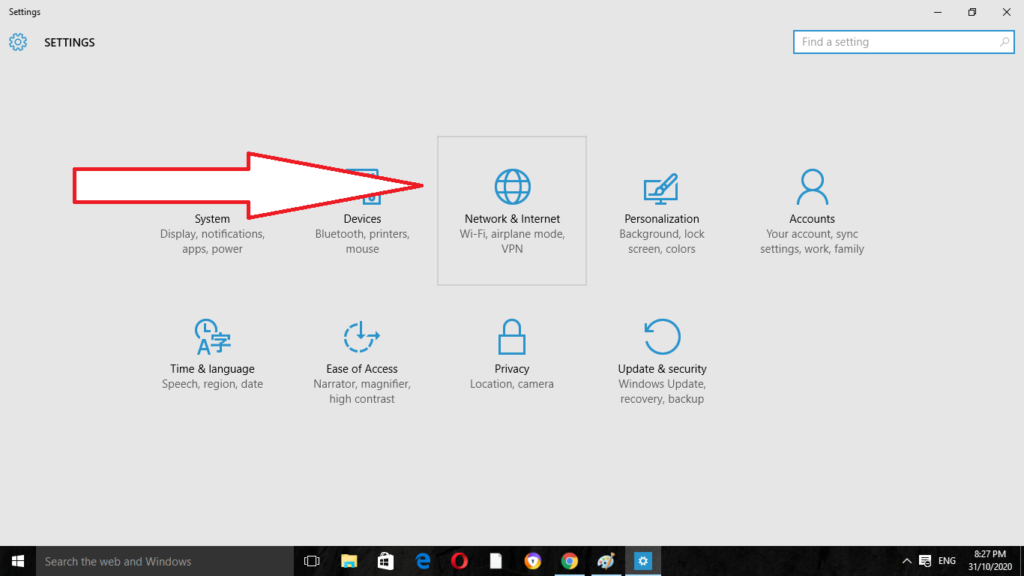
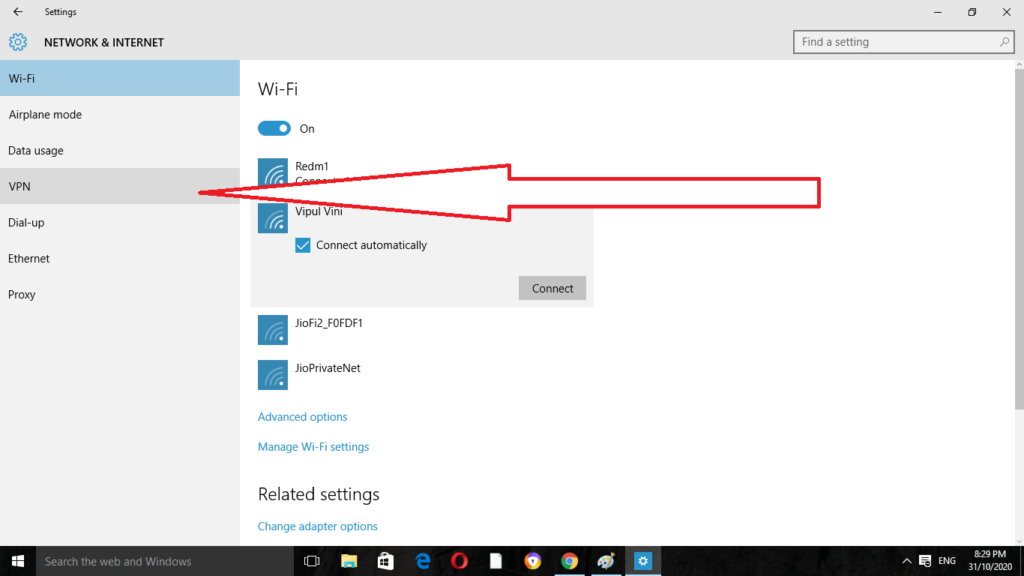
Step 4
Click on the VPN button.
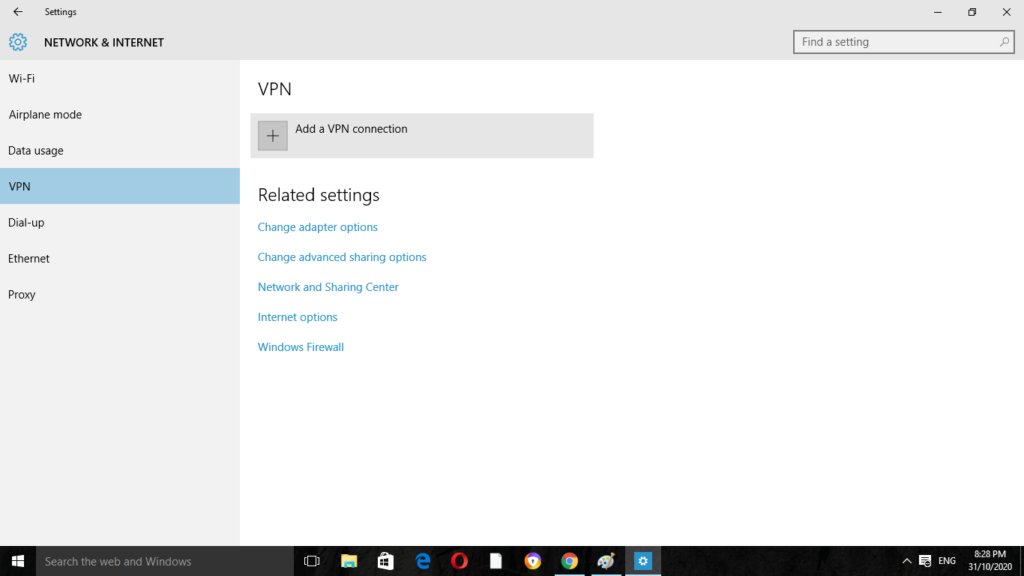
Step 5
After that, click on the ad for a VPN connection.
Step 6
Then click on the menu of dropdown which is under the VPN provider.
Step 7
Now click on the Windows (built-in).
Step 8
Then click on the field of Connection name.
Step 9
Type there a name for the connection of a VPN.
Step 10
Click on the field of Server name Or address.
Step 11
Now you have to type the Server’s address there. It is located in the VPN account of yours.
Step 12
Click here on the menu of dropdown which is under the VPN type.
Step 13
Do the selection of connection protocol.
Step 14
Now click on the menu of dropdown which is below the Type of sign-in info.
Step 15
Select the option of the sign-in method. It will change depending on the type of VPN provider you have. Click on the Save button.
Step 16
Tap the VPN which you have set up just now. It will now be shown in the list of VPN.
Step 17
Click on the Connect button. As per the sign-in method, you have to enter there the username as well as the password.
Disconnect VPN Connection on Windows 10 / Windows 11
If there is no further use of the VPN, or if you need to remove the server from the available list, you can simply disconnect or can remove it altogether.
A VPN button is there for changing on or off which is located on the Windows 10 in the action center. It is available as the small speech bubble which is at the downward side to the right corner of the display.
Here we have explained the whole process that includes full steps for removing VPN from the system.
Follow the given steps for it:-
Step 1
Firstly, do right-click on the Start button.
Step 2
Now click on the Settings option.
Step 3
Do the selection of Network & Internet.
Step 4
Click on the VPN button.
Step 5
Tap on the VPN connection which you need to remove or disconnect.
Step 6
Select the option of Disconnect.
Step 7
Then click on the Remove button.
Step 8
Do the selection of the Remove button again for confirmation.
FAQ: Frequently Asked Questions
These are some of the frequently asked questions related to the Change VPN Connection on Windows 10 with complete information.
How do I change my Windows VPN connection?
In order to change the Windows VPN Connection settings you need to follow these step. 1. Activate the Control Panel. 2.Select Network & Internet from the drop-down menu. 3.Select Network and Sharing Center from the drop-down menu. 4.From the left pane, select Change adapter settings. 5.Select Properties from the right-click menu for the VPN adapter.
How do I add a VPN connection in Windows 10?
On Windows 10, go to Settings > Network & Internet > VPN to connect to a VPN. To create a new VPN connection, click the “Add a VPN connection” option. Provide your VPN’s connection information. Under “Connection Name,” you can enter whatever name you like.
How do I restore my VPN connection?
In order to restore your VPN Connection on Windows PC you need to follow these steps. Disable the VPN connection on the device that is not connected to the cloud. Enable the VPN connection on the device off the cloud once the status of the VPN connection on the cloud changes to Not connected.
Change the VPN connection’s cloud remote gateway IP address to any other IP address.
How can I check my VPN connection status?
Simply check the status of your IPv4 address to see if your VPN is connected. It’s working if it matches the location of your VPN server. Visit WhatIsMyIP.network to find out the IP address of the VPN server you’re presently connected to.
Summing Up
Here we get to know how you can change the VPN connection on your Windows 10. Also, we get to know more about it and how you can disconnect it from the system.
Related Articles:
What is the VPN Service is And How to Use it
How to Restore Printer Connection on Windows 10
How to Call an Extension Number (Step by Step Guide)
How to Restore Printer Connection on Windows 10
How to Fix Modern Setup Host on Windows 10
How To Restart iPhone 7 (3 Working Methods)
How to Play Fortnite on PS4 Ultimate Guide
How to Create a Book in Minecraft Game
5 Best Apps For Android Devices