How to Fix Windows 10 Freezes Randomly
When you use your computer and suddenly its desktop freezes for several minutes or for more time period and to fix it you have to restart your computer and again start the applications and software you’re are using before freezing the computer.
So, here is the proper solution to fix the desktop freeze on your computer or laptop using a Windows task manager to reduce the number of an application running on your computer system.
How To Fix Windows 10 Keeps Freezing?
If you’re PC Freezes Randomly and you don’t know how to fix it then, this ultimate guide is totally for you. Here we have covered all the working troubleshooters that any Windows user can apply in order to get rid of the computer freeze issue permanently.
Cause of Computer Keeps Freezing
These are mainly caused when your laptop or computer freezes while running a program or game.
- Corrupted Windows File.
- Lower Hard Disk Storage Space.
- Windows Not Updated To Latest Version
- System Configuration (2GB or 4GB) of RAM
Unfreeze the Desktop Via Task Manager
Task Manager is basically used on a computer to manage all the applications, programs, services, and networking with the help of Task Manager you can easily control all the applications run on your machine and you can also send them right away using a command.
For this, the process you have to open a task manager on your computer there are two ways to open Task Manager and I am going to tell you the simplest one. Press (Ctrl+Alt+Delete) to open Task Manager.
Follow the below-given step-by-step instructions in order to access the task manager.
1. Press the CTRL+SHIFT+ESC and ALT+CTRL+DELETE to access the Task Manager.
2. Once the Task Manager is accessible you need to switch to the Processes tab.
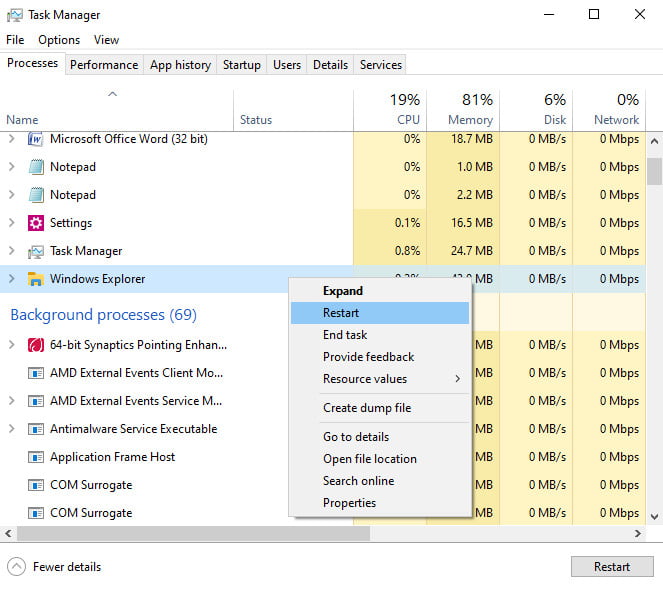
3. Now, you need to Right-click on Windows Explorer from the list of running programs and processes.
4. Simply, choose the “End Task” from the available option.
Clear Temporary Files on Windows
There are multiple ways to get rid of the computer frozen issue on a Windows PC or laptop If you’re computer randomly freezes then in order to fix it you need to clear Windows temp files. Here is the step-by-step processes you need to follow in order to clear the Windows temp files.
- Press the Windows + R buttons together in order to Run the Dailogue box.
Type the following command line in the RUN dialogue box and hit the enter button.
Temp
The Temporary Folder will be pop-up on your computer screen.
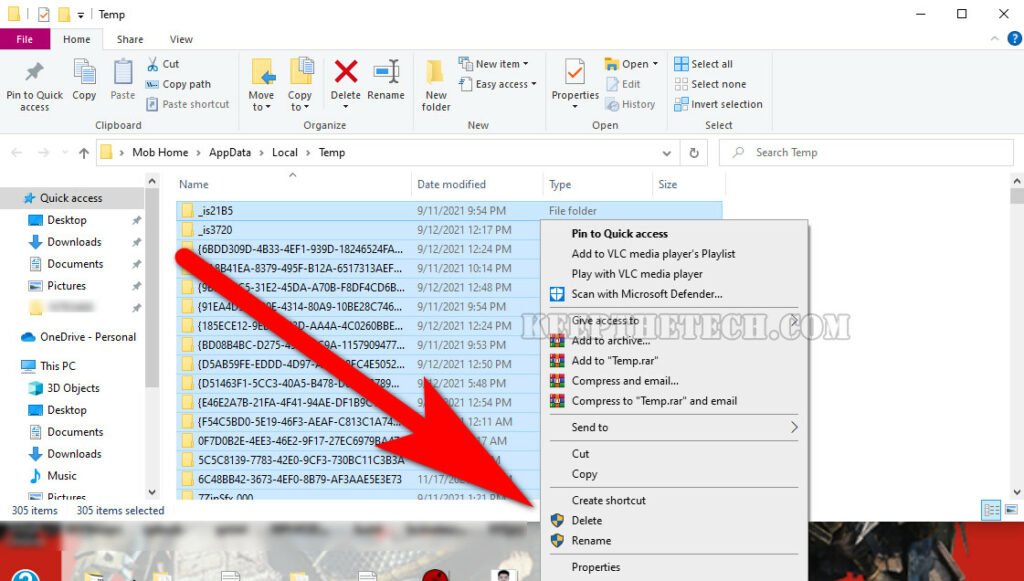
Now, press the CTRL+A to select all files into the Temp Folder and press the DELETE button in order to delete all the temp files and folders present within the folder.
Make Adjustment to your PC or Laptop Virtual Memory
Virtual Memory is an extension or the backup of your PC’s physical memory. Technically it’s a combination of the RAM along with a portion of your hard drive. So if your PC runs our memory while performing a high-end task or running software. In this case, Windows will take the help of the virtual memory for temporary files.
Follow the below given in order to the Advanced System Settings.
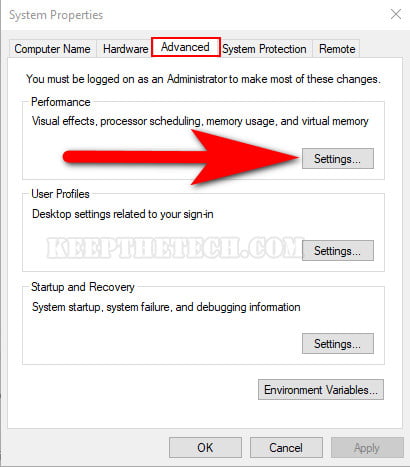
Press the Windows + Pause/Break buttons together in order to open the Advanced System Settings. Else type “Advanced System Settings” on the search bar given next to the Start Menu.
Switch to the Advanced tab and simply select the “Settings” given under the performance section.
In the Performance Options, Go to the Advanced tab, and select the “Change” option.
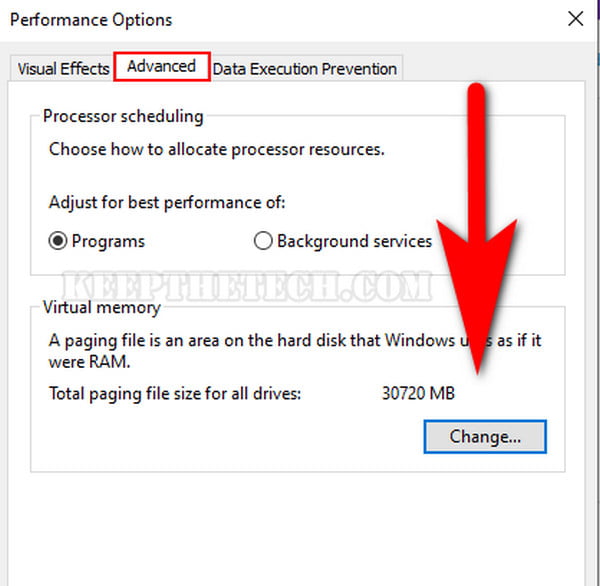
Now, remove the checkbox on “Automatically manage paging file size for all devices”.
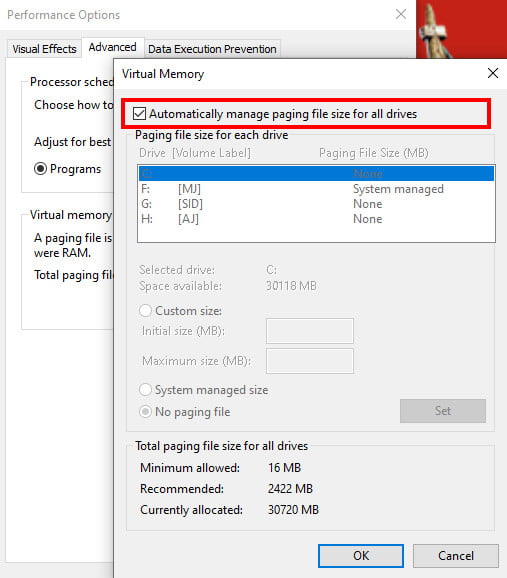
Choose the “C” drive or the drive on which you’ve installed the Windows. After that enter the Initial Size and Maximum Size of your PC virtual memory.
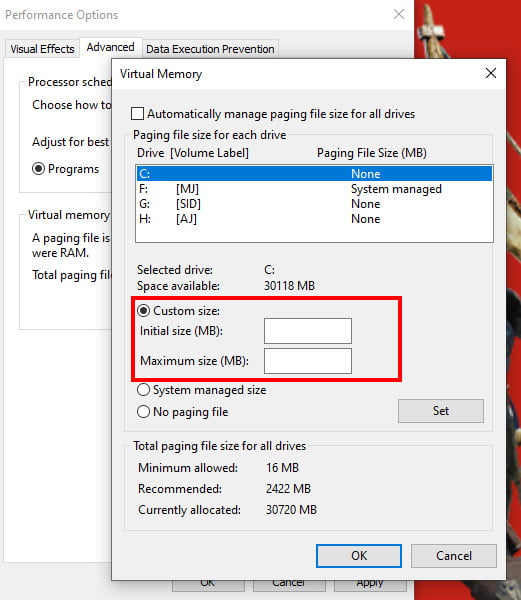
Initial Size:
Maximum Size:
After filling in the Initial and Maximum size of your Windows Virtual Memory simply choose the SET and then hit the “OK” button.
Run the System File Checker on the Computer
Windows comes with a System File Checker in order to scan all the corrupted files and automatically repair or replace them using one command line.
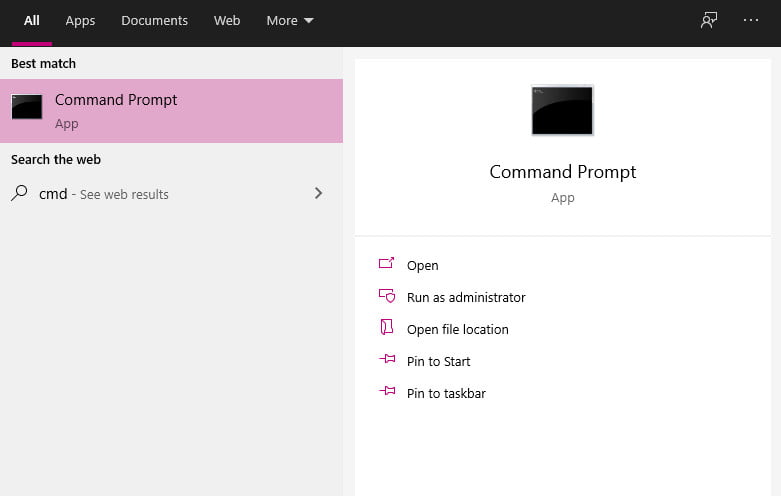
Type the CMD on the search bar given next to the Start Menu. You need to open Command Prompt by “Run as the Administrator.”
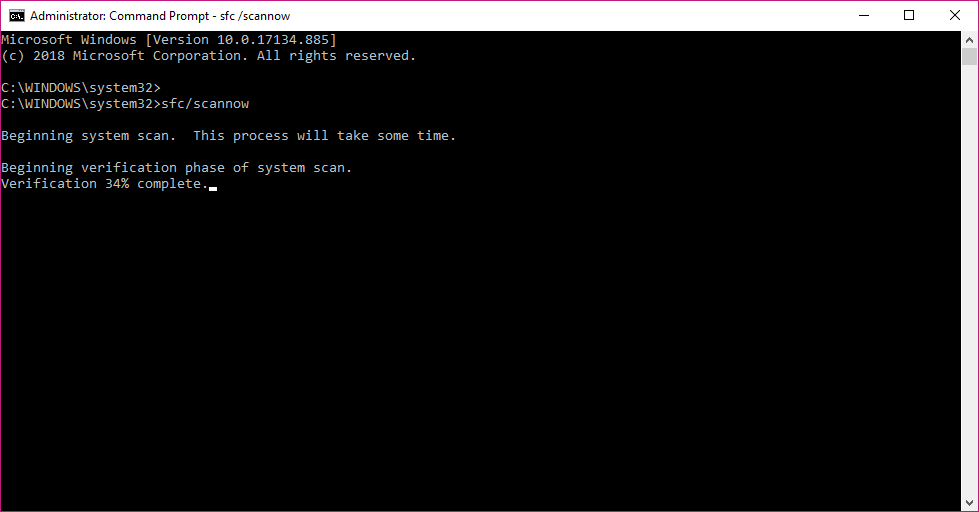
Once the Command Prompt opens, Simply enter the following command line and hit the enter button.
sfc/scannow
This will run a system scan and automatically scan the corrupted files into your computer system and replace them within a few minutes.
Now type “chkdsk /r ” in the command prompt and hit the enter button.

Most of the time the computer randomly freezes can also occur due to the corrupted files and you can easily fix it using the system file checker.
Perform a Memory Check on your Windows PC
Computer freeze issues can also be caused by a corrupted memory card. So before changing your computer, you must check the memory card status using the Windows built-in tool that allows Windows users to check the current status of the Windows Memory Card within a few seconds without having a hassle.
Here are the steps you need to follow in order to check the memory card status on Windows 11, Windows 10, Windows 8, and the later versions.
Press the Windows+ R keys together to open the Run Dialog box.
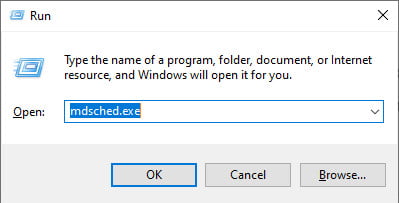
Type the following command and hit the enter button. In order to open the Windows Memory Diagnostic.
mdsched.exe
In case you want to check the memory issues using the memory diagnostic. Then simply choose “Restart now and Check for problems (recommended)” and if you don’t have to perform the memory check then choose “Check for problems next time when I start my computer”.

The Windows will restart and the Windows Memory Check will be started if you don’t see any error in the process then your Windows Memory is totally fine.
However, if you notice an error during the checking process then you need to change the Windows Memory of your PC or laptop in order to fix the computer’s randomly freezing issues in no time.
Disable Startup Programs on Windows
Turning off Startup Programs can give a boost to your computer performance and also help in resolving the PC freezes. Basically, When your computer or laptop bootup its startup some of the programs in Windows.
Most of the Startup Programs are not important and you can easily turn off the startup program without in a minute. Here are the steps you need to follow in order to disable the startup program on windows 11, Windows 10, Windows 8, and later versions.
Press the Windows + R keys together to open the Run dialogue box.
Now simply type “msconig.exe” into the search bar on the Run box and hit the enter button.
This will open the System Configuration window, Go to the Startup tab.
Uncheck the programs that want to disable as a startup.
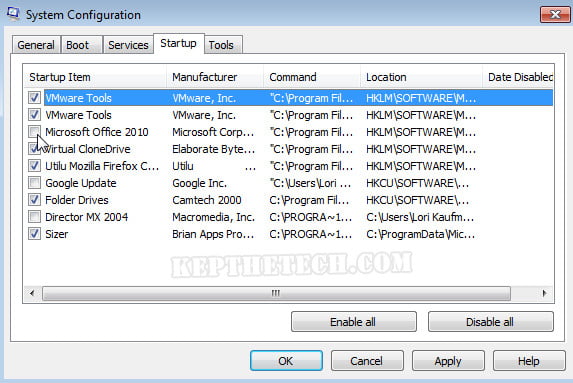
Once done, simply click on Apply and then OK to save changes.
Restart the system in order to apply the changes successfully.
Run the C: Drive Check Using This PC
The Windows 10 Freezes due to some malware file or the Windows Files that got corrupted. Windows users can run the Disk Check in order to check the entire drive for the corrupted file.
Follow these steps in order to perform C Drive Check.
1. Go to My Computer or This PC from the Desktop Icon.
2. Right-click on the C Drive to open the menu options list.
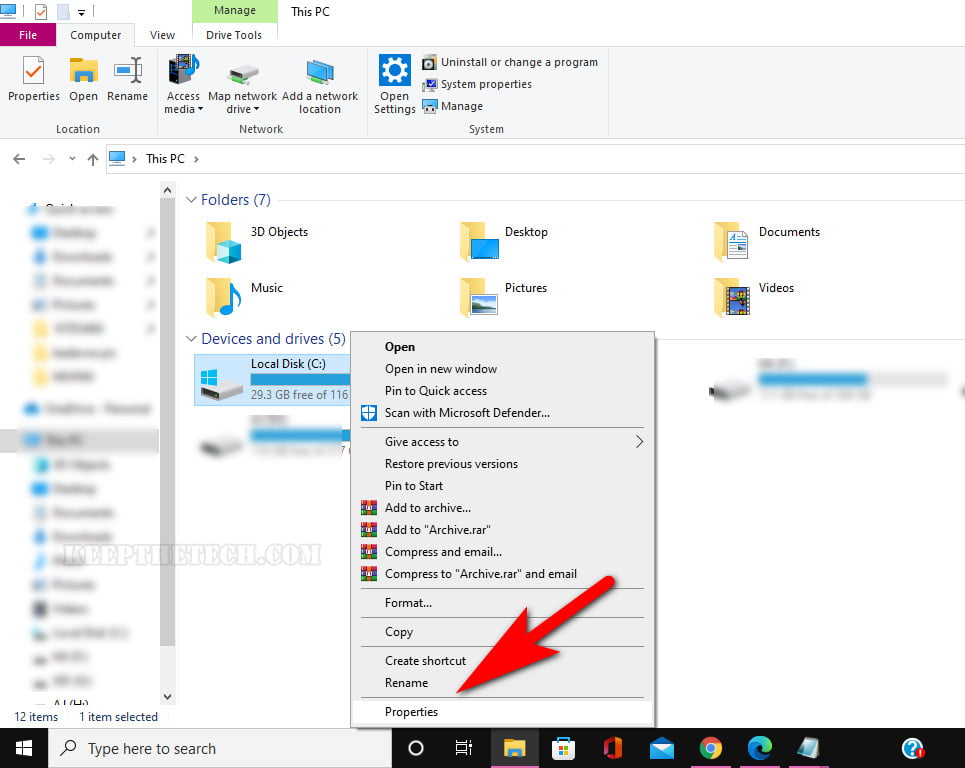
3. From the Menu Options, Select the Properties.
4. Go to the Tools tab > error checking > Check.
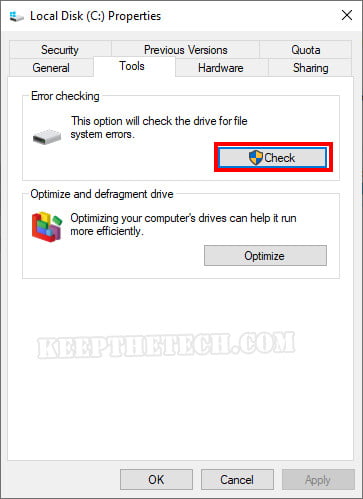
If there is no single issue present on your Hard disk drive then you will see this message “Windows Successfully Scanned the drive. No Errors were found.”
Turn off C-States in Windows BIOS
The C-States stands for the CPU States and its use on the computer or laptop as the power saving options. Its runs when your laptop battery is low and it your computer or laptop is soon going to shut down. But the CPU states will shut down the system voltages, multipliers, and other programs that consume power and increase the battery life.
Most of the time, C-States turn down the running or important Windows files that cause your computer keeps freeze again and again. The Windows user can easily fix this by simply disabling the C-States from the Windows BIOS
Disabling the C-states will turn off the power saving mode on your Windows PC make your computer more stable and reduce the unwanted issues related to the frozen computer or laptop.
These are the steps you need to follow in order to disable the C-States from Windows BIOS.
Restart your PC or Laptop and once you see the Windows logo, Start pressing the F12 or F8 button continuously in order to access BIOS.
1. Once you enter into BIOS Setup. You need to navigate to the following path.
2. Go to the Advanced Tab and then select the CPU Configuration option.
3. In the CPU Configuration panel. You need to check the C1E Function and Intel(R) C-STATE tech and make sure both will be disabled. You can use the keyboard’s up and down buttons to navigate through the options.
4. After making changes, simply save and exit the BIOS Settings.
Update Windows To the Latest Verison
Most of the time your computer starts freezing due to outdated Windows files and you can easily fix it by simply updating the Windows to the latest version. Here are the step-by-step instructions to update Windows to the latest version to fix all temporary issues in no time.
Press the Windows + I keys together to open Windows Settings.
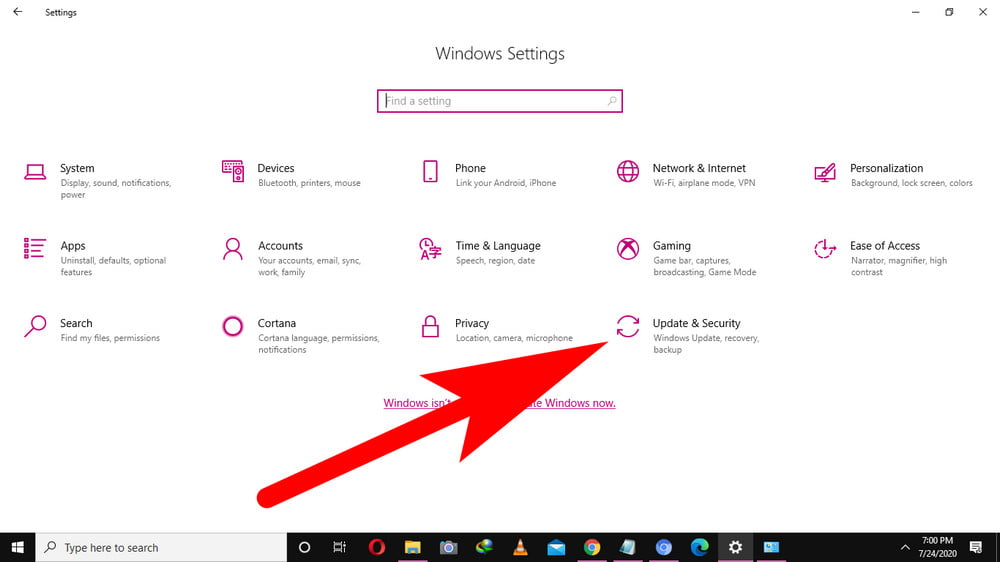
Now, open the Update & Security section, and from the left side panel choose Windows Update.
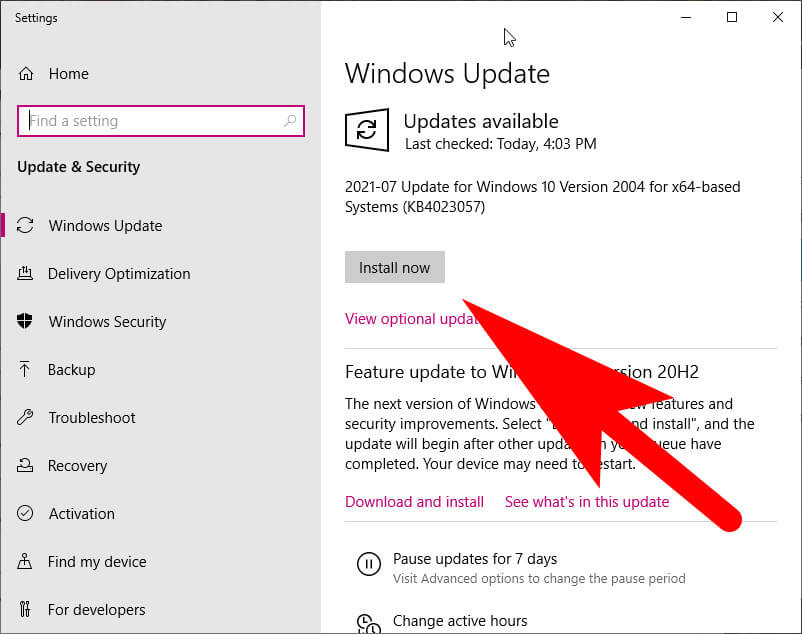
Select the Check for Update or “Install now” button in order to update Windows.
After updating the Windows to the latest version restart your computer system and check if the system and check your computer keeps freezing or the issue is resolved now. In case if you’re PC freezes randomly again then move to the next troubleshooting.
Upgrade RAM To Boost System Performance
Mostly the system lagging or computer frozen issue is caused due to the RAM. If your PC or laptop has 2GB or 4GB of RAM then you need to upgrade it to 8GB to get a better experience and performance.
Simply read this article if you don’t know how to check RAM on Laptop on Windows 11, Windows 10, or a later version.
If you’re running multiple programs at once on your computer system at 2GB or 4GB RAM. Then most likely your system froze due to the background processes that run on your Windows system. You can easily use free software to run the CPU Stress Test in order to check the GPU and RAM performance on your PC when you’re running high-end programs or games.
We recommend you upgrade your computer system to at least 8GB or 12 GB RAM to get enhanced performance.
This is the end of this guide, hopefully, you find this article helpful.
Related Articles:
Windows 10 Start Button Not Working | Windows Stuck at “Getting Windows Ready” Screen on Windows 10 | Windows 10 Won’t Shut Down | Difference Between PowerShell vs CMD | Ways to Check if Port is Open on Windows 10 | Your Location Is Currently In Use | How to Open CRDownloaded File on Windows 10 | How To Install Bluetooth Driver on Windows 10