How To Stop Windows Update from Installing
Here is the step-by-step guide on how to stop Windows 11 updates from installing without having a hassle.
Windows 11 and Windows 10 has replaced the Windows 7 and Windows 8 version and now every Windows user wants to switch to Windows 10 from the old version to the newest version. Moreover, recently Microsoft also introduced Windows 11 which comes with more new and advanced features.
Well, Windows 7 and Windows 8 the newly introduced Windows 10 get regular updates and fix all the temporary bugs but most of the time you don’t have not enough internet data for the update, and most of them when you enable Windows 10 Update feature. Then most of the time it will install the files that your computer already has and does it occupy the space.
Recently, most Windows users, claim the Windows 10 Update without any authorization from the Windows users. So most of you want to stop the Windows Update feature from installing again and again.
Stop Windows Update on Windows 10 and Windows 11
Here in this guide, we are going to show step-by-step instructions to disable the Windows update feature in Windows 10 without having a hassle.
There are some methods that you can easily apply in order to stop the Windows 10 Update.
Disable Automatic Windows Update Feature
Yes, you can easily able to pause or disable the automatic Windows update feature on your Windows 10 PC to stop the download of the Windows 10 update. Here are the steps that you need to follow in order to disable the automatic Windows update.
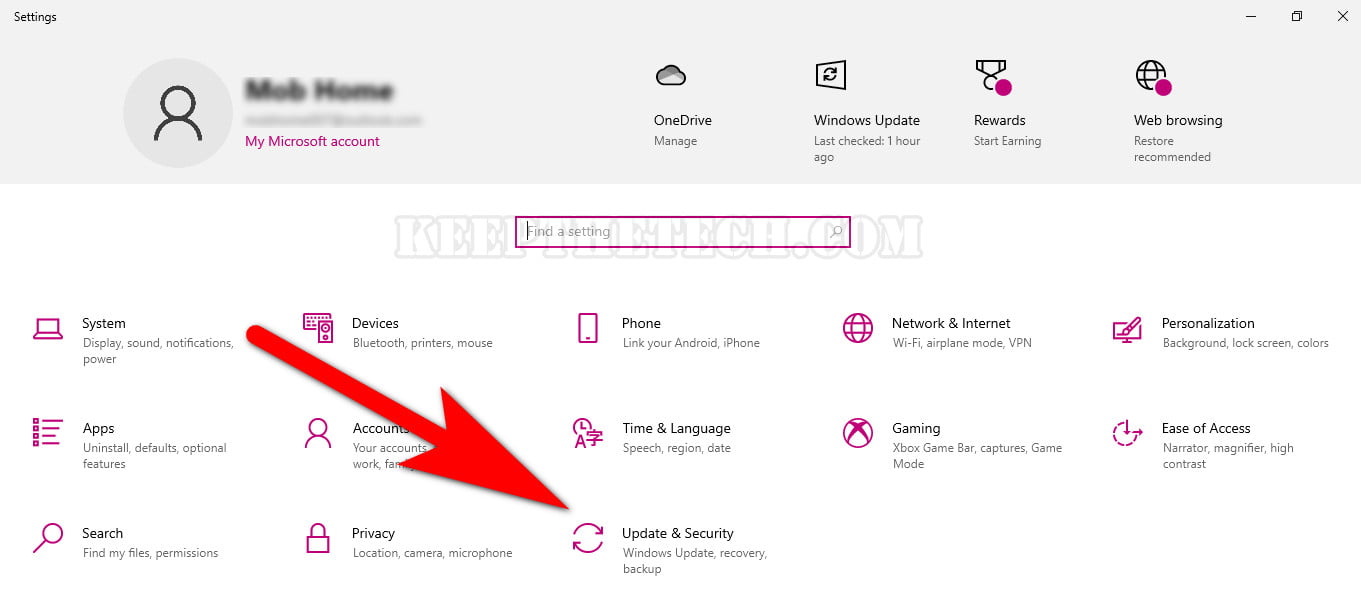
Press the “Windows + I” keys to open the Settings.
Now, navigate to the Update & Security icon.
After that simply click on the Windows Update option given at the left sidebar.
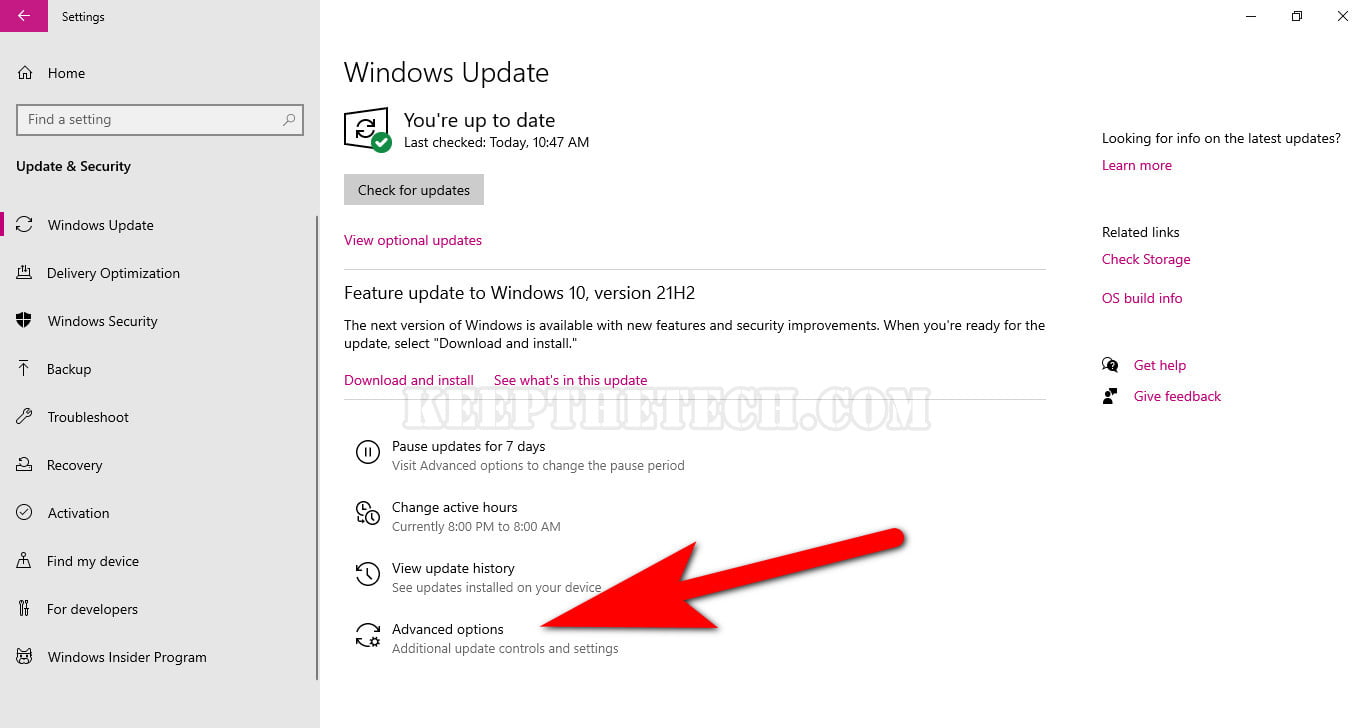
Simply click the “Advanced Options” and toggle the “Pause Update” option to “On” to disable the automatic update.
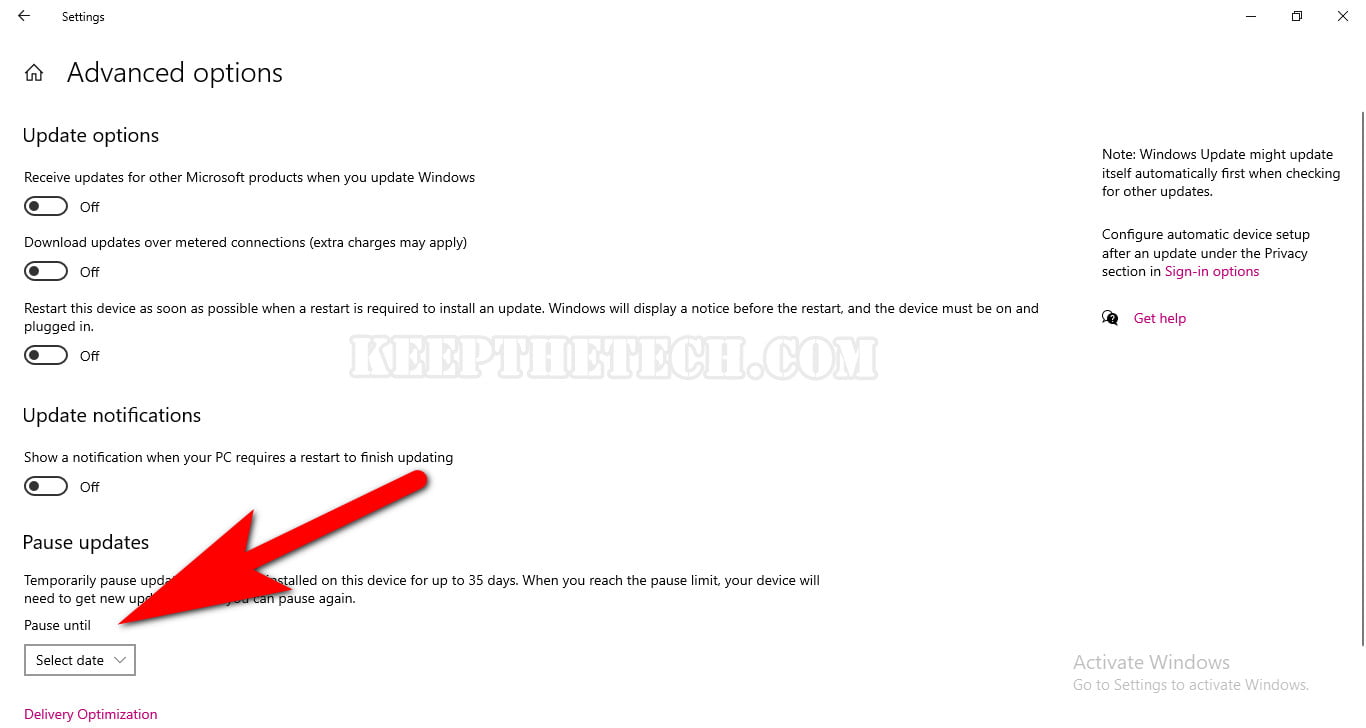
Note: This will pause the automatic Windows 10 update for a 35 days period of time and after you need to download the Windows 10 update into your PC.
You can also choose to delay feature updates for up to 365 days and quality updates for up to 30 days (which contain crucial security fixes). After these times have passed, you’ll need to obtain updates before deferring them again.
Disable Windows Update Via Group Policy
Well, you can also stop Windows 10 Update using the Windows Group Policy. In this method, you need to make changes to the automatic Windows update file that easily be accessed in the Group Policy. Here are the steps you need to take in order to disable the Windows 10 Update.
Go to the Start Menu and type “gpedit.msc” in the search bar and open it.
Once the Group Policy window is launched you need to navigate to the following path.
Computer Configuration > Administrative Templates > Windows Components > Windows Update.
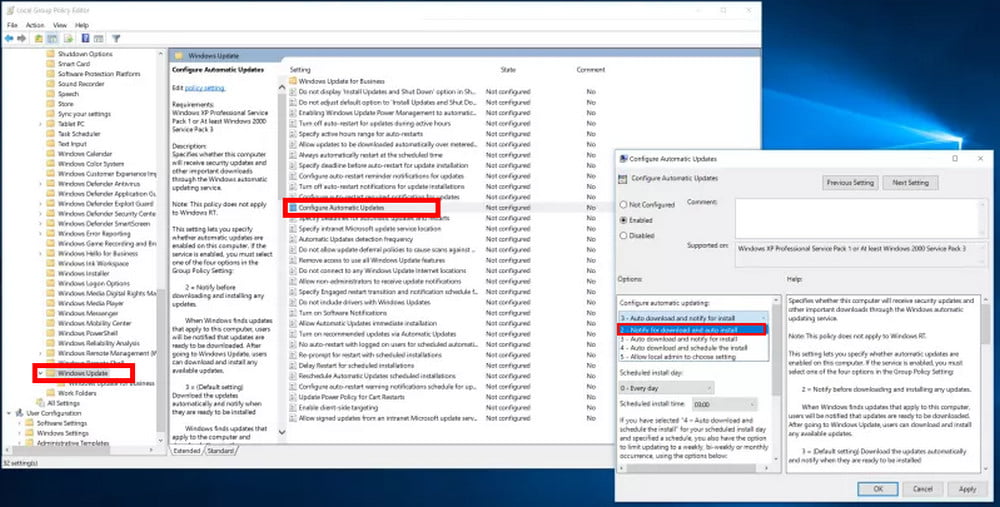
Now, select the Configure Automatic Update and right-click on it.
The new window tab will be opened on it you need to select “Disabled” > “Apply” > “OK”.
These steps will prevent Windows 10 from downloading and installing the automatic updates into your Windows 10 PC and the plus point is you can still check the Windows 10 Update manually from the Settings in case you want to update your system to the latest update.
Limited Your Internet Connection To Stop Windows Update
As we all know the Windows 10 Update takes lots of internet data and in case you have a limited amount of internet data and want to stop the Windows update temporarily or permanently. For this, you can easily monitor your internet connection.
Basically, doing so will tell the system that you have a limited amount of internet and as a result, the Windows 10 Update will automatically stop (but you can still download the update manually if you want ). Moreover, This works until you don’t use the Ethernet connection. Here are the steps you need to follow in order to limit the internet connection on Windows 10.
Press the Windows + I keys together to open the Settings window.
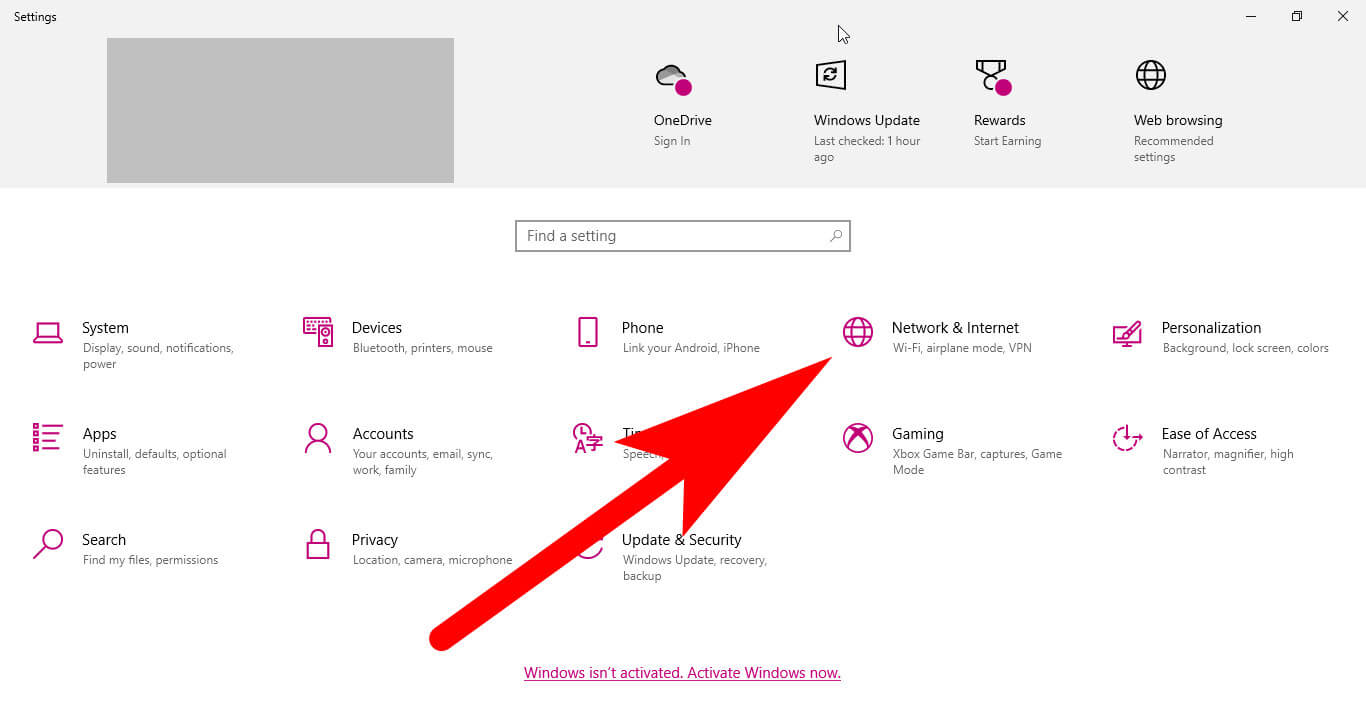
Now, Navigate to the “Network &Internet “ from the given options.
After that, you need to select “WiFi” from the left sidebar and select the current WiFi Connection.
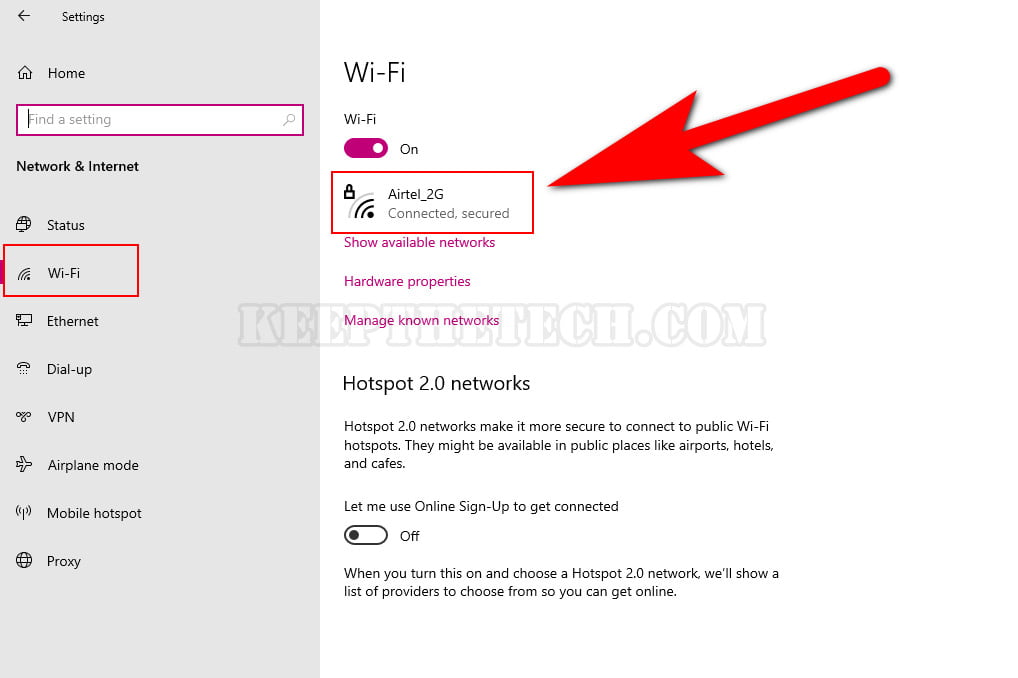
Select the current internet connection and Scroll down to the “Metered connection”.

Simply, toggle the ‘Set as metered connection’ option switch to “On”.
Disable Windows Update Via Registry
The Windows 10 user can also disable the Windows Update using the Registry. But before making changes to the Registry make sure you’ll generate a backup of anything that is important because the mistake can easily cause a problem.
Follow the below given step-by-step instructions in order to disable the Windows update with Registry.
Go to the Search Bar type “Regedit” and hit the enter button.
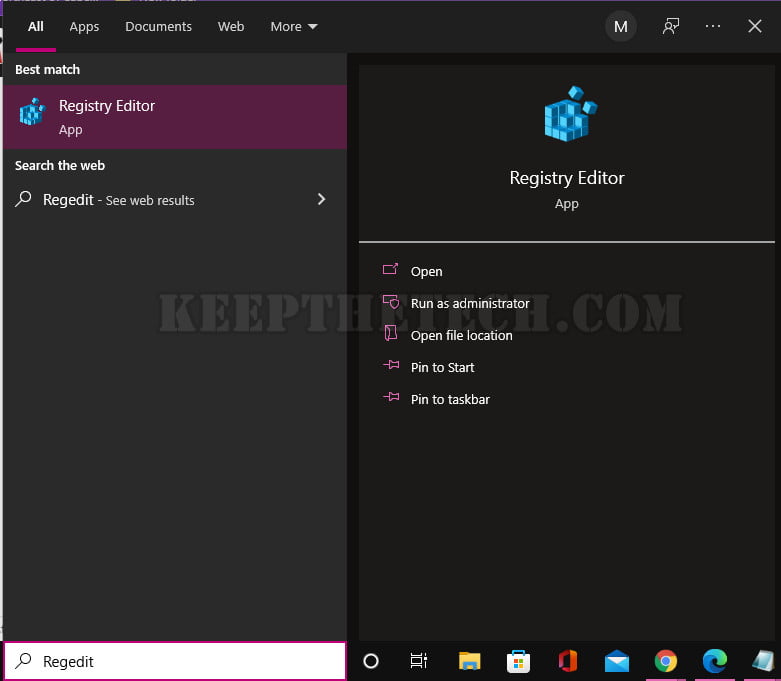
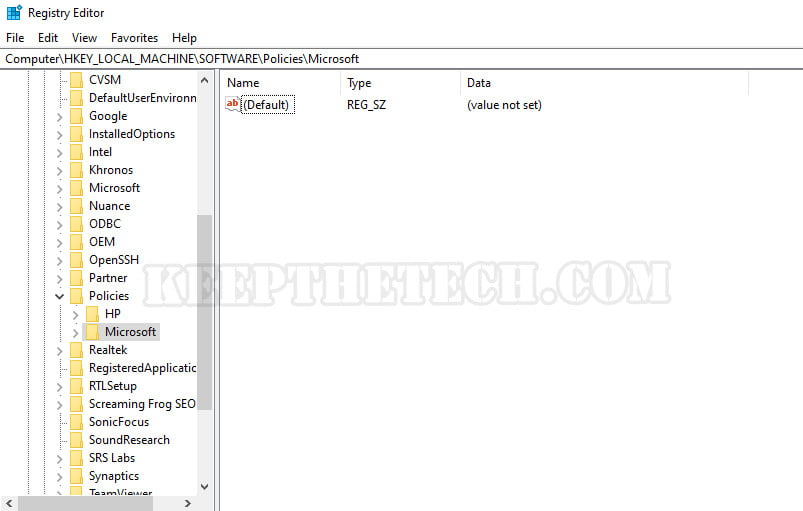
Once the Registry window is opened. You need to navigate to the following tab.
‘HKEY_LOCAL_MACHINE > SOFTWARE > Policies > Microsoft > Windows’.
Simply, right-click on the Windows Folder and click “New” > “Key” then name the file “Windows update” and then hit the Enter button.
Right-click here and select ‘New > Key,’ then give this entry the name AU and hit the ‘Enter’ button. Right-click on the right-hand side of this entry and select ‘New > DWORD (32-bit) Value)’. Press ‘Enter’ after naming this entry “NoAutoUpdate”.
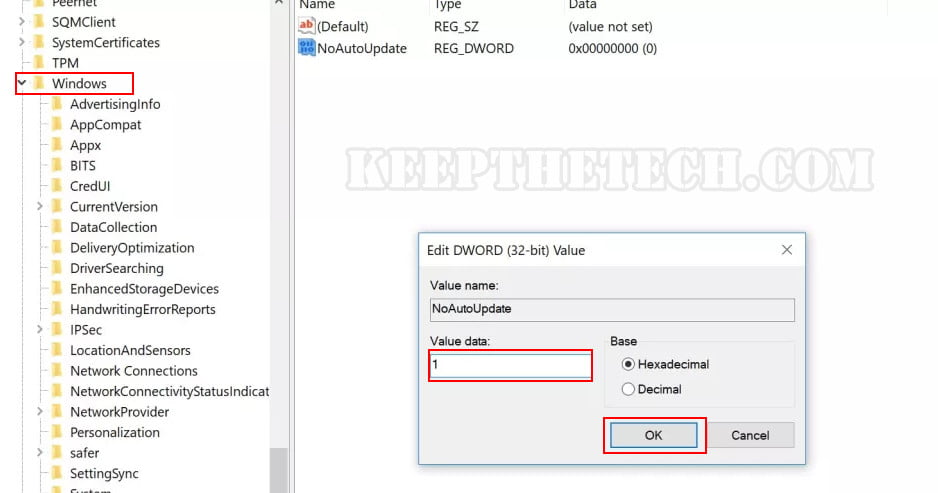
When you’ve created the file. Simply change the entry from 0 to 1 in the value section and hit the “Ok” button.
Prevent Download Windows Update From Installing
If Windows has started downloading the Windows update then we recommend you try not to stop it because the Windows Stuck on Update while downloading the update can be dangerous for your Windows system. So if your computer has downloaded the Windows Update but not installed it until now. In this case, you can also stop the Windows update from installing.
Here are the steps you need to follow in order to stop the Windows update installation or Schedule Windows 10 updates without having a hassle.
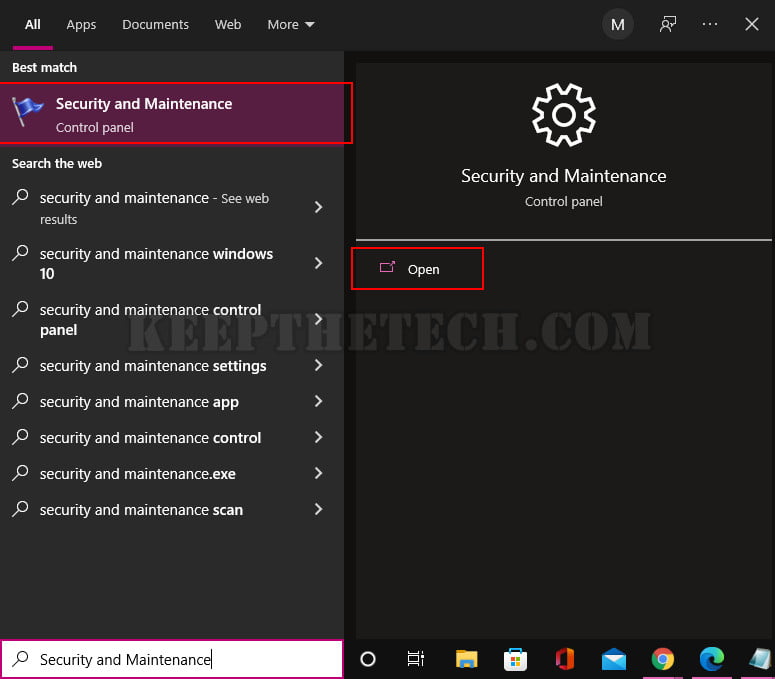
Go to the Search Bar and type “Security and Maintenance”, and you need to select the first result that shows up to access the control panel window.
After that simply select “Maintenance” and you need to expand it.
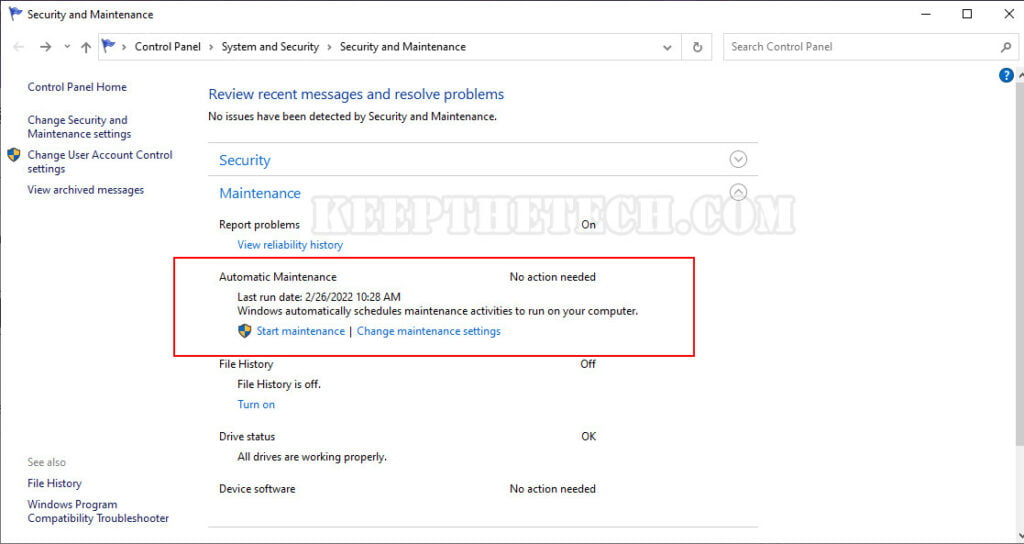
After that, you need to scroll down to the “Automatic Maintenance” section and select “Stop Maintenance” to stop the installation.
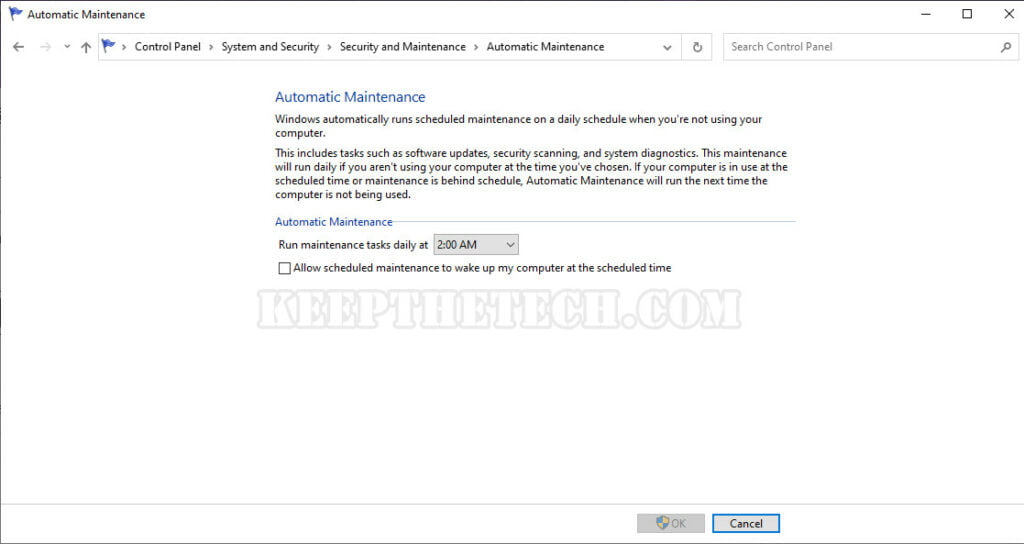
Moreover, if you’ve changed your mind or there is an important update then you can also simply choose the “Start Maintenance” option to start the update whenever you want.
Limited Number of Updates Via Group Policy
In the above method, we have shown you how to disable the Windows Update using the Group Policy. But more importantly, you can also limit the Windows update without having a hassle. Here are the steps you need to take in order to limit the updates via group policy.
- Go to the search bar type “gpedit.msc” and hit the Enter button.
- Once the Group Policy window is access you need to navigate to the following path.
- Computer Configuration > Administrative Templates > Windows Components > Windows Update.
- Simply double tap on “Configure Automatic Updates” and in the above method we recommend you to select “Disabled” here you need to select “Enabled” Simple is that.
Click the top drop-down box in the ‘Options’ box on the left-hand side and select one of the four options:
- Notify for download and auto install
- Auto download and notify for install
- Auto download and schedule the install
- Allow local admin to choose Setting
The option ‘Notify for download and auto install’ comes closest to turning off automatic downloads.
Turn off Windows Update Startup Service
The Windows user can also turn off the Windows Update Startup Service without having a hassle. Most Windows users prefer to use this method to stop Windows 11 updates. Basically in this method, you’ll disable the Windows Update Startup Service that allows the Windows 10 Update to run.
Here are the steps you need to follow in order to disable the Windows Update Startup Service.
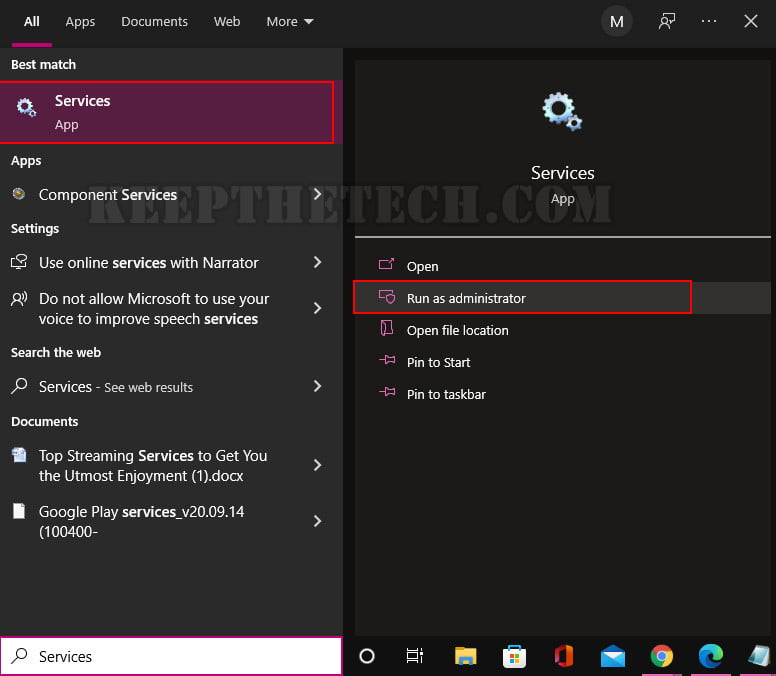
- Go to the Search Bar and type “Services” and you need to launch it as “Run as administrator” using the right click.
You need to navigate to the Windows Update entry. Now you need to check if the status shows “Running” then you need to right-click the Windows Update entry and simply select the ‘Stop’ option.

After that, you need to right-click on the Windows Update entry again and simply select the ‘Properties.’
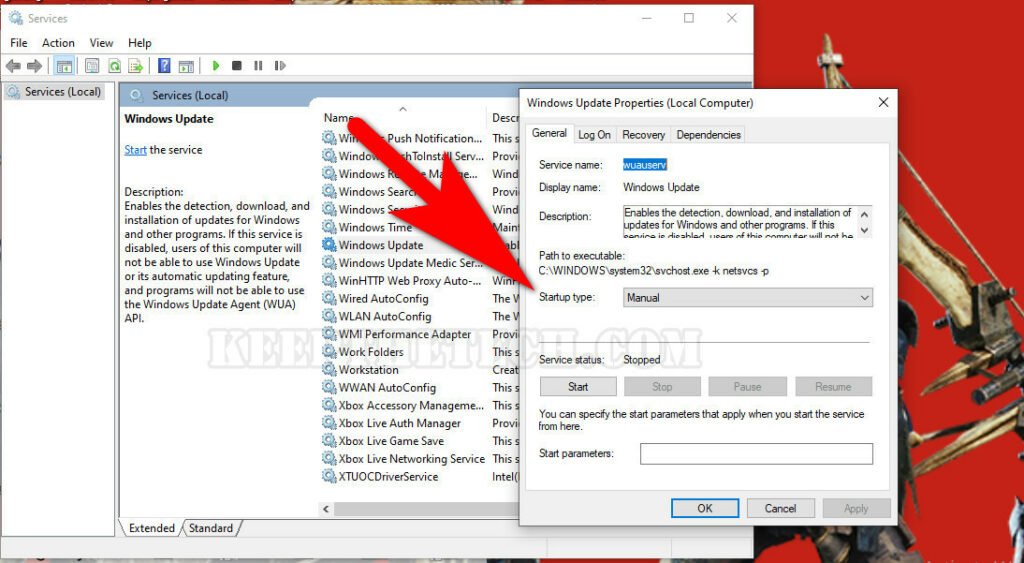
Now under the menu option, you’ll see the ‘Startup Type’ select the “Disabled” and ‘OK‘.
This will stop windows to update the latest updates automatically into your computer. But the fun part is you can still download the updates manually from the settings in case you wanted to install them in the future.
This is the end of this short guide, hopefully, you find this article helpful.
Related Articles:
How to Update Windows 10 Assistant
How To Stop Driver Update In Windows 10