
Searching for how to add watermark in photos? or how to watermark a photo? We have steps for it here on this page.
Watermarks are a great issue in the photos which disturbs the whole picture. It prevents everyone from the effects that it has on a photo. There is the best option of PowerPoint available there for removing the watermarks in the photos.
How to WaterMark a Photo
Here are the steps explained for removing the watermarks in the photos.
Procedure: By the use of PowerPoint
Step 1
Firstly, open the PowerPoint on your PC. Open it from the start button where you will find the Microsoft Office. If you are using the Mac device, then it is on the Launchpad and in the folder of applications.
Step 2
Now click on the blank presentation option. It is available on the upward side to the left of the home page of PowerPoint. It will open a new presentation on your screen. If you are using a Mac, then you don’t need to follow this.
Step 3
After it opens, do the deleting of anything on the given slide there. For creating the watermark, you must have a blank slide on your screen. Press the keys of Control+ A (Ctrl+A) of you are using a PC. If there is Mac then press Command + A. It will do the selection of the boxes in the slide. After that, click on the Delete key.
Step 4
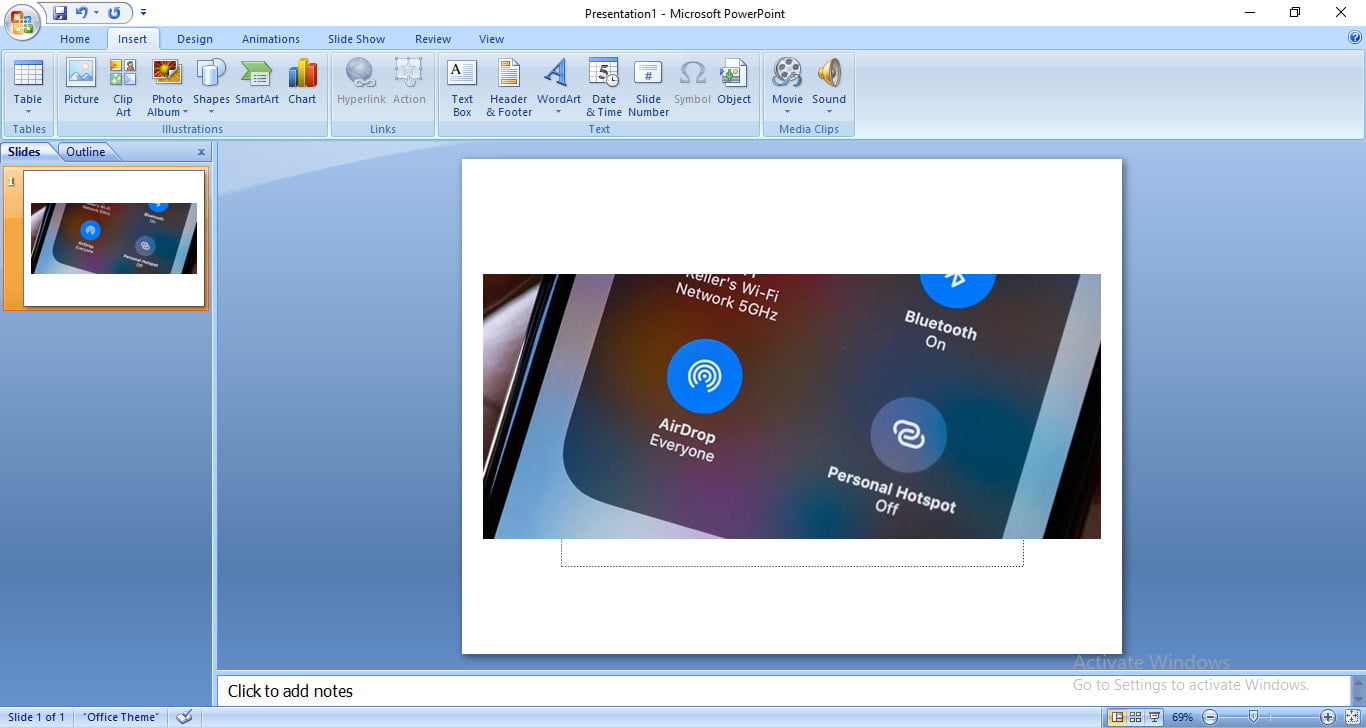
Now click on the Insert option. It is available on the upward side of the window of PowerPoint. The screen will now show a toolbar under the tab there.

Step 5
After that, click on the pictures option. It is located in the section of images of the given toolbar. If you are on Mac when you will click on the pictures, select the pictures from the file option in it.
Step 6
Do the selection of a photo and click on the insert option. It will place the image on the slide there.
Step 7
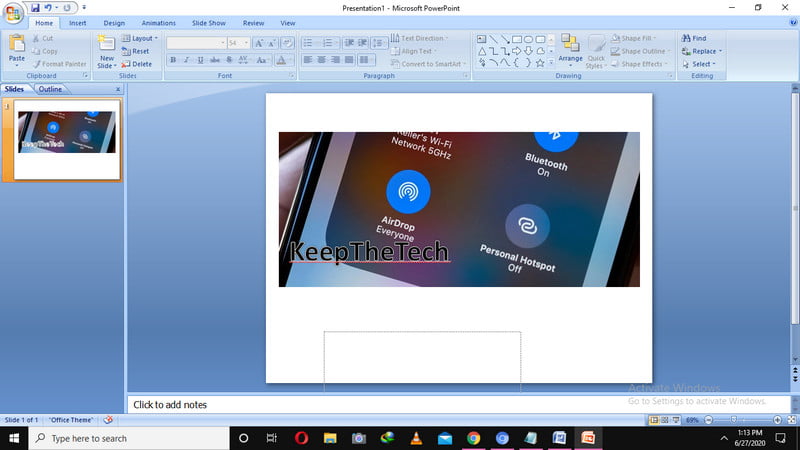
Tap on the WordArt option. It is available in the section of Text in the toolbar at the upward side of the PowerPoint. Now various styles of the letter will appear on your screen. If this option is not visible there, click on the tab of the image that is available at the upward side of the screen.
Step 8
Now select a text style there. After the selection when you have made, a new text box will appear there including the words of “Your Text Here” in it.
Step 9
Place the text to the area where you want the watermark to occur. For sound, this, do the holding of the cursor of the mouse over the line of dotted text box till it comes as crosshairs. After that, click on the box to the position of it. Users can also make it to the resized form by clicking on it and taking the square on the edge or on the corner of the given text box.
Step 10
Now enter the text of watermark. Click on the text of the sample one thing inside the box of text for selecting it. Afterward, type name there along with the brand or the phrase which you want to use as the watermark there.
Step 11
Do the formatting of the text. Users can now do the customization there of the effects along with the color, and also the transparency of the watermark.
Step 12
Do the selection of all the items in the given slide. For performing this, click on the Ctrl+ A for PC or Command + C for the Mac.
Step 13
Now click on the tab of Picture tools there. It is available on the upward side of the PowerPoint.
Step 14
Select the menu of the Group. It is located in the section of Arrange in the tab of Picture tools.
Step 15
Open the Group option in the given menu. As the grouping of the objects is done, the watermarked picture will now be saved there.
Step 16
At last, do the saving of the photo. Do the right click on the photo and then select the Save as Picture in the given menu. Do the selecting of the location and then save it by clicking on the Save button.
Method 2: Use Photo Editing Software To Watermark Images
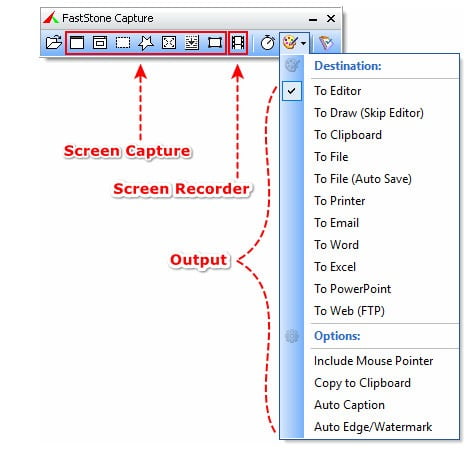
You can also use any third-party software used for photo editing. Well, we recommend Faststone Screen Capture, one of the best photo editing software for Mac and Windows.
Step 1:
Download Faststone software into your Computer system running on Windows or Mac. After completing the downloading of the software, you’ve installed it into your computer.
Step 2:
Now, open the Faststone software into the computer system. Go to the File tab from the navigation bar and select “Open”. After that select the photo that you want to watermark.
Step 3:
Go to the Draw option, once the photo is fully loaded into the software. The software will redirect you to paint toolbars. Now go to the “A” icon given at the right in tools. Click on it.
Step 4:
Now, enter the text that you want to write on the photo. (Such as company name or person name etc).
Step 5:
When you Done. Hit the “OK” button and you’ve will again redirect to the mainframe of the software. Save the photo that you’ve watermark into the local drive or desktop screen of the computer.
Wrapping Up
I hope this information made the readers understand the adding of a watermark in the photo. Give us feedback on this in the comment section. Also, read our more topics for more info.