
Searching everywhere for how to make a google survey? In this article, you will learn about it with detailed instructions that may be able to help you.
Users can make their own surveys as per their customization. It can be easily done through the help of Google forms.
It is one of the accessible apps available in the drive. Also, it creates the survey more simple in view. Users can also send or receive the survey and also can get responses from people.
How To Make A Google Survey
Here are the steps explained in making a Google Survey.
Creating Surveys
Step 1
Firstly, do the logging into your website on Google Drive. Visit the website of drive.google.com and then sign in to the account of Gmail there. It will be the Google ID for the services of Google along with Google Drive. After logging in, you will find all your documents there.
Step 2
Now click on the new button which is available on the upward side of the corner. A menu will occur on the screen with all the files as well as documents that you can create there.
Step 3
Click on the More option and do the selection of Google Forms there. A tab on Windows there will open with the new form. As untitled on the screen.
Step 4
Now do the settings of the survey. A few options will occur at the top of the page for the control of the survey settings. Do the checking of all of it and tick only what you want to apply to the survey.
Step 5
Do the naming of the survey. By clicking on the untitled form text and editing the name in your survey, the description of optional form can be done to give a proper background, instructions, along with the objectives to the respondents there.
Making Of The Questions
Step 1
Do the writing of the first question of yours in the box of question title. Users can put their many types of questions whichever you need in the survey. At least one question should be there. Start with the main question which you want to ask from the audience.
Step 2
Add there the help text for the readers. It can also be added for the guiding of the respondents in giving answers to the question. It is used for the explanation of the thing which is confusing in the question.
Step 3
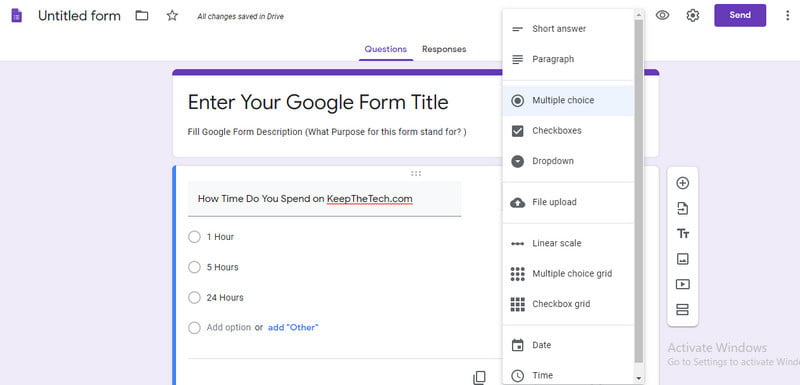
Do the selection of the question type. Select the indication that which type of answer will be in acceptance for the given question. Click on the list there for seeing the options.
Step 4
Adjust the options of answers there. As per the depend on the type of question, the next item gets changed. Do the putting of the answers that are acceptable in the required fields.
Step 5
Make any of the questions in a compulsory form. A checkbox is available there on the downward side of the given question to make it appear as a question that is required. Now tick on the question that you feel like a mandatory there.
Step 6
Click on the done option for saving of the question. If any other question is there which you want to add there in the survey, click on the add item there available on the downward side.
Completion Of The Survey
Step 1
When the survey is done, a confirmation message will occur on the screen. A thank you message can also be there by the user on the receipt of the answer by them.
Step 2
Do add the confirmation page in the settings. There are various other options for controlling the settings of confirmation. Tick on the one which you want to apply there.
Various options will occur there on the screen to ask for your confirmation for them. Select the one which you want as per your choice.
Step 3
Send the completed form by clicking on the send form option on the downward side of the page. It will save your survey. A window will occur there for displaying the link to the form of your survey. Users can share it on their social networks or through their emails of theirs.
I hope this information made the readers understand about the making of a google survey. For more related articles read our how to Sign Out of Google Play and you can also read this how to Change Google Maps Voice (Android & iPhone), and many more.