
Windows 10 is the best-improved version of Windows in many forms. The main thing here is that it must not slow down. If it happens, then it will affect the configuration of the device.
For that, we have the feature of Superfetch which will do the best improvement of Windows 10. Here we have a deep discussion on this topic along with how you can enable and Disable Superfetch it.
What is the Superfetch feature?
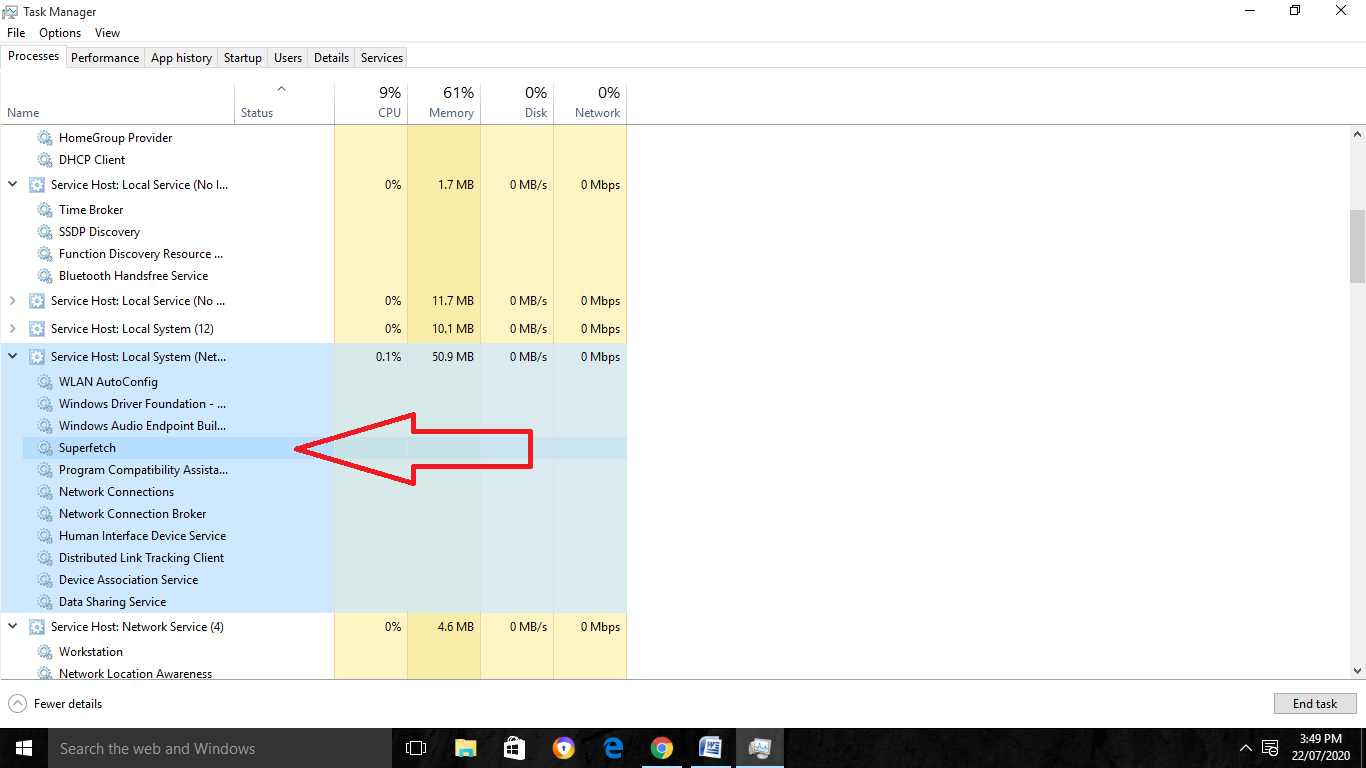
Superfetch performs the maintenance of the system in improving it in a better way. It shows the option as “Service Host: Superfetch” located in the Windows Task Manager.
It sits in the background form, and in a constant type analyses the RAM usage and understands which apps the person is using the most.
Superfetch gives the mark to such apps as “frequently used” and does the preloading of them into the RAM.
The main thing here is that Superfetch is much different from Prefetch. The prefetch feature was the manager of preloading memory which was before in Windows XP.
Superfetch is known as the successor of Prefetch. As the prefetch doesn’t analyze the patterns in its usage and it adjusts the parameters of the preloading form.
How Superfetch Works?
If the device is of the older version, then it shows in the task manager as Service Host: Superfetch. It will be shown in Windows 10 or any of the versions of Windows.
In the latest version of Windows 10 or other Windows, the Superfetch will appear under the name as Sysmain. In the location of Task Manager, it will appear as Service Host: SysMain.
The given service works in the background by the use of CPU power and analyzes the use of RAM along with the used apps.
When we will run the app it will launch there even faster as it is already preloaded in the memory. We can easily access it by opening the Task Manager and then going to the Processes tab.

Superfetch is perfectly designed for the taking up of space in RAM with the apps of preloaded. The dealing of it is only with the memory which is not used.
As when the system requires RAM more, it provides more of it at the time of requirement.
How to Disable Superfetch in Windows 10
If people are not having any kind of issues with the performance of the system, then keep running superfetch in its normal form.
It is the process that is much useful for accessing at the time of launching the programs which use in the frequent form.
If people face the situation of the hard drive in high utilization form along with the issues of constant memory and also of performance in poor type, then they can disable the Superfetch and can resolve the issue.
If things go perfectly, then keep it in disabled only. Or in other cases, you can access the troubleshooting.
Here we have steps explained for the disabling of Superfetch in Windows 10:-
Step 1
Open the Start menu, and there type of services there. After that, select the given Services app.
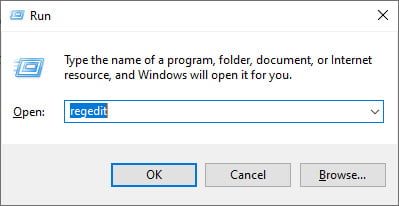
People can easily open it by pressing the keys of Windows + R and then typing their services.msc and then clicking on the OK button.
Step 2
Now in the given app of services, scroll the screen and you will find Superfetch. Do the right-clicking on service and then go for the selection of the Stop button.
If it is the newer version of Windows then the screen will show SysMainservice. Then click on the Stop button.
Step 3
After that, go for the prevention of service from restarting it when you do the starting of Windows.
As the service gets stopped, right-click again on the service and then select the option of Properties.
Step 4
Then in the given dropdown menu of Startup, click on the Disabled button.

Step 5
Now we can see that the Superfetch service is disabled in a permanent form and will not get restarted till we do the starting of the computer.
How to Disable Superfetch with the Registry Editor?
This is the best alternative that people can take other than the use of the task manager. As before performing this, take the full backup of the Registry.
Step 1
Begin with clicking on the Start menu and then typing their regedit. After that, select the app of Registry Editor.
Step 2
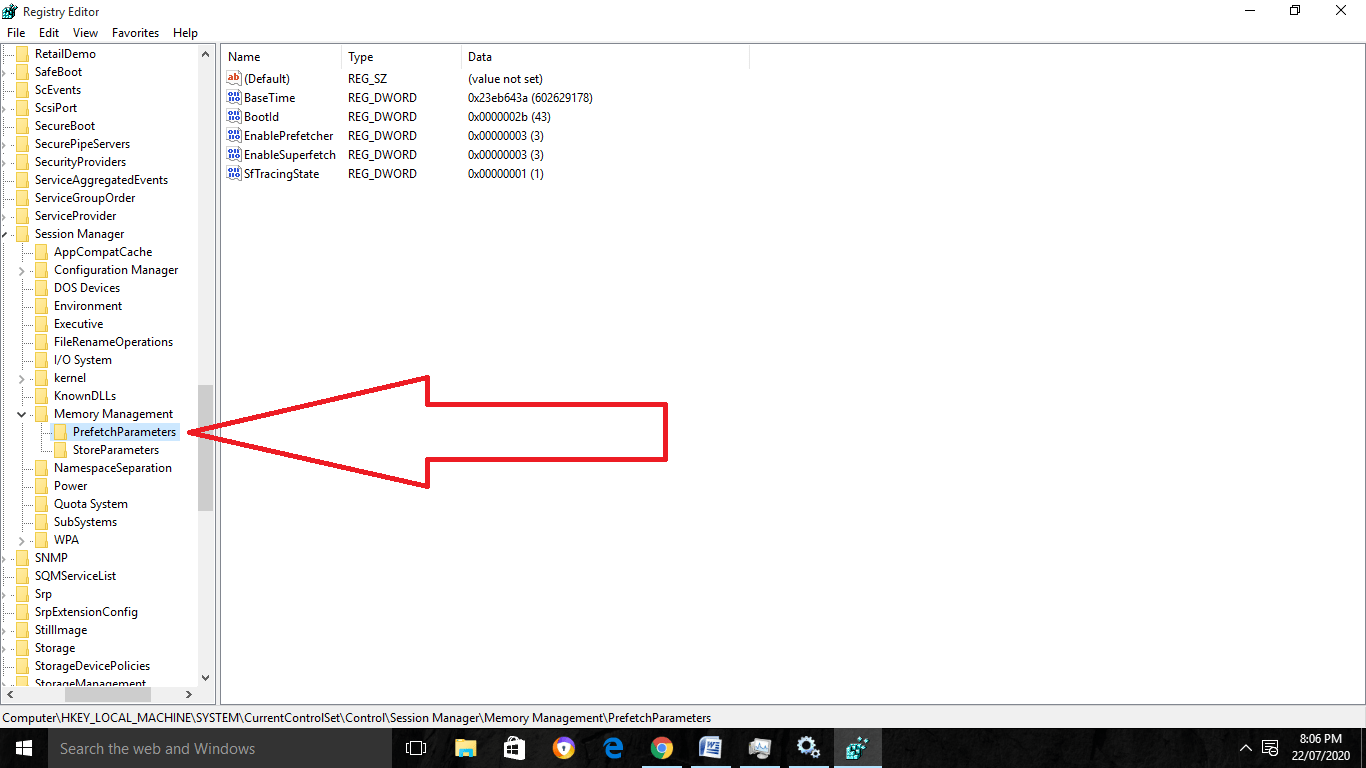
When the Registry Editor app will open there, go for the navigation of HKEY_LOCAL_Machine. In that, open the SYSTEM option.
Select the Current Control Set and go for the Control option. Click on the Session Manager and then open Memory Management.
Now click on the PrefetchParameters and the following will appear on the screen.
Step 3
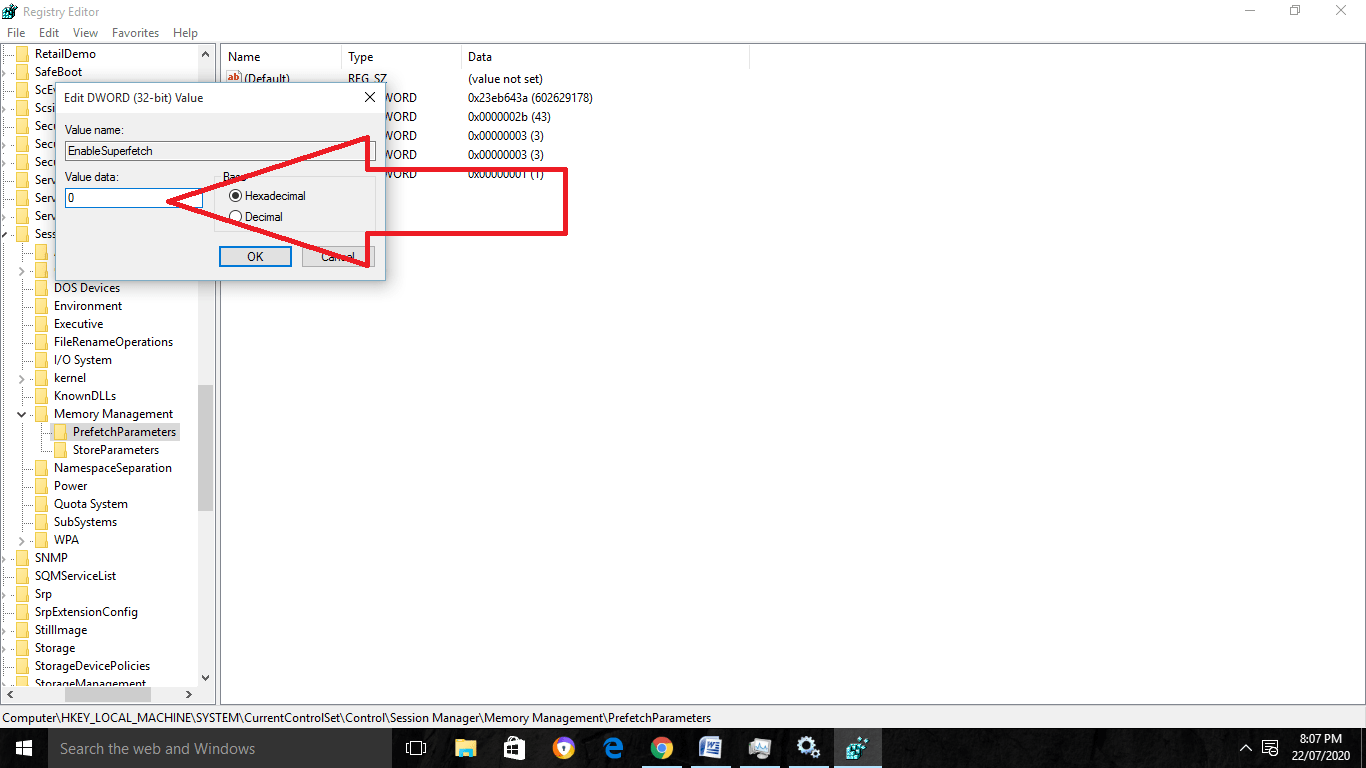
Now in the Window of Edit DWORD, when it appears on the screen change there the field of Value data to the digit of 0 and then click on the OK button.
Step 4
Now you can smoothly close the Registry Editor when it gets finished. It will now disable the SuperFetch service on your Windows 10.
Disable SuperFetch with the use of Command Prompt
If people are easily accessing the command prompt, then there are few commands which they can use the disable the service of SuperFetch.
Firstly, open the command prompt in the mode of the administrator. Then go for the given command:-
sc stop “SuperFetch” &scconfig “SuperFetch” start=disabled
If the person is using the newer version of Windows, then simply change the “SuperFetch” with “SysMain”.
There is also the command for Powershell. Begin with the opening through the administrator, and then follow this command:-
Stop -Service -Force -Name “SuperFetch”; Set-Service – Name “SuperFetch –StartupType
This is the best approach to perform and is also the fastest one.
Should I Disable Superfetch?
In actuality, it is not necessary for stopping SuperFetch from running it. It uses a bit amount of CPU and uses the unused form of RAM.
For the general user, it is unnoticeable. Though, there are various reports about the Microsoft forums that most of the time Superfetch uses the issues of performance.
Superfetch is the system only there which is the feature for optimization. It may not harm Windows by service stoppage. Through it may affect the apps on your device.
Facts of Superfetch
Superfetchhas most of the facts. A few of them are mentioned below:-
As Superfetch runs in the background, it uses a few CPU and RAM.
Superfetch does not eliminate the apps that are loaded to RAM. In actuality, it relocates the loading of it. At the time when loading happens, the experience of the system goes down and the app launching slows without the use of Superfetch.
Superfetch can cause the issue of performance at the time of gaming.
The gaining of performance in Superfetchmay is unnoticeable at the time of installation of Windows 10 on the SSD.
It is fully safe to disable the Superfetch. There occurs no risk of turning it off. The recommendation is that if the system is working in a better way, then leave it and keep it on. Otherwise, go for turning it off.
Wrapping Up
Here we discussed the topic of Superfetch its meaning of it and also how we can disable it on Windows 10.
The facts and also the need for disabling will provide better knowledge about it to everyone.
Frequently Asked Questions [FAQ]:-
Is it safe to disable Superfetch?
Is Disabling Superfetch Safe? Yes! If you choose to turn it off, there are no negative effects. Keep your system on if it’s functioning correctly.
Is turning off SysMain acceptable?
Is it acceptable to turn off service host Sysmain? Yes, you can disable SysMain if it is using a lot of CPU power, however doing so will also disable some system-wide automated programmes.
Must I turn off Superfetch on my Windows 10 SSD?
“Superfetch disabling reduces writes to the HDD,” “Superfetch is useful if you have a hard drive in your Computer. However, it is unnecessary for an SSD and just wastes P/E cycles.”
What happens if Superfetch is turned off?
When disabled, Superfetch still functions (sort of), but it doesn’t generate prefetch files and resets upon restart. When superfetch is disabled, it stays disabled and does not reset when my pc is restarted.
Related Articles :
How To Install Bluetooth Driver on Windows 10/11
50+ HD Dual Monitor Wallpaper For PC
Windows 11 Won’t Boot: Troubleshooting