With the feature of Sync Settings, Windows performs the syncing of various settings on the Windows 10 devices on which you have signed in with the Microsoft account. In this article, we will tell you how do i Sync my Settings in Windows 10.
It is to be noted that sync settings can be accessed with the school as well as the work account that is linked with the account of Microsoft. If you find that the Sync settings are not there on the device, then the organization may not give you the allowance for it.
We can also do the selection of sync settings on OneDrive (cloud).
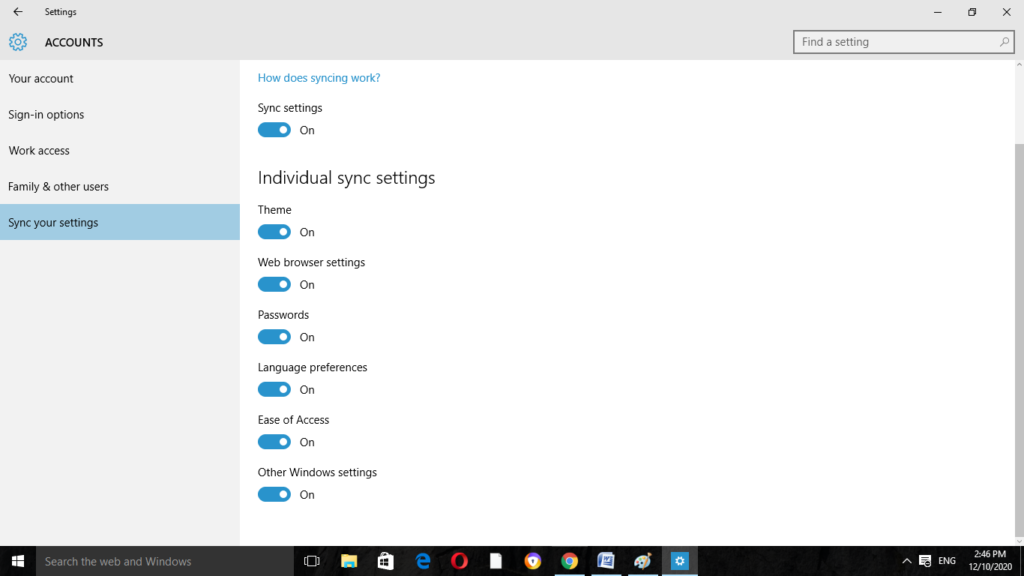
We can sync the passwords, themes, Ease of Access, Language Preferences, and other settings too. If we will turn on the Other Windows Settings, then the Windows syncs will show some of the device settings that you can access there.
How Do Sync Settings In Windows 10?
Here we have explained both enabling as well as disabling the settings of Sync in Windows 10.
Follow the given steps for it.
Step 1
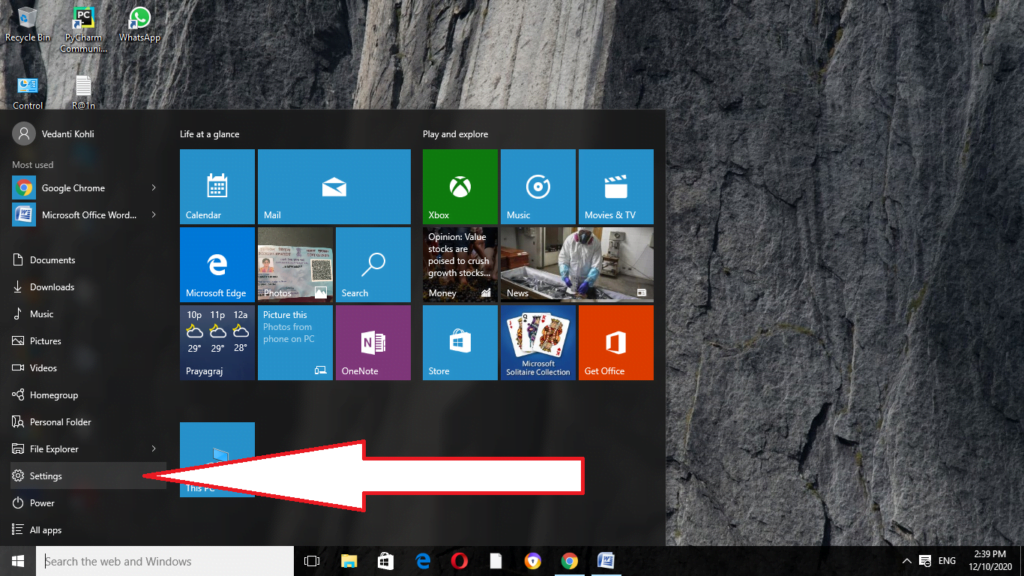
Firstly, open the Settings panel. We can access it by clicking on the Start Button and then clicking on the gear icon. Alternatively, we can press the keys of Win + I together.

Step 2
Now in the given window of Settings click on the option of Accounts.

Step 3
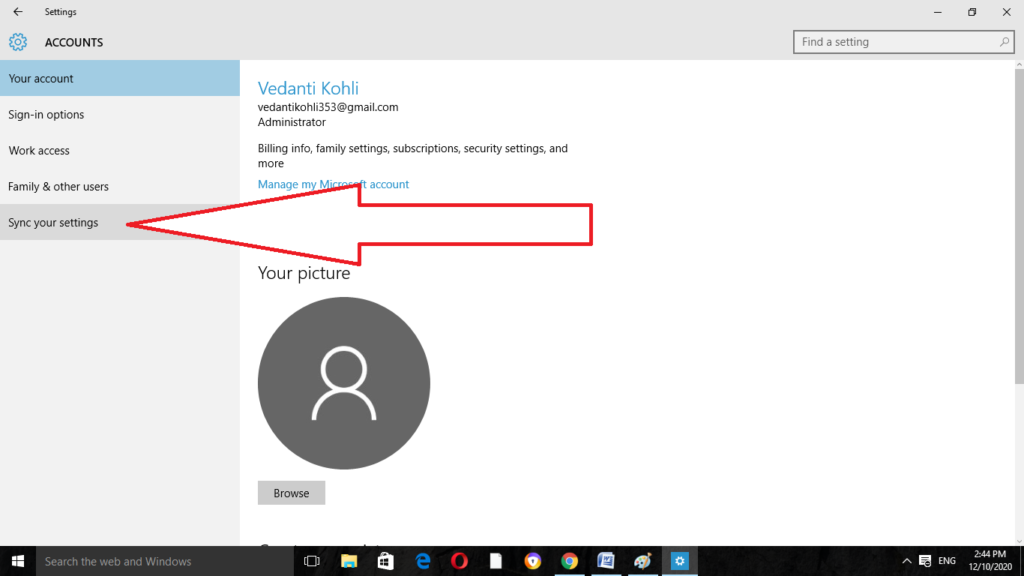
Then on the available Accounts page located on the left side, click on the option of Sync your Settings.

Step 4
Users can individually sync the settings thereby turning on the theme, passwords, language preferences, and other available options.

Similarly, by unchecking the options we can disable them. Simply click on the Sync settings and turn it off. It will now get disabled.
Hopefully, now you know those syncing settings. It requires simple steps to be followed by which settings can be synced easily. For more related articles read our how to Hibernate Windows 10 (Ultimate Guide) and you can also read this ways to Enable Administrator Account in Windows 10 and many more.