How to Setup AMD Graphics Card on Windows 10
Graphics Card was the most important part of the computer for lots of windows users because these Windows users can’t live without playing games just like me. As you know graphic card control graphics of videos, pictures, animation and 3D displayed on the screen.
The graphic component is on the separate card that plug-in on the motherboard of the computer. That’s why it’s called Graphics Card there are also some other names Video Card, Video Adapter, Display Adapter, and Graphic Accelerator.
With the help of Graphic drivers, graphic cards start working on the computer. Graphic Drivers were the most important component of a graphic card. Different types of graphic cards have their own graphic drivers.
Enabling AMD Graphic Card on Windows 10 :
The AMD ( Advanced Micro Devices ) was the most known graphic card and some other computer parts such as processor manufacturer company suited in the United States and its headquarter is on Sunnyvale, California.
In this article, you know how you can enable an AMD graphic card on your computer running on Windows 10 operating system.
Read given below guides carefully to know how you can enable AMD graphic cards on Windows.
Step 1 :
Open CCC (Catalyst Control Centre). If you haven’t installed it yet then just download it from the AMD website and install it on your computer.
Note:
If you don’t know how to install the Catalyst Control Centre (CCC) in your computer system. In this case, you can easily look out step by step guides provided by AMD for how to download and install the catalyst control centre in windows.
Step 2 :
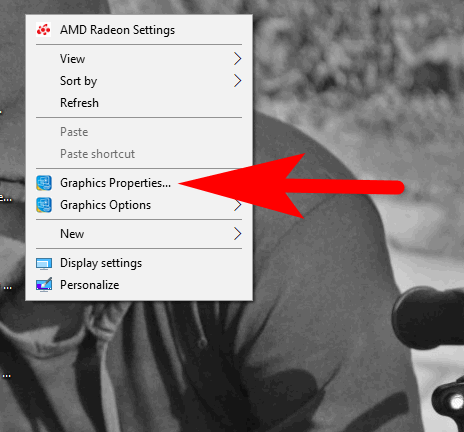
Now after install CCC in your windows 10 computer system. Right Click on the Desktop home screen and select Catalyst Control Center or Graphic Properties (as shown in the given screenshot).
Step 3 :
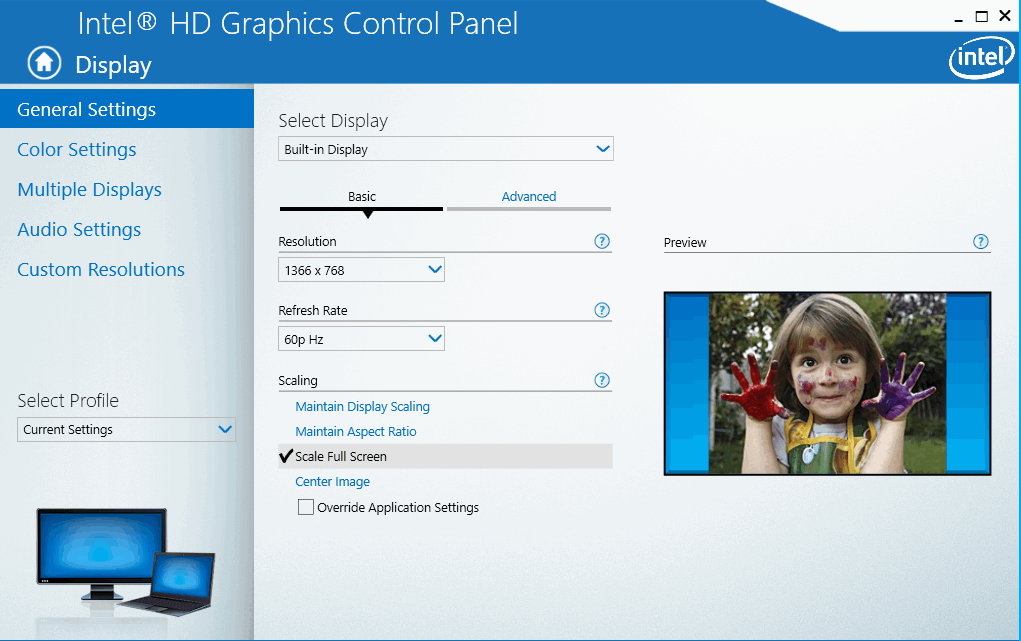
After this Graphics Properties window pop-up on your system screen, now select “Display” from the options.
Step 4 :
Set up the Application to High Performance such as display resolution “1366 x 768” and Refresh rate 60Hz and hit the Apply button to save the graphics settings.
Now your application starts running on an AMD graphic card now you know how you can easily enable AMD card on your computer.
AMD Graphics Card Not Detected On Windows 10 (Solution)
Sometimes, our computer system isn’t able to detect the graphics card due to some kind of error. However, there is an easy solution to this problem. To resolve this issue you’ve to locate the graphics card on your system and enable it. That all the graphics cards will start showing on your system.
For this follow the below-given step-by-step instructions.
Step 1:
Press “Windows Key + X” to open Power User Menu. Now select “Device Manager” from the list.
Step 2:
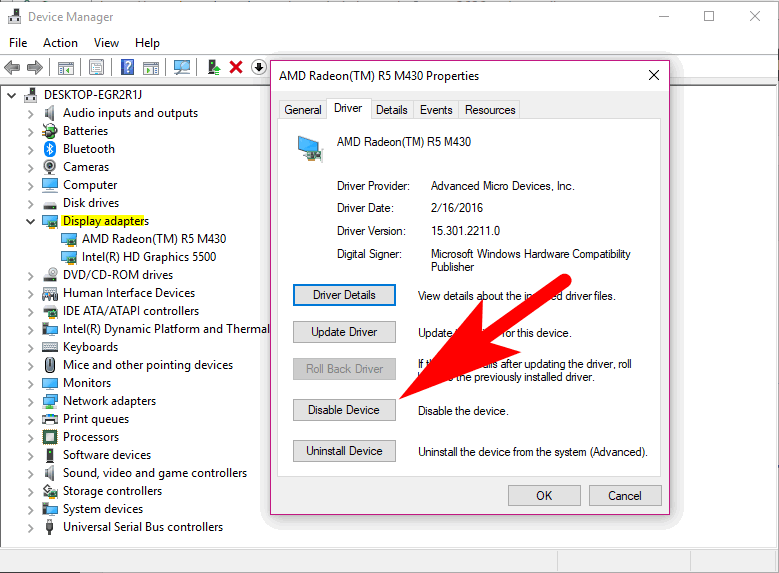
Now once’s the device manager opens, start locating the graphics card and double click on it. To see the properties of the graphics cards.
Step 3:
Go to the Drivers tab and hit the Enable button. In case, if the Enable button is missing which means the graphics card is already enabled into your computer system.
How To Enable Graphics Card In BIOS
The PCI Express slot on the motherboard of the computer system allows the windows users to connect the video card or graphics card using the PCIe bus standard. Most of the computer motherboards have integrated graphics chipset that allows windows users to run a computer without installing a PCIe video card.
In terms, if your computer used an integrated graphics card as its primary display adaptor. Then you have to enable PCI Express first from the computer system BIOS.
Follow the below steps to enable PCI Express on BIOS of the Windows computer system.
Step 1:
Firstly open the “BIOS Menu” of the computer system. (Continues Press “F2” or “Delete” button after restarting the computer system) To open the BIOS Menu.
Step 2:
Now select the “Advanced” tab and select the “Video Configuration “ option.
Step 3:
Choose the “PCI Express Graphics” option and hit the Enter button.
After this press the F10 button to save the changes in your system BIOS. Now you can use the PCI Express slot to connect video cards to your computer without having a hassle.