The question is how to search files in Windows 10. In case if you’ve forgotten where you place or copy one of the important file or folder that you want to open now.
Locate Files In Windows
There are a lot of files, folders, images, videos, and what not in your PC as it supports a lot of space and content. Even to space up your mobile phones some times, you transfer the data to a computer. Now the situation comes up as your computer has so many files, and if you are searching for a particular file.
You cannot afford to go throughout the PC for that one file as it will take up a lot of time effort of yours. Instead, you would prefer it if you could make an option of searching the data to get your work at ease and utilize your energy at the correct place.
How To Search Files In Windows 10
It is very convenient to search for files, folders, and text content in windows 10. You have to follow a few steps, and you will get there.
Step 1:
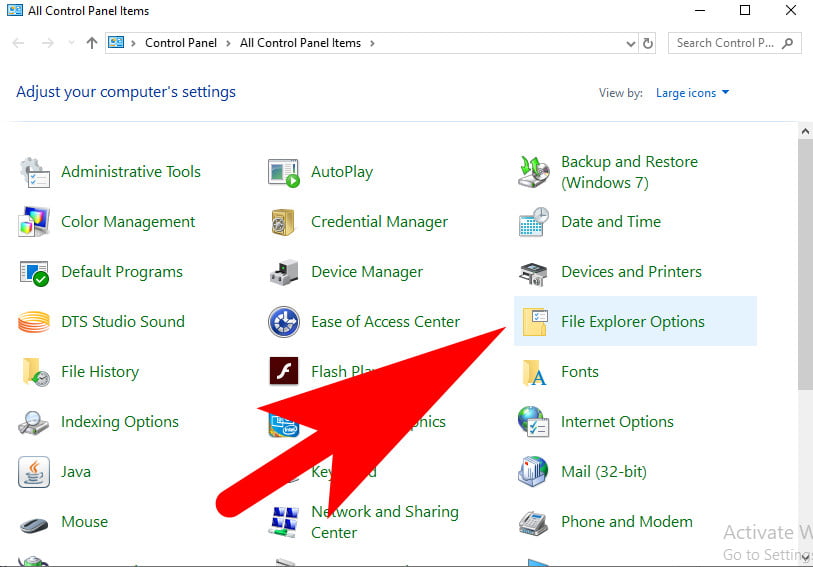
You have to go to your control panel. You will see a few options in there where you have to click on appearance and personalization. From there, you gotta click on the file explorer options.

Step 2:
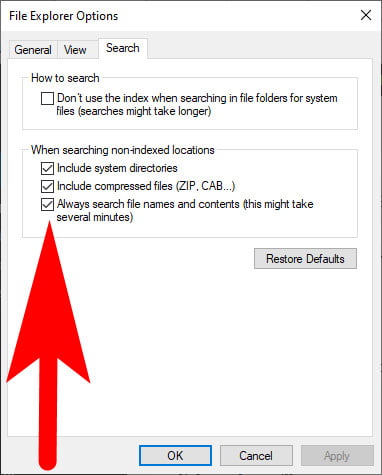
A dialogue box will appear. You gotta click on the search tab, and then you gotta check the ‘always search files names and contents, this might take several minutes’ option. So uncheck this one as it usually works up.

Step 3:
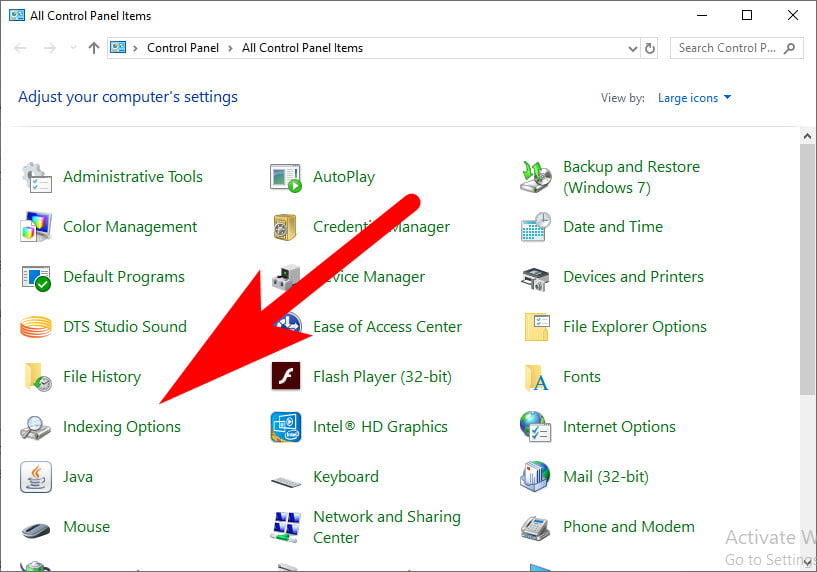
Click on OK. After this, come back to the control panel and click on the category and click on large icons and now search for an option that is readily visible to you say indexing option. Click on it, and then a drop-down appears from which click on modify, and there you have a choice to which drive you to want to search that is, for example, your internal or exports, etc.

Step 4:
You have to select whichever drive you want it to search for, may it be local drive C or D, or what do ever. You know your data and its location, so you know what you want to search for, so modify it accordingly, check on the ones you want by what data one has, and click on OK. Then close it.
Step 5:
Now you may try and search for it to double-check the process, let’s say you want to explore the content of the file so, click on options and then click on view side by side and then click enter.
Step 6:
Then you will see, it will have all the files and folders, documents, videos, photos, articles, GIFs, content, images, effects, and every legit thing that will be available on your PC.
Step 7:
So now you have a search for say a specific folder, whose location will be known to you to judge the process by its accuracy as if it works properly or not.
Step 8:
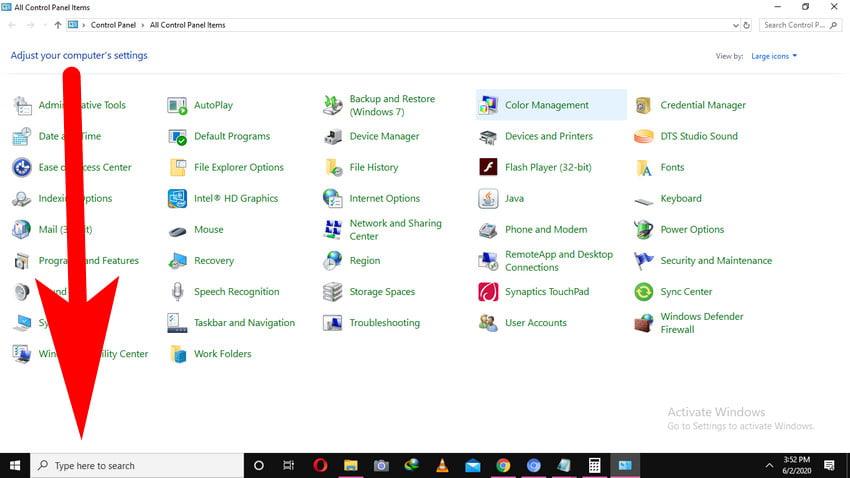
Click on the windows symbol at the extreme left on the bottom, and then at the bottom, you will find a search bar, where you have to type the name of the specific file or folder or image or anything that you want to search.

Step 9:
Type in the name of the specific file or folder or anything that you want to search and whose location is known to you, say you searched for a folder or data on your desktop only, so type the name and click on search. As soon as you click on the search, your PC will take you to that file, and it will be shown highlighted or selected to stand out of all the other files.